> ## Documentation Index
> Fetch the complete documentation index at: https://docs.spurtest.com/llms.txt
> Use this file to discover all available pages before exploring further.
# Scenario Tables
> Simplify and scale your test suites by using parameterized test data instead of creating multiple nearly identical tests.
## What are Scenario Tables?
Scenario Tables are a powerful feature in Spur that help you simplify and scale your test suites by using parameterized test data. Instead of creating multiple nearly identical tests with different inputs, you can write one test that dynamically runs through multiple scenarios defined in a table.
 **Understanding the structure:**
* Each **row** = one scenario (test variation)
* Each **column** = one property (variable you'll use in tests)
## How to Set Up Scenario Tables
### Step 1: Create Your Scenario Table
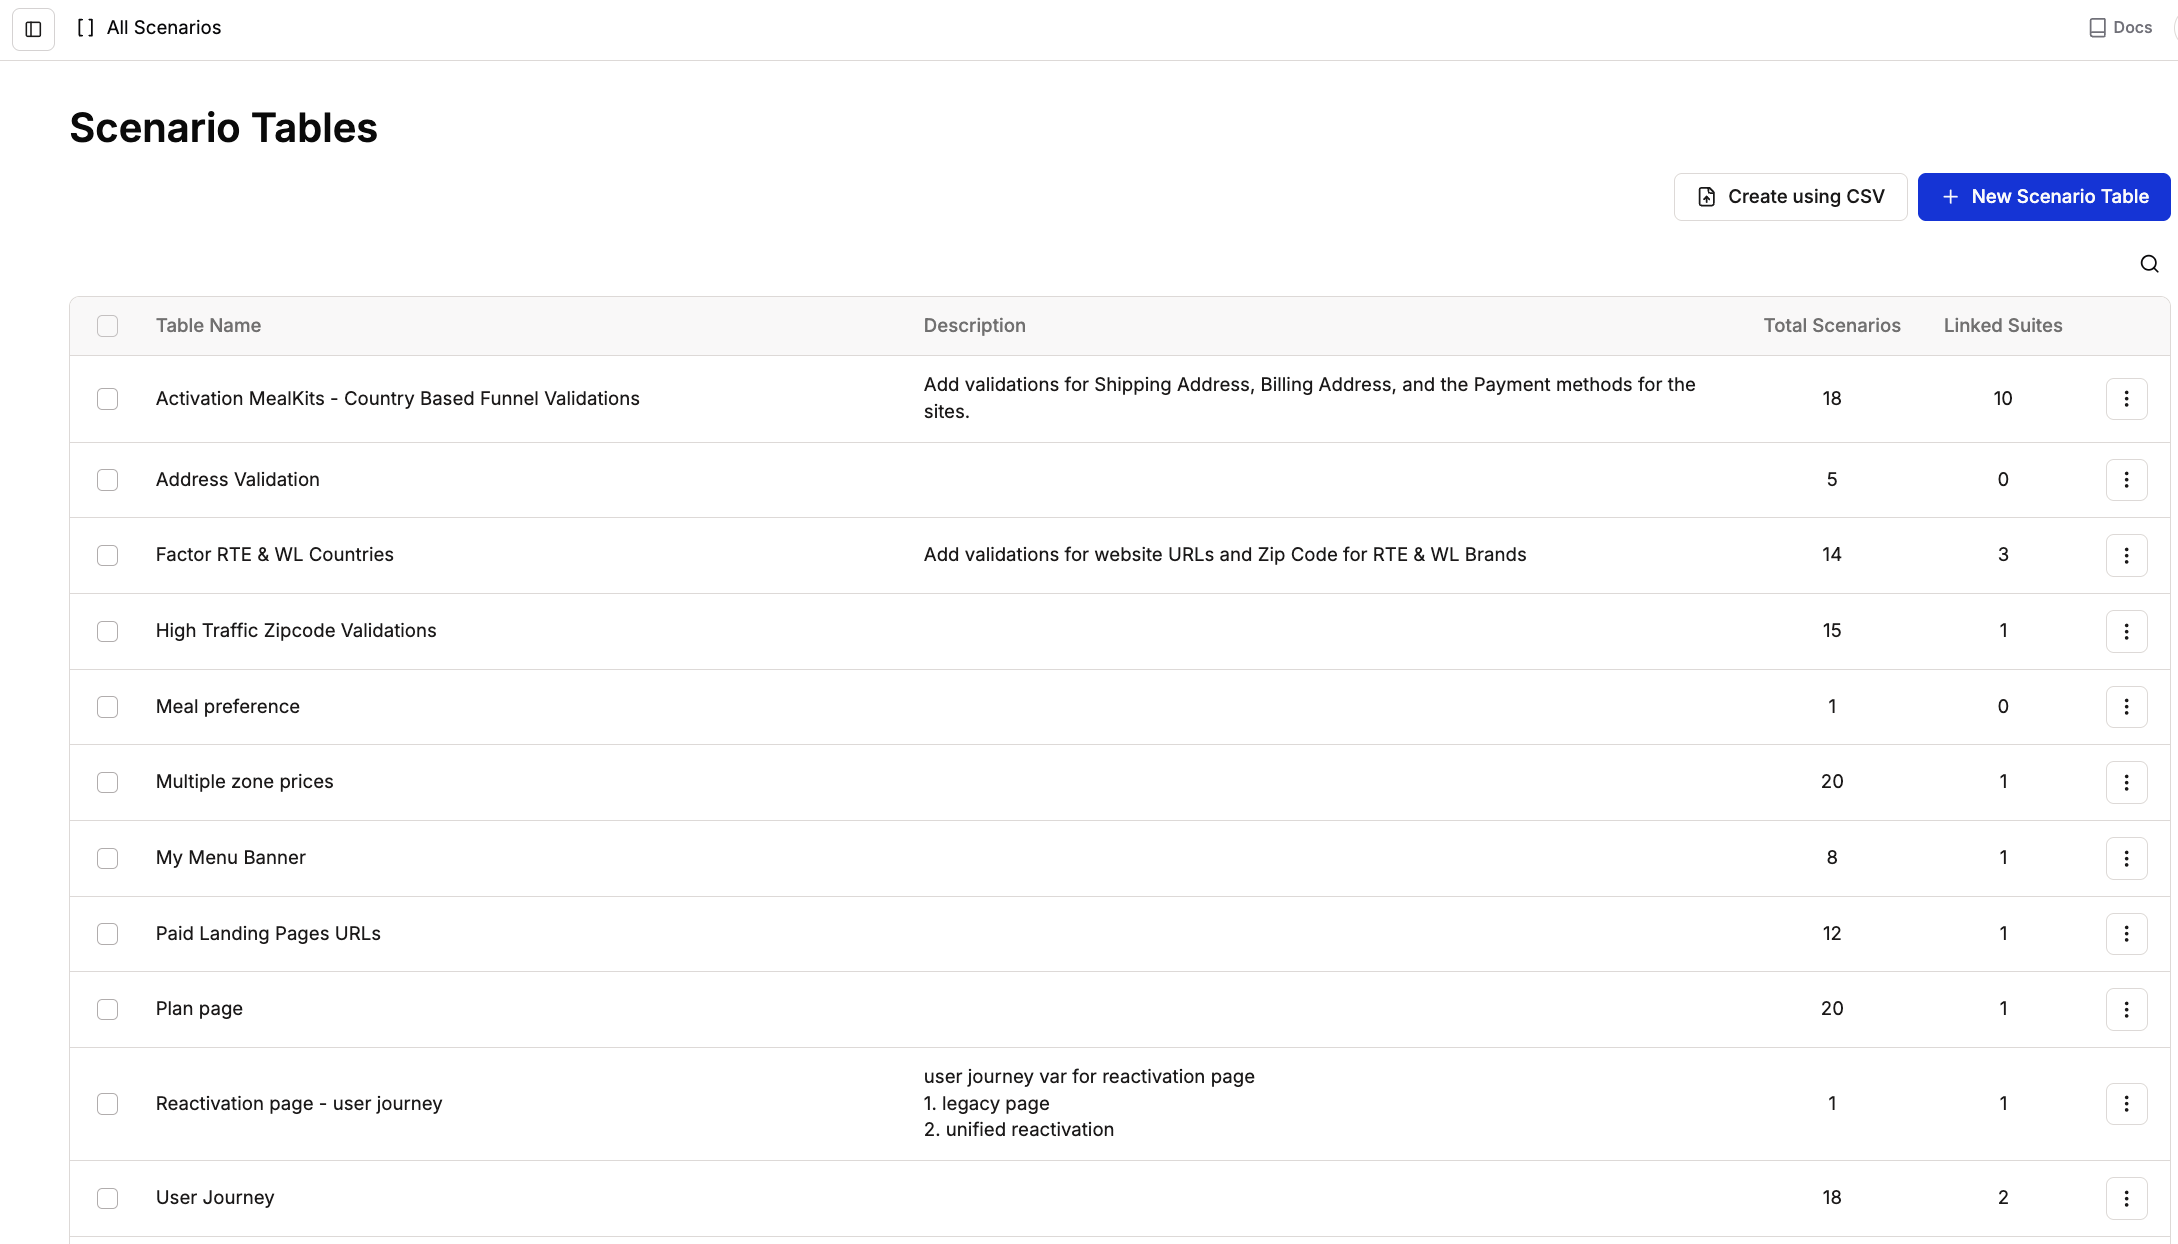
Navigate to the **Scenario Tables** section in Spur and choose your preferred method:
**Understanding the structure:**
* Each **row** = one scenario (test variation)
* Each **column** = one property (variable you'll use in tests)
## How to Set Up Scenario Tables
### Step 1: Create Your Scenario Table
Navigate to the **Scenario Tables** section in Spur and choose your preferred method:
 Best for small datasets
Click the New Scenario button
* **Scenario Table Name**: Choose a descriptive name
* **Description**: Explain what scenarios this table covers
Best for small datasets
Click the New Scenario button
* **Scenario Table Name**: Choose a descriptive name
* **Description**: Explain what scenarios this table covers
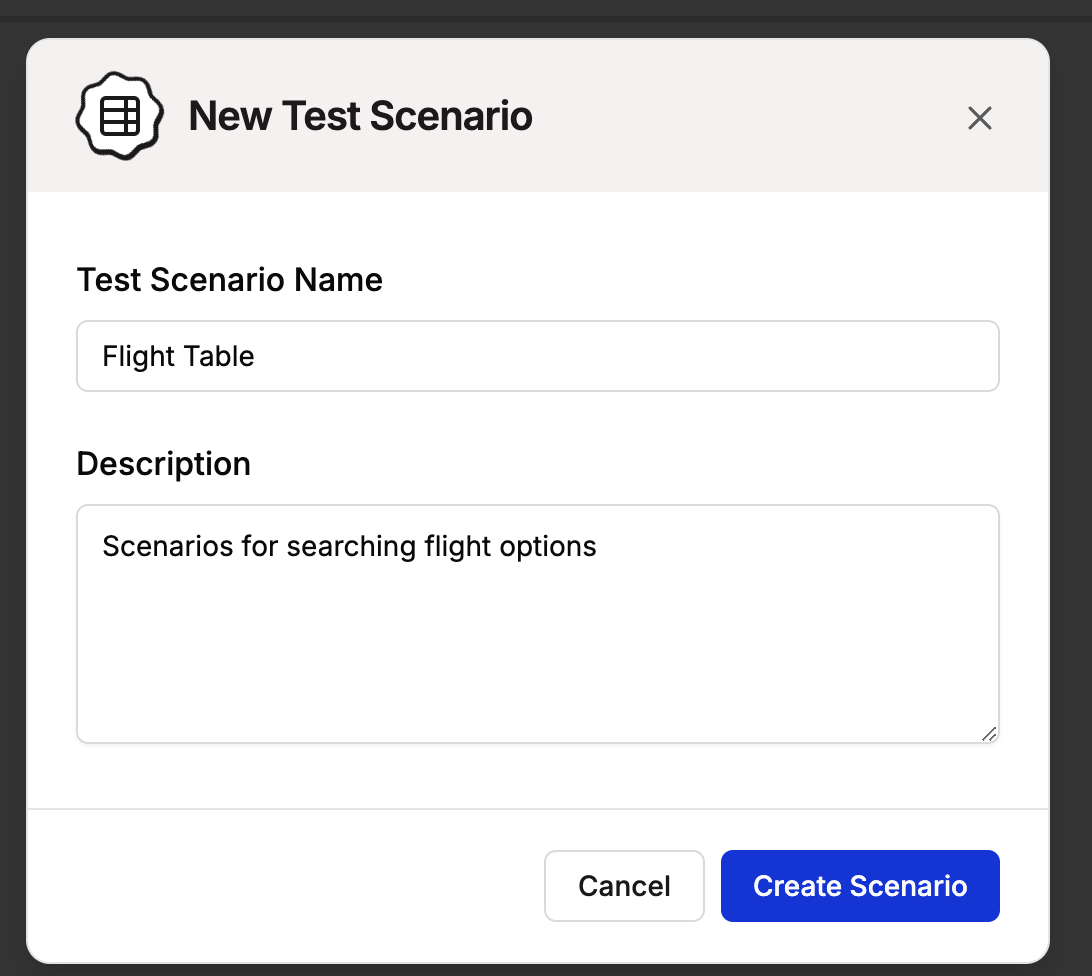 Click "Create Scenario"
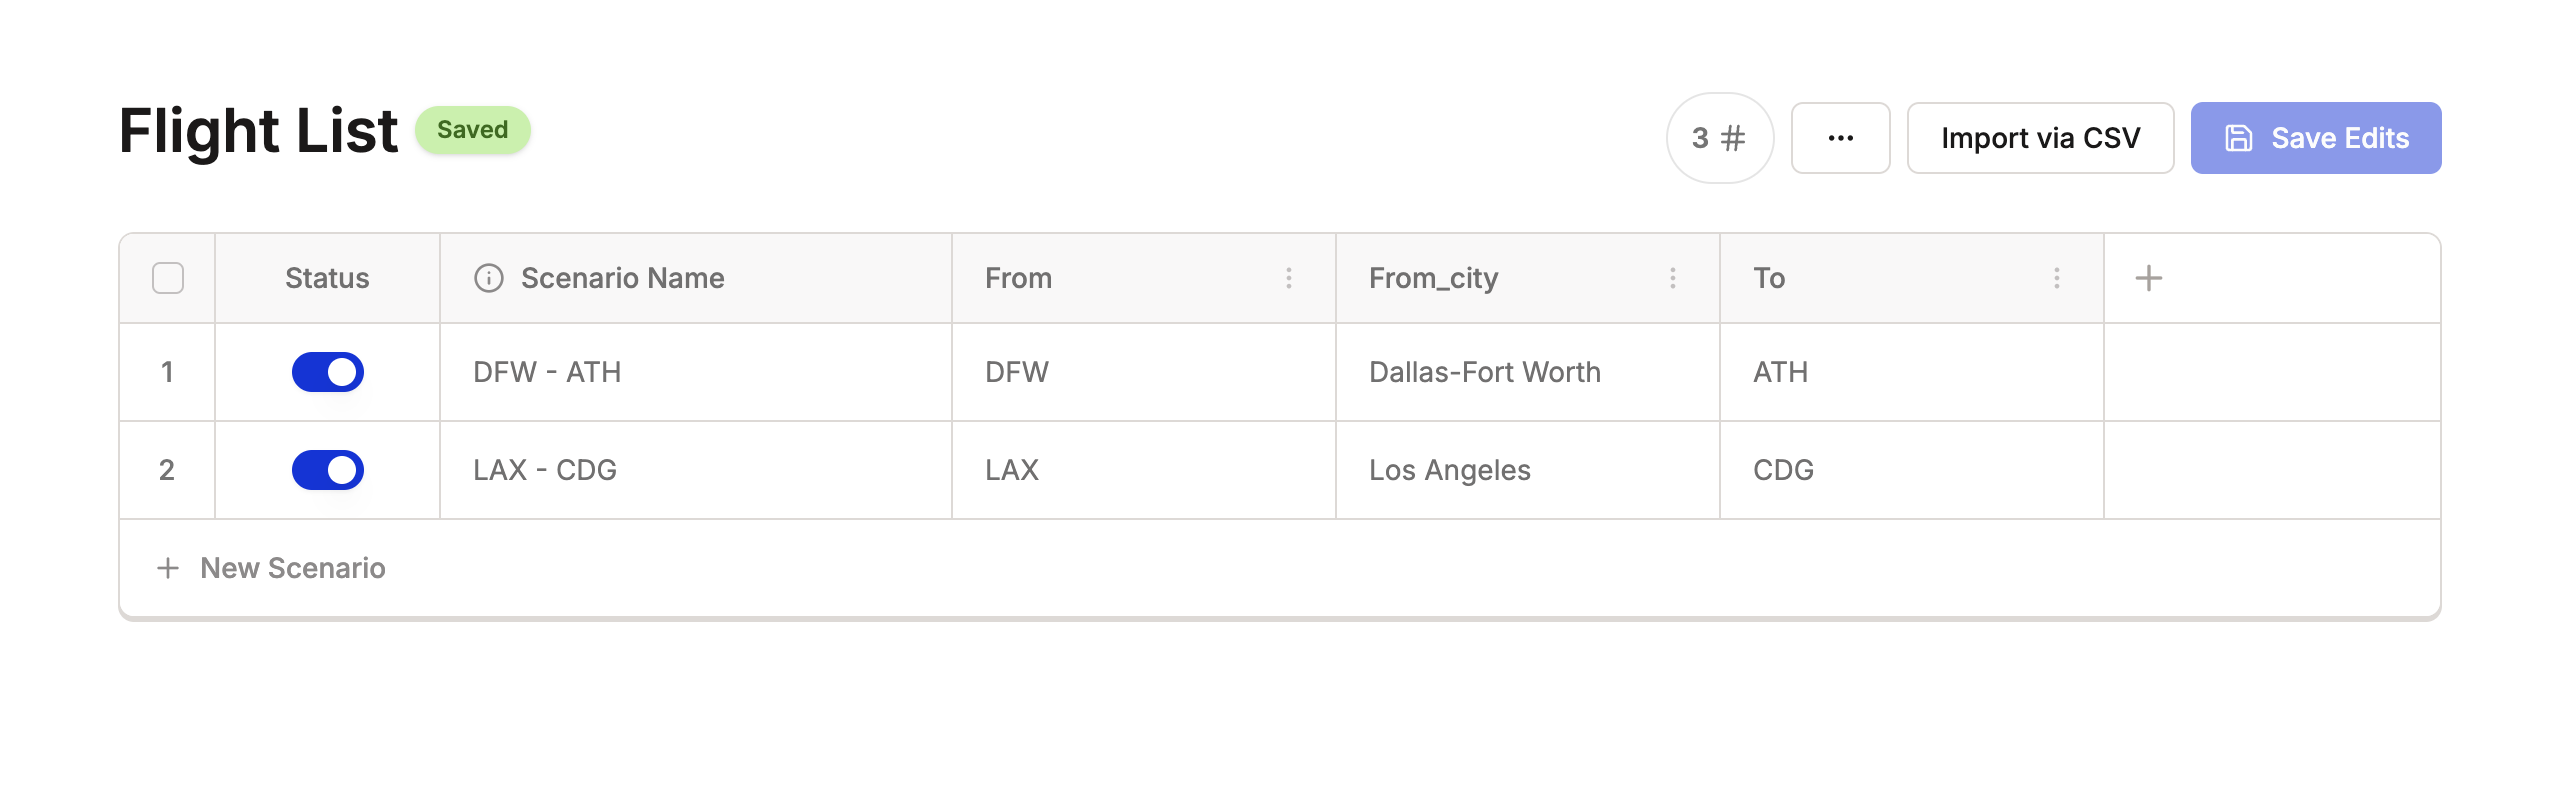
Add your data manually in the table editor
Click "Save Edits" when finished
Click "Create Scenario"
Add your data manually in the table editor
Click "Save Edits" when finished
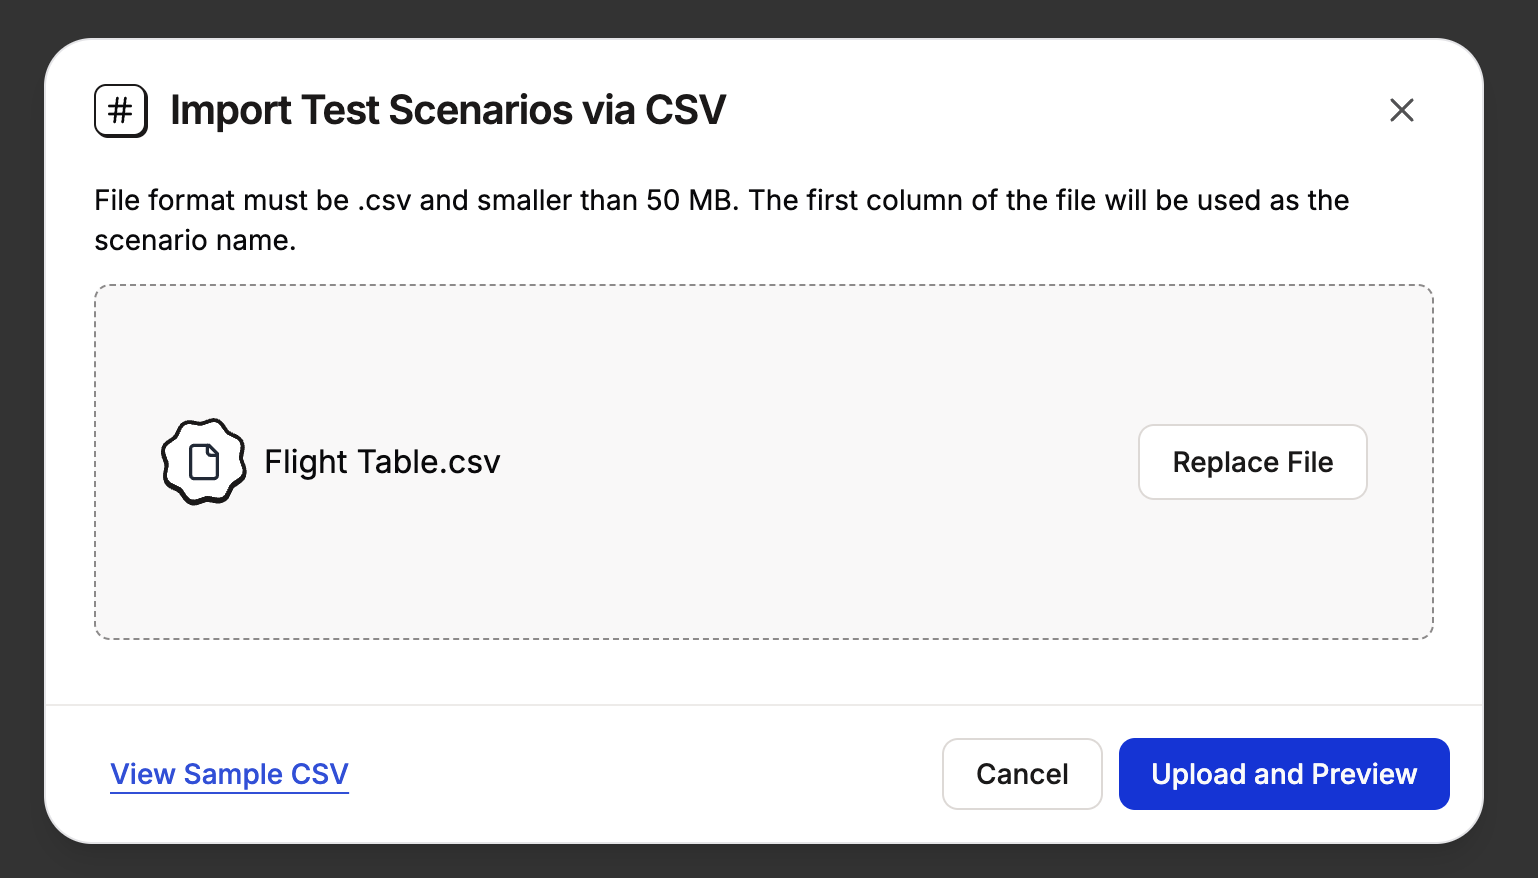
 Recommended for bulk data
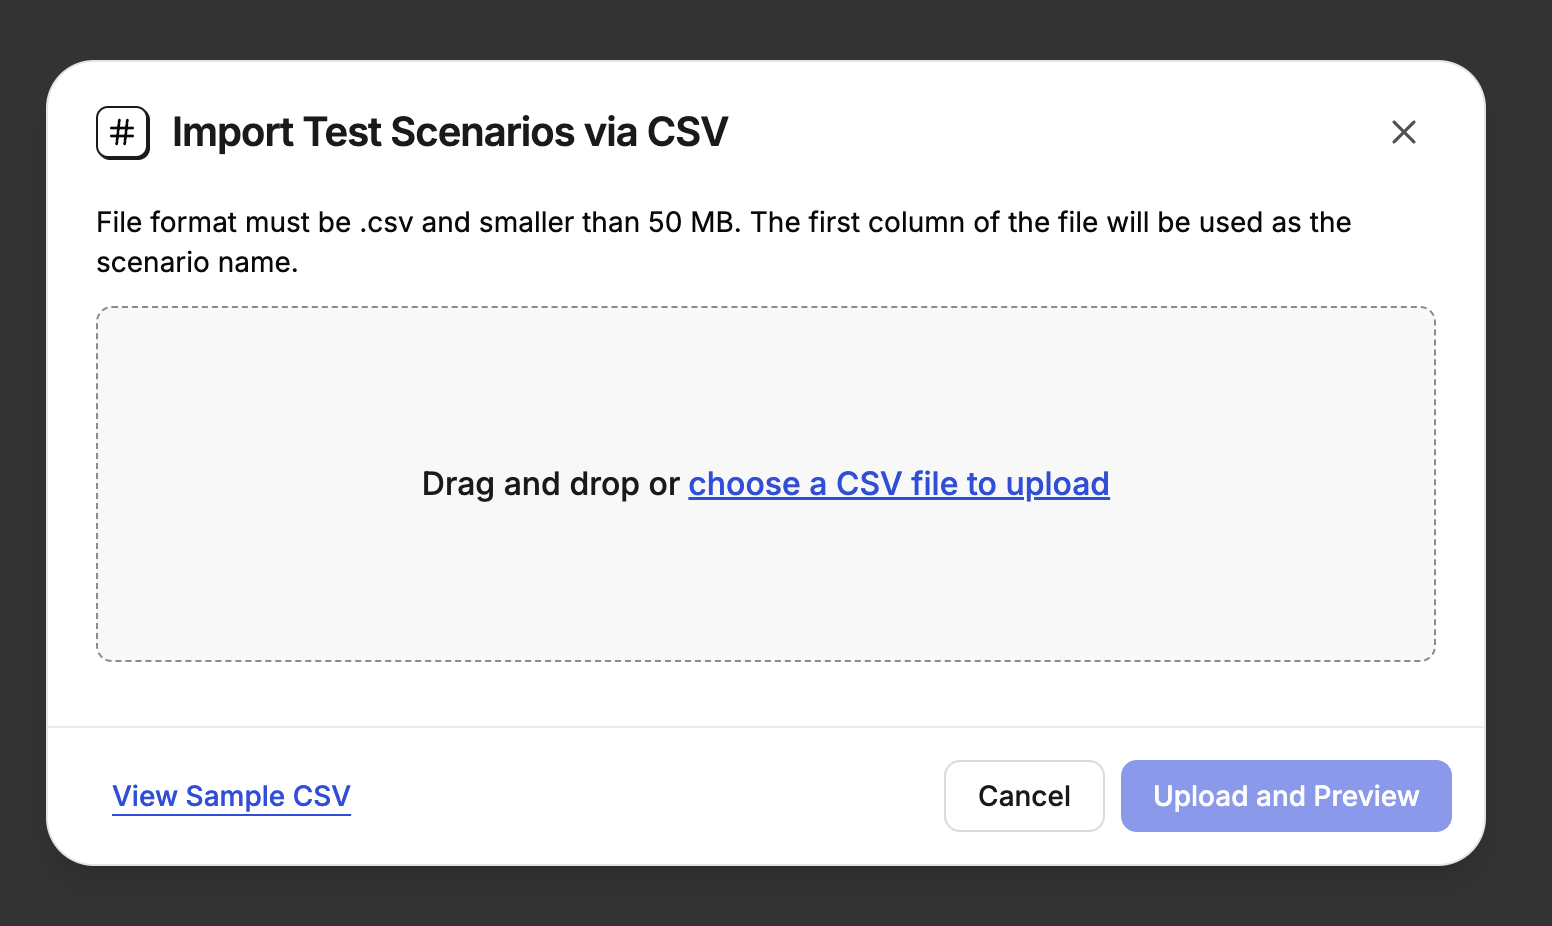 Click the Import via CSV button in the Scenario Tables section
Follow this format:
Click the Import via CSV button in the Scenario Tables section
Follow this format:
 **Important CSV requirements:**
* First column must be "Scenario Name"
* Property names cannot contain spaces
* Each property name must be unique
* Use underscores instead of spaces for column names (e.g., `user_email` instead of `user email`)
**Important CSV requirements:**
* First column must be "Scenario Name"
* Property names cannot contain spaces
* Each property name must be unique
* Use underscores instead of spaces for column names (e.g., `user_email` instead of `user email`)
 * Enter **Scenario Table Name**
* Add a clear **Description**
* Review the preview to confirm correct import
* Enter **Scenario Table Name**
* Add a clear **Description**
* Review the preview to confirm correct import
 Click "Import" to create your table
### Step 2: Connect Your Table to a Test
Scenario Tables must be connected to **Test Suites**, not individual tests. Once connected to a suite, all tests within that suite can use the scenario properties.
#### How it works:
1. **Connect** the Scenario Table to a Test Suite
2. **Use** the properties `[property_name]` in any test within that suite
3. **Run** the suite to execute all scenarios across all tests
Now you'll connect your Scenario Table to a test suite. You can do this in two ways:
#### Option 1: Through Test Suites Menu
Navigate to the Test Suites section
Choose the test suite you want to connect to a scenario table
Click the three-dot menu (⋯) next to your test suite
Select "Connect Scenario Table" from the dropdown menu
Select the scenario table you want to connect to this test suite
#### Option 2: Through Test Editor
Open the test editor for your chosen test
In the test editor:
* Type `[` to open the scenario variable menu
* Select your Scenario Table (e.g., "Flight List Table")
* Insert properties into test steps (e.g., "Type \[From\_city]")
Property names will auto-complete as you type, making it easy to reference your scenario data.
[Detailed guide for using Scenarios in Tests →](/authoring-tests/scenarios/scenarios)
### Step 3: Run and Monitor Your Tests
After saving your scenario-based test:
Click "Run" to execute all scenarios
Check results in Run History, broken down by scenario:
Click "Import" to create your table
### Step 2: Connect Your Table to a Test
Scenario Tables must be connected to **Test Suites**, not individual tests. Once connected to a suite, all tests within that suite can use the scenario properties.
#### How it works:
1. **Connect** the Scenario Table to a Test Suite
2. **Use** the properties `[property_name]` in any test within that suite
3. **Run** the suite to execute all scenarios across all tests
Now you'll connect your Scenario Table to a test suite. You can do this in two ways:
#### Option 1: Through Test Suites Menu
Navigate to the Test Suites section
Choose the test suite you want to connect to a scenario table
Click the three-dot menu (⋯) next to your test suite
Select "Connect Scenario Table" from the dropdown menu
Select the scenario table you want to connect to this test suite
#### Option 2: Through Test Editor
Open the test editor for your chosen test
In the test editor:
* Type `[` to open the scenario variable menu
* Select your Scenario Table (e.g., "Flight List Table")
* Insert properties into test steps (e.g., "Type \[From\_city]")
Property names will auto-complete as you type, making it easy to reference your scenario data.
[Detailed guide for using Scenarios in Tests →](/authoring-tests/scenarios/scenarios)
### Step 3: Run and Monitor Your Tests
After saving your scenario-based test:
Click "Run" to execute all scenarios
Check results in Run History, broken down by scenario:
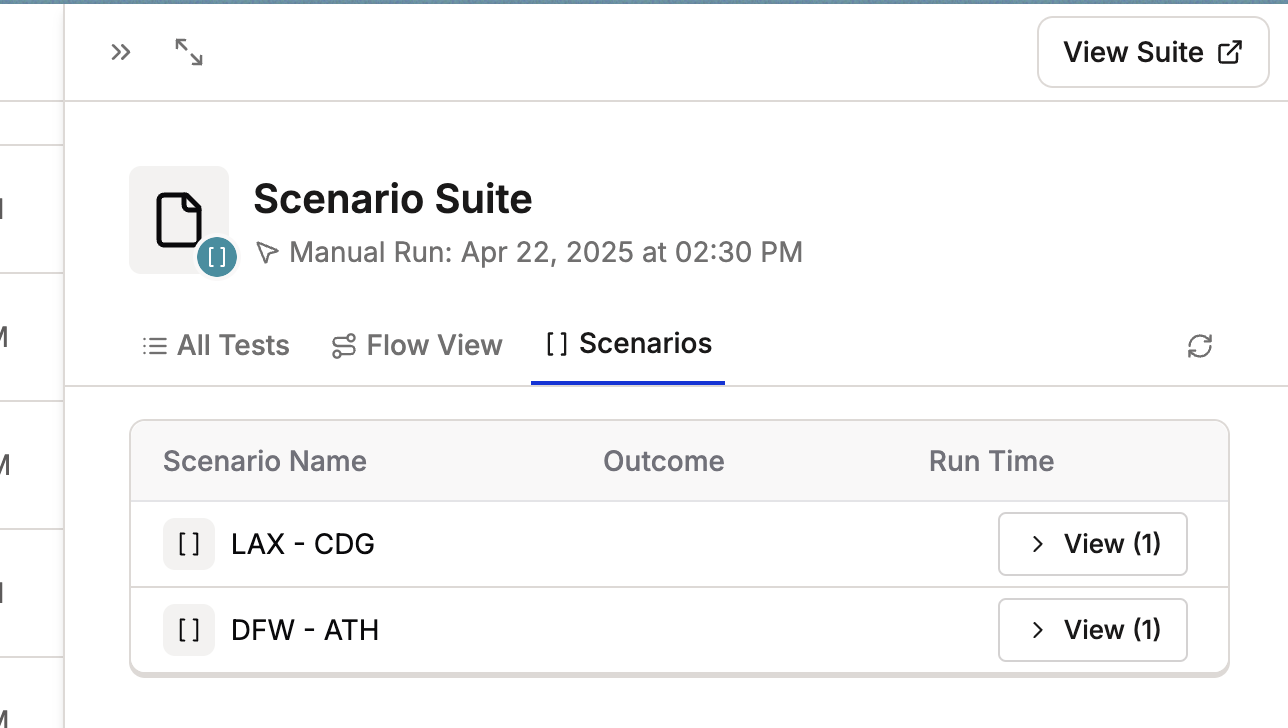 * Example: Separate results for DFZ scenario and LAX scenario
Click each scenario to inspect individual steps and outcomes
* Example: Separate results for DFZ scenario and LAX scenario
Click each scenario to inspect individual steps and outcomes  Schedule recurring runs just like regular test suite
 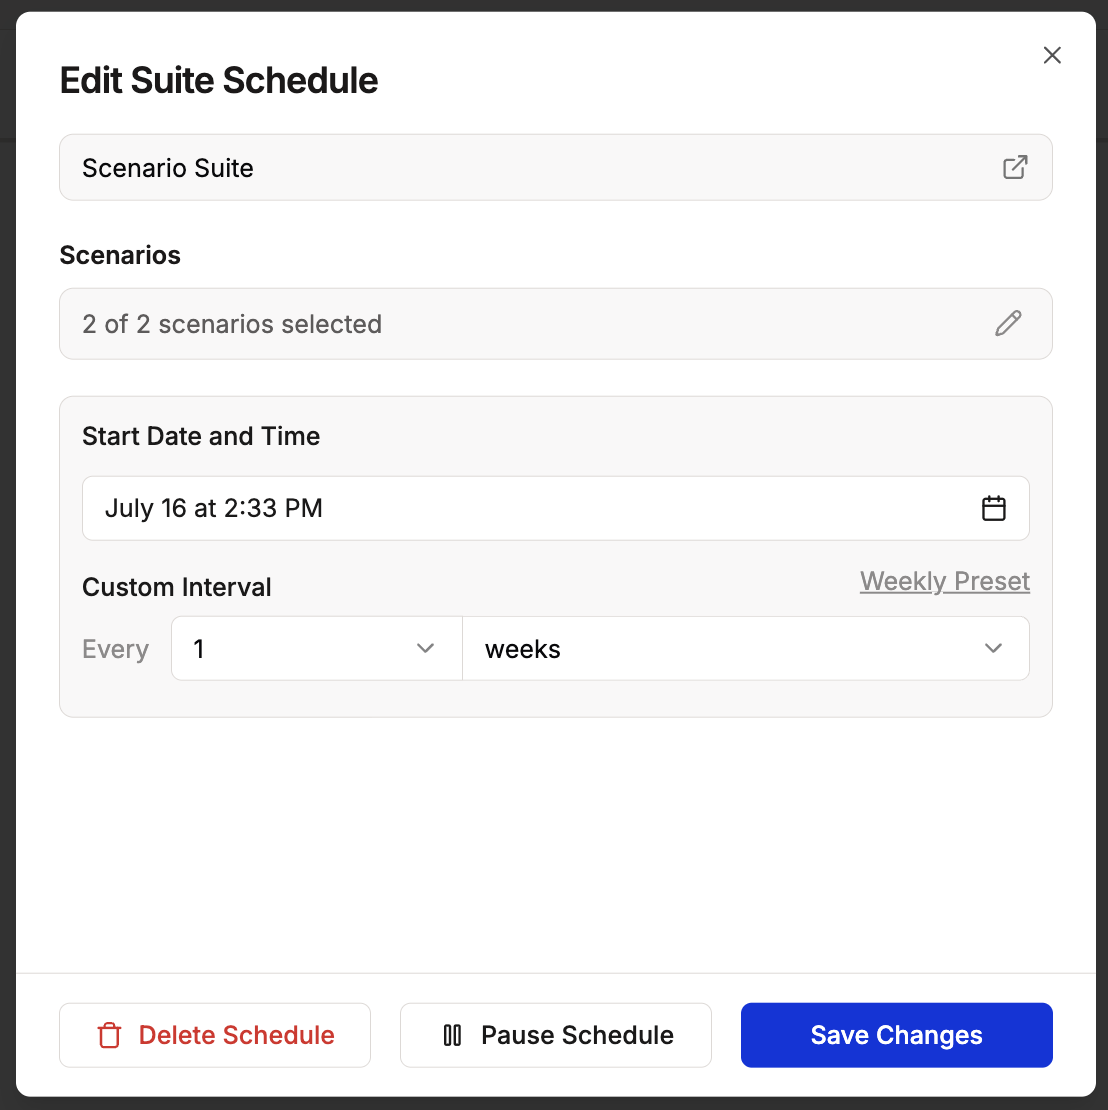 ***
## Managing Scenarios
Use the toggle switch in the Status column to enable or disable specific scenarios without deleting them. Disabled scenarios won't run when you execute the test.
Click any cell in the scenario table to edit values directly. Changes save automatically.
Click **+ New Scenario** at the bottom of the table or press the keyboard shortcut to add additional scenario rows.
Select scenarios and use the delete option to remove them from your table.
## Best Practices
* **Start simple**: Begin with 2-3 scenarios to validate your test logic before scaling up
* **Use descriptive scenario names**: Make it easy to identify which scenario failed in test results
* **Organize related scenarios together**: Group similar test variations in the same scenario table
* **Keep variables consistent**: Use the same variable names across related tests for easier management
* **Test with one scenario first**: Verify your test works correctly with a single scenario before adding more
* **Document edge cases**: Use scenario names to clearly indicate boundary conditions or special cases
## Key Benefits
Write one test instead of many duplicate tests. A single parameterized test can handle dozens of scenarios without duplicating test logic.
Update inputs in one central location. When test data needs to change, modify the scenario table rather than updating multiple individual tests.
Easily test variations and edge cases. Add new scenarios to your table without modifying test logic, enabling comprehensive coverage of input combinations.
Easily test variations and edge cases. Add new scenarios to your table without modifying test logic, enabling comprehensive coverage of input combinations.
***
***
## Managing Scenarios
Use the toggle switch in the Status column to enable or disable specific scenarios without deleting them. Disabled scenarios won't run when you execute the test.
Click any cell in the scenario table to edit values directly. Changes save automatically.
Click **+ New Scenario** at the bottom of the table or press the keyboard shortcut to add additional scenario rows.
Select scenarios and use the delete option to remove them from your table.
## Best Practices
* **Start simple**: Begin with 2-3 scenarios to validate your test logic before scaling up
* **Use descriptive scenario names**: Make it easy to identify which scenario failed in test results
* **Organize related scenarios together**: Group similar test variations in the same scenario table
* **Keep variables consistent**: Use the same variable names across related tests for easier management
* **Test with one scenario first**: Verify your test works correctly with a single scenario before adding more
* **Document edge cases**: Use scenario names to clearly indicate boundary conditions or special cases
## Key Benefits
Write one test instead of many duplicate tests. A single parameterized test can handle dozens of scenarios without duplicating test logic.
Update inputs in one central location. When test data needs to change, modify the scenario table rather than updating multiple individual tests.
Easily test variations and edge cases. Add new scenarios to your table without modifying test logic, enabling comprehensive coverage of input combinations.
Easily test variations and edge cases. Add new scenarios to your table without modifying test logic, enabling comprehensive coverage of input combinations.
***