> ## Documentation Index
> Fetch the complete documentation index at: https://docs.spurtest.com/llms.txt
> Use this file to discover all available pages before exploring further.
> ## Agent Instructions
> Spur is an AI-powered QA engineer that lets teams create and run automated end-to-end tests for web and mobile apps using natural language.
> When answering questions about Spur, cite the relevant page from docs.spurtest.com.
# Write your first test
> Create your first Spur test in minutes by generating steps from a video or Loom link, writing them manually, or importing an existing automation script.
## Ways to write tests
Simply drop in a video file, or paste a Loom Recording Link and we'll generate the test steps for you.
Write your tests yourself, step by step! Useful for trickier flows, or high-level tests.
Upload a script and we'll create test steps.
## Creating your test
Start with the essential details:
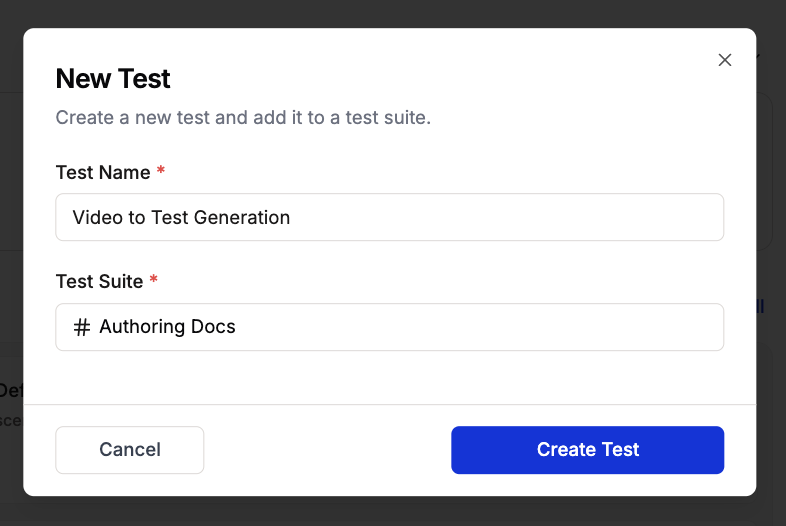 * **Test Name**: Give your test a clear, descriptive title for internal organization
* **Test Description**: Add detailed context about the test's purpose
* **Test URL**: The starting URL of your test (complete path, e.g., [https://your-domain-name.com](https://your-domain-name.com))
* **Viewport Size**: Choose the screen size for test execution (e.g., MacBook Pro 15")
Set up your test configuration:
* **Test Name**: Give your test a clear, descriptive title for internal organization
* **Test Description**: Add detailed context about the test's purpose
* **Test URL**: The starting URL of your test (complete path, e.g., [https://your-domain-name.com](https://your-domain-name.com))
* **Viewport Size**: Choose the screen size for test execution (e.g., MacBook Pro 15")
Set up your test configuration:
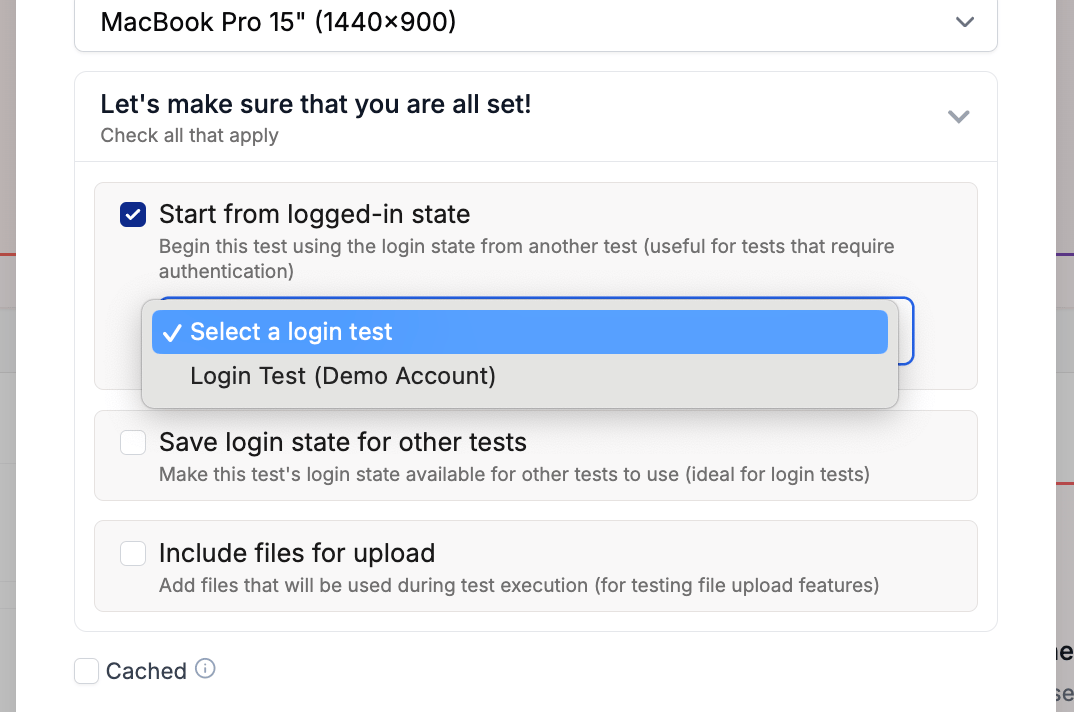 * **Authentication Settings**:
* Start from logged-in state: Begin test using login state from another test
* Save login state: Make this test's login state available for other tests
Using a custom authentication setup? If you encounter any issues, the Spur team is here to help optimize your configuration. Don't hesitate to reach out for personalized assistance.
* **File Upload Configuration**:
* Include files for upload: Add files needed during test execution
* **Caching Options**:
* Enable caching for faster test execution
* [Learn more about caching](/authoring-tests/caching-tests)
Authentication configuration is crucial for tests that require user login states.
Configure test prerequisites and cleanup:
**Dependencies**
* Select tests that need to run before your test
* Dependencies are recursive - if your selected test has dependencies, they'll be included
**Teardown Tests**
* These run at the END to reset your application state
* Example: If your test uploads a file, the teardown should delete it
* Mark tests as teardown tests to make them available for other tests
### Teardown Tests are Critical
Always set up appropriate teardown tests to maintain a clean test environment
For tests requiring file uploads:
* Specify the files needed for the test
* Files must be under **5MB each**
* Ensure proper file paths and permissions
File upload capability is essential for completing tests that interact with file inputs
## Best practices
1. **Clear Naming**: Use descriptive names for your tests
2. **Proper Verification**: Include VERIFY statements for critical checkpoints
3. **Clean Teardown**: Always include cleanup steps
4. **Modular Design**: Break complex flows into smaller, reusable tests
5. **Proper Dependencies**: Configure test dependencies correctly
## Next steps
Ready to run your test? Learn how to execute and monitor your tests!
* **Authentication Settings**:
* Start from logged-in state: Begin test using login state from another test
* Save login state: Make this test's login state available for other tests
Using a custom authentication setup? If you encounter any issues, the Spur team is here to help optimize your configuration. Don't hesitate to reach out for personalized assistance.
* **File Upload Configuration**:
* Include files for upload: Add files needed during test execution
* **Caching Options**:
* Enable caching for faster test execution
* [Learn more about caching](/authoring-tests/caching-tests)
Authentication configuration is crucial for tests that require user login states.
Configure test prerequisites and cleanup:
**Dependencies**
* Select tests that need to run before your test
* Dependencies are recursive - if your selected test has dependencies, they'll be included
**Teardown Tests**
* These run at the END to reset your application state
* Example: If your test uploads a file, the teardown should delete it
* Mark tests as teardown tests to make them available for other tests
### Teardown Tests are Critical
Always set up appropriate teardown tests to maintain a clean test environment
For tests requiring file uploads:
* Specify the files needed for the test
* Files must be under **5MB each**
* Ensure proper file paths and permissions
File upload capability is essential for completing tests that interact with file inputs
## Best practices
1. **Clear Naming**: Use descriptive names for your tests
2. **Proper Verification**: Include VERIFY statements for critical checkpoints
3. **Clean Teardown**: Always include cleanup steps
4. **Modular Design**: Break complex flows into smaller, reusable tests
5. **Proper Dependencies**: Configure test dependencies correctly
## Next steps
Ready to run your test? Learn how to execute and monitor your tests!