Walk through every failure, warning, and error in a test plan run in Spur, triage each result, group by cause, and rerun failing tests without leaving the page.
After running a test plan, the review flow gives you a guided way to work through every failed test, warning, and error. You can triage each result, add notes, edit tests inline, create bug tickets, export PDFs, and pick up exactly where you left off across sessions.
Open a test plan run from the run history. At the top of the results page you’ll see the Test Review progress bar, which shows the number of tests remaining to review. This count includes failures, warnings, and errors.Click Start to enter the review flow.
The Test Review progress bar at the top of a test plan run, showing remaining failures and warnings
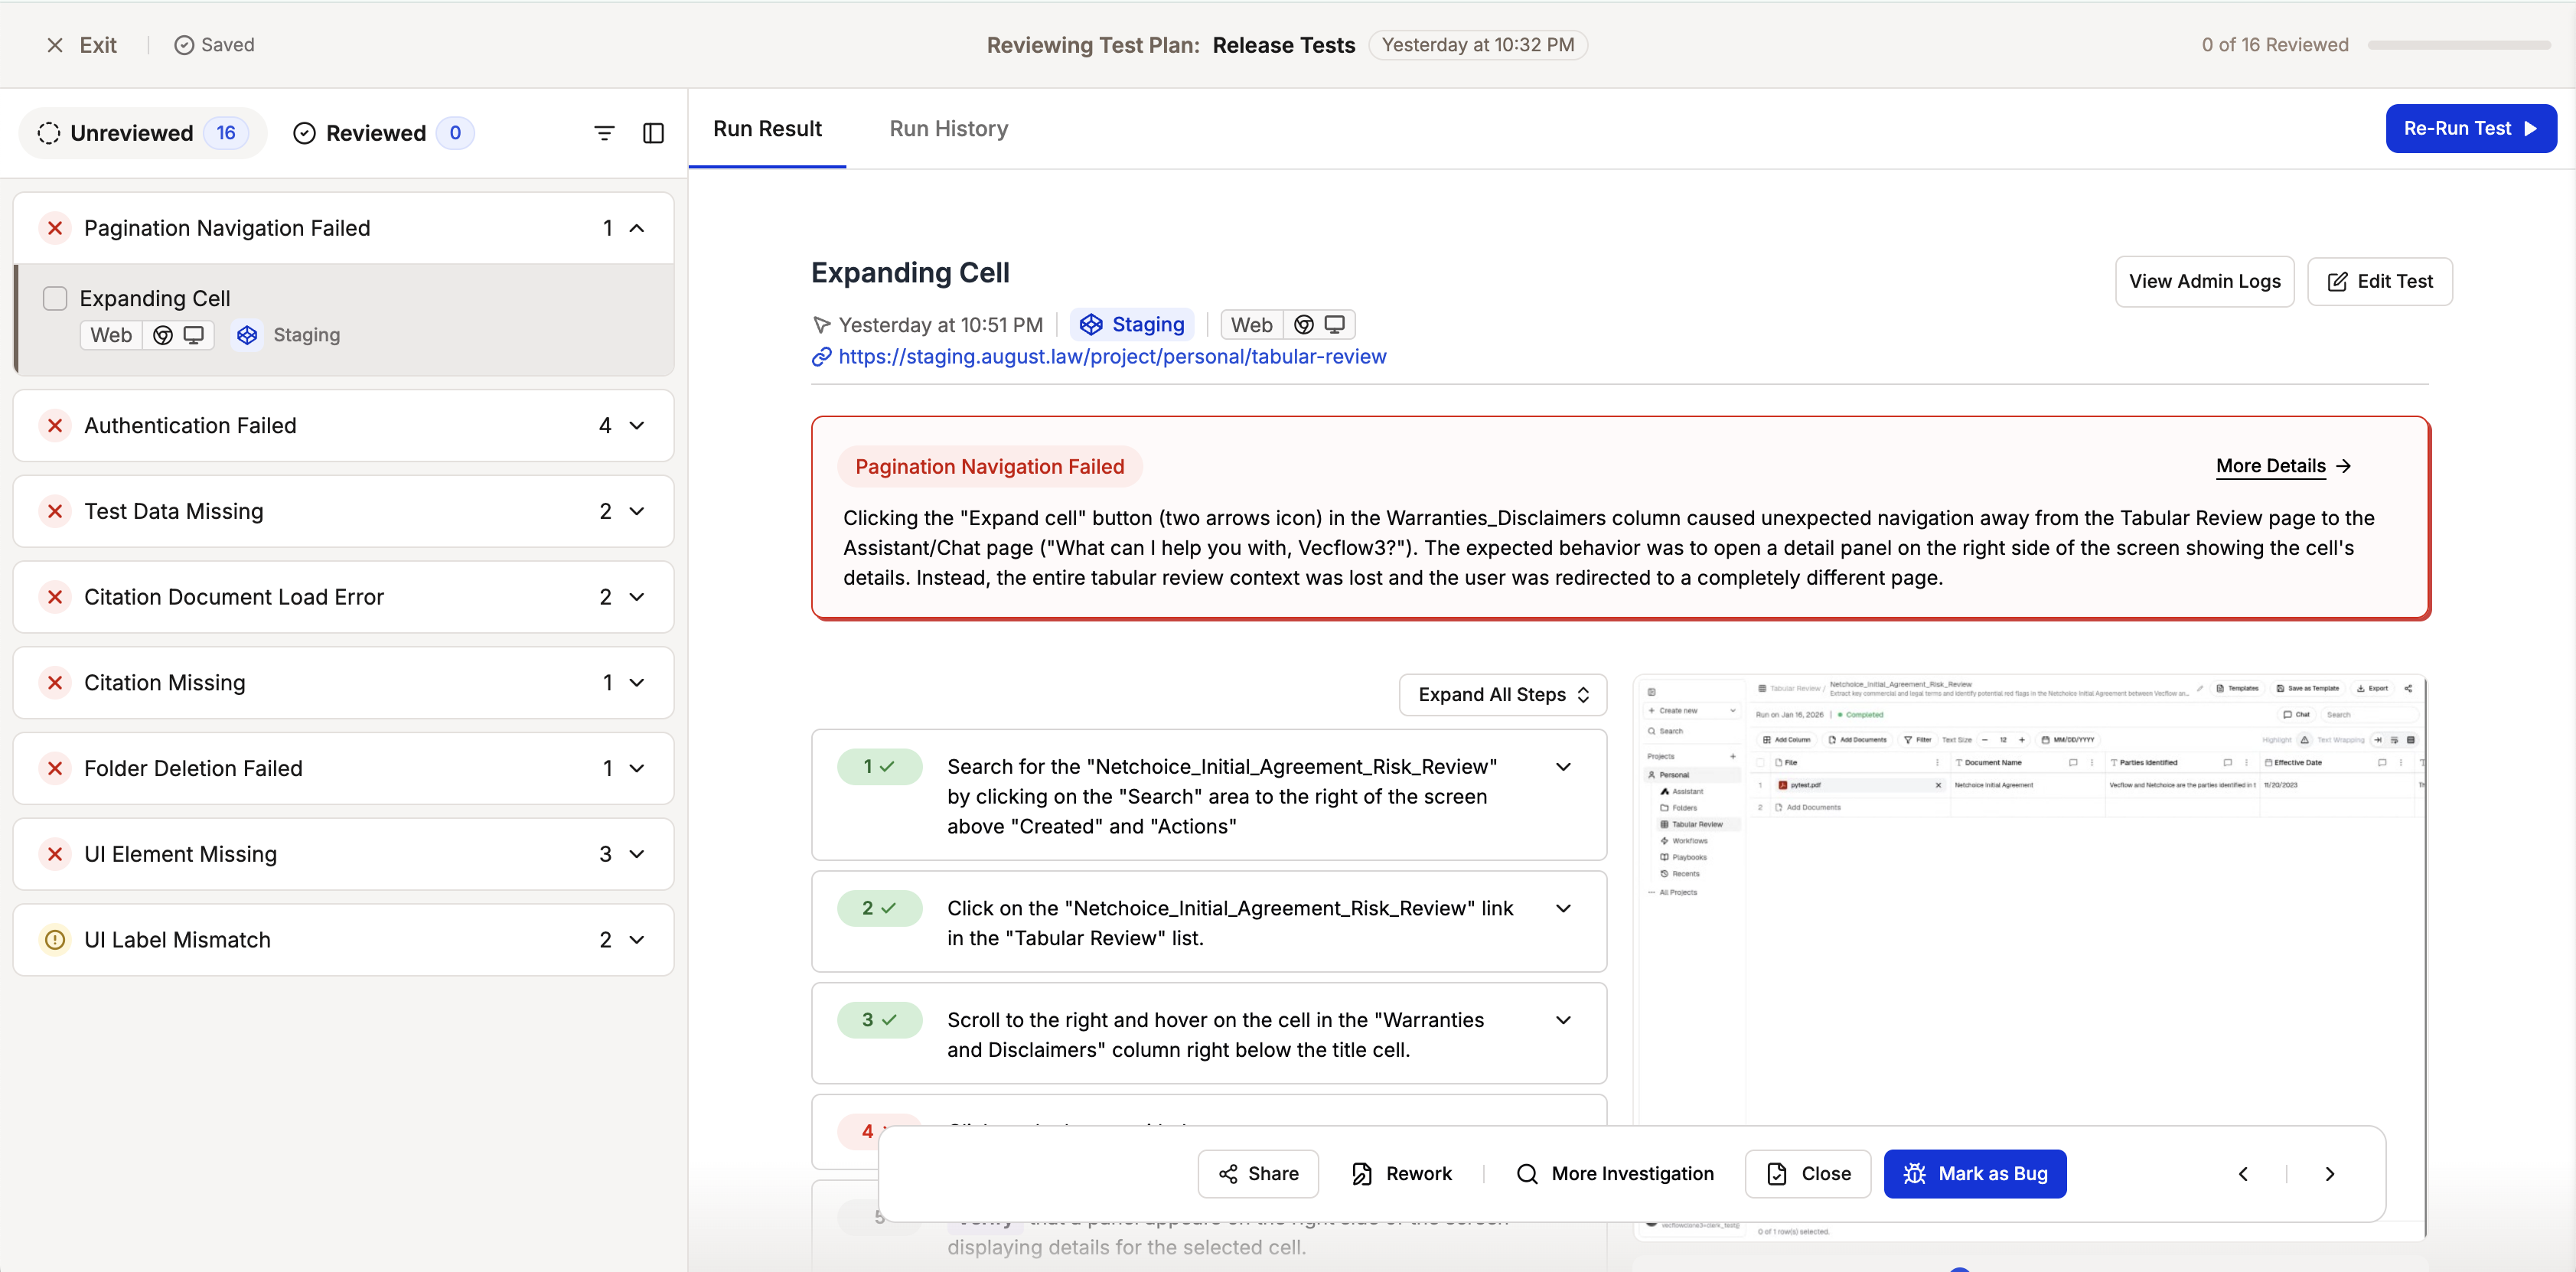
Left panel — A list of all tests that failed, surfaced a warning, or encountered an error in this run
Right panel — Full details for the selected test: failure reason, steps, screenshots, video, and console and network logs
Work through tests one at a time. As you assign a status to each test, it moves to the Reviewed tab. The left panel updates automatically so you always know what’s left.
Use the Group by dropdown at the top of the left panel to change how tests are organized:
Failure Reason (default) — tests grouped by the root cause Spur detected
Folder + Suite — tests grouped by folder, with a second level for each suite inside it
Environment — tests grouped by the environment they ran against
Scenario — tests grouped by scenario when the plan uses a scenario table
Your selection is saved in the URL, so sharing a link preserves the grouping for whoever opens it.Use the Expand all and Collapse all control next to the dropdown to open or close every group at once — useful for scanning a large review list.
The review interface showing the test list on the left and full test details on the right
To assign a status, press C or click Classify in the action bar at the bottom of the screen. This opens the classify modal with four options:
The action bar showing the Classify button and the classify modal with four statuses
Bug — Mark this when you have found a bug in your application.Closed — Use this when the failure was expected or explained — for example, a deployment was in progress or the test environment was temporarily unavailable.Needs Rework — Use this when the test steps themselves need to be updated. You can edit the test inline from within the review flow (see Editing and rerunning tests below).Needs Investigation — Use this when you need more context before deciding — for example, you want to discuss the failure with a teammate before committing to a status.You can quick-classify by pressing 1 through 4 while the classify modal is open.
The Reviewed tab groups tests into Resolved (Bug and Closed) and Unresolved (Needs Rework and Needs Investigation). Resolved tests are considered dealt with; unresolved tests still require follow-up action.
You can attach a note to any test to record context, observations, or next steps.
Standalone note — Press N or click Note in the action bar. Type your note and submit. Notes appear in the test timeline.
Note with classification — While the classify modal is open, hold Shift and press a number key (Shift+1 through Shift+4) to assign a status and add a note at the same time.
Notes can also be added to multiple tests at once when using bulk selection.
Every classification action can be undone. After you classify a test, a toast notification appears with an Undo button. You can also press Cmd+Z (Mac) or Ctrl+Z (Windows/Linux) to revert the last action.Undo restores the previous review status, removes any note that was created with the action, and returns you to the previous tab and selected test.
You can fix a test and re-run it without leaving the review flow:
1
Open the editor
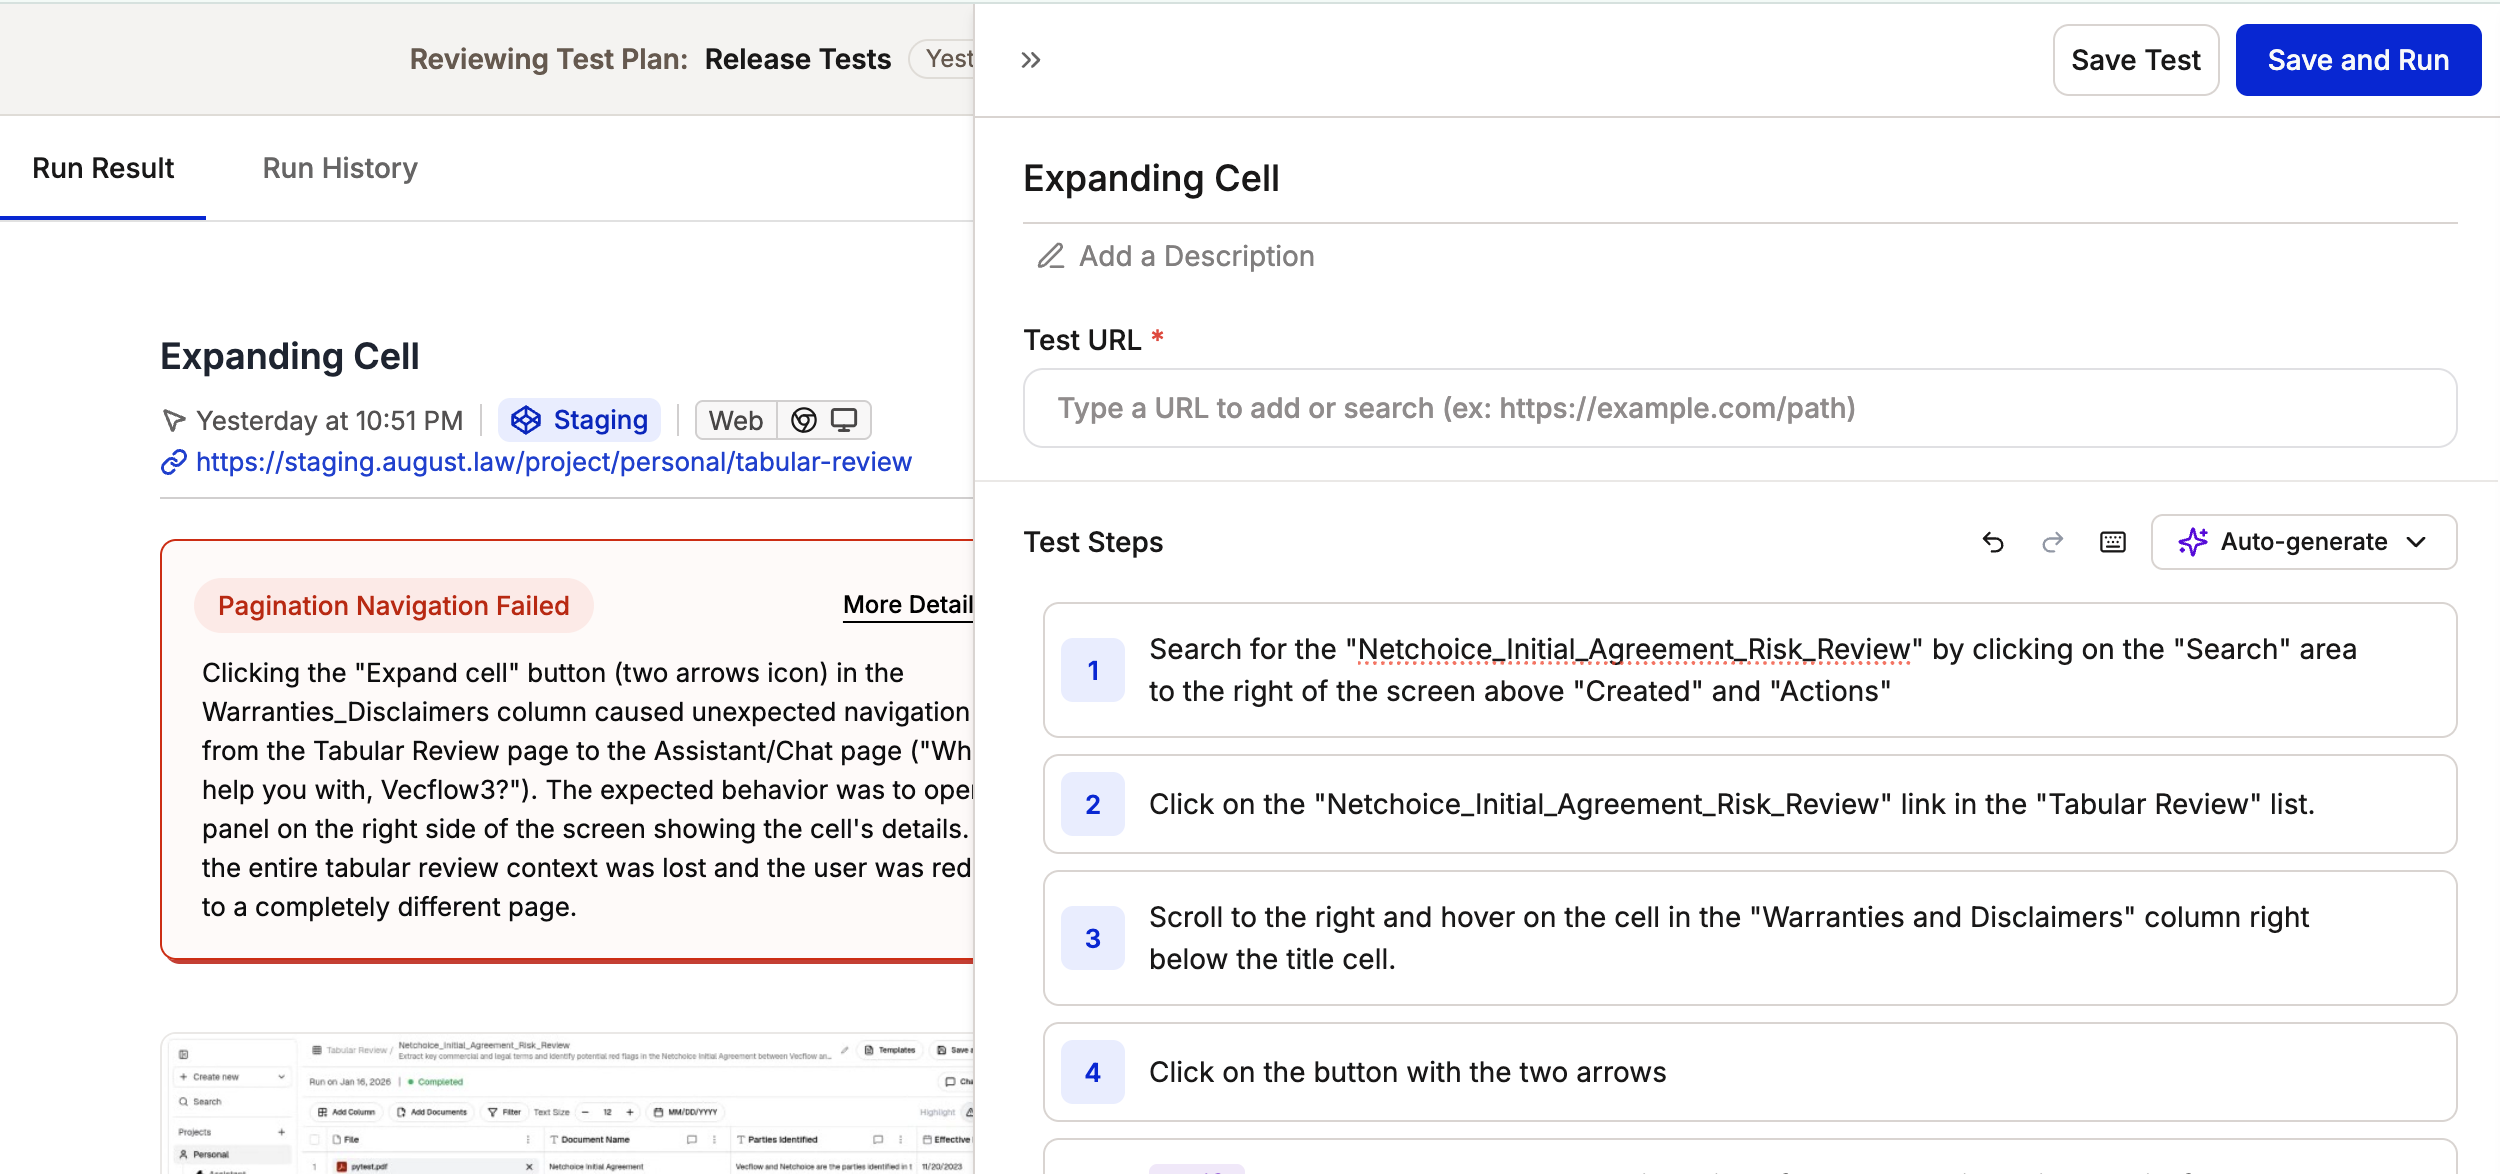
With a test selected in the right panel, click Edit. The test side peek opens so you can update the steps.
2
Save and rerun
Click Save and Run. A confirmation modal appears before the run starts. Spur saves your changes and triggers a new run.
The test editor with the Save and Run button
3
Track the result
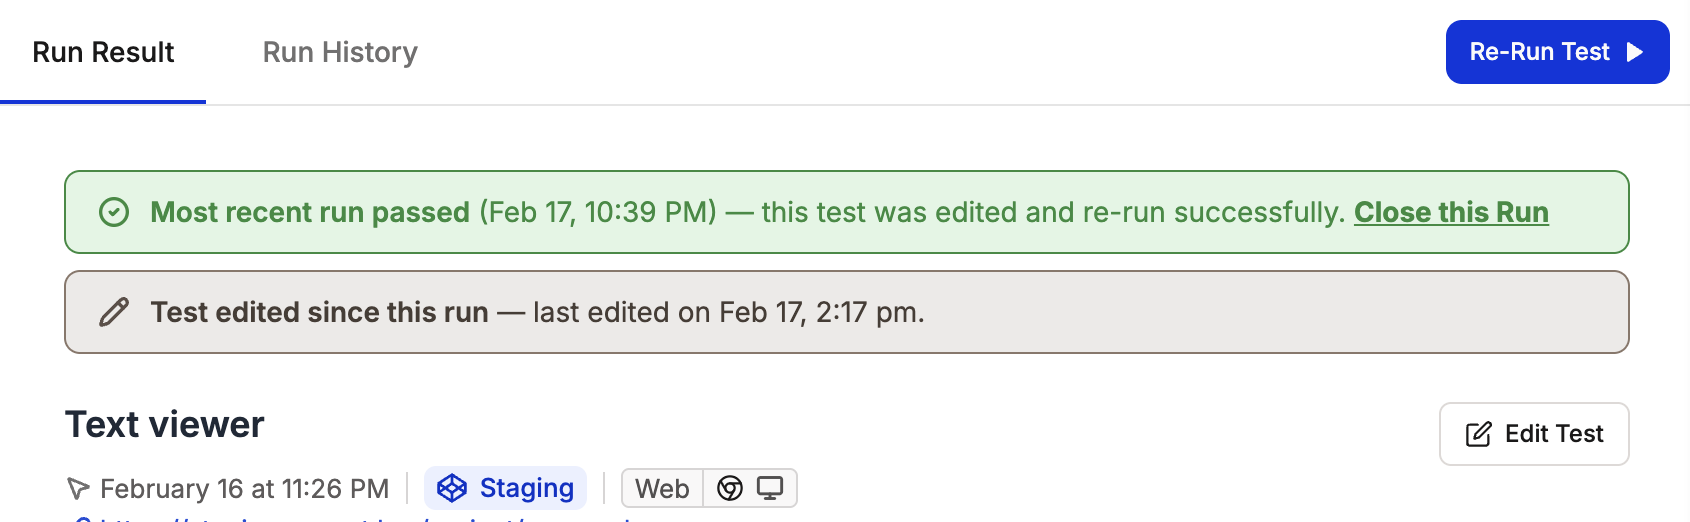
A banner appears at the top of the panel showing when the test was edited and the rerun status. Once the rerun finishes, you’ll see whether it passed or failed — giving you more context to finalize the status.
The edit and rerun banner showing edit time and live rerun status
You can also open the Run History tab in the right panel to see all previous runs for the selected test in the same configuration (environment, browser, viewport).
When you rerun a native test from the review flow, Spur automatically uses the correct native platform configuration from the original run. The run modal opens pre-configured with the matching platform (iOS, Android, or both) and environment, skipping directly to the summary step.This means:
Web tests rerun with the original browser and viewport
Native tests rerun with the original native platform — no browser or viewport is applied
The rerun inherits the same environment and scenario configuration as the original test run. If the original test ran on Android with a specific environment, the rerun uses the same settings.
From within the review flow, you can file a Jira ticket, a Linear issue, or an Azure DevOps work item for any test:
1
Open the share menu
Click Share in the action bar (or press S) and select Create a Ticket.
2
Review the auto-generated content
Spur pre-populates the ticket with a failure reason, reproduction steps, test execution details, and a direct link to the test run. Edit any of these fields as needed.
3
Set ticket details
Choose the project, priority, and assignee.
4
Create the ticket
Click Create Ticket, or Create Work Item for Azure DevOps. The ticket identifier appears next to the test in the Reviewed tab, with a ticket icon to identify it at a glance.
A ticket integration must be connected before you can create tickets from the review flow. Only the connected trackers appear as options. See the Integrations guide for setup.
Once a run has been reviewed, you can send a summary email to configured recipients or to a one-off address. The email shows the total runs, the classification breakdown, the reviewer’s name, and highlights the tests classified as bugs.
You can send the email from three places:
The Test Plan run page — use the Email button in the header.
The end of the review flow — click Email Results on the completion screen.
The top-right header inside the review flow — available once every test has been reviewed.
In the send dialog:
Recipients set to After review in the Test Plan’s email alerts are selected by default.
Add any one-off address by typing it in — the recipient does not need to be configured on the Test Plan.
You can resend the email to someone who has already received it.
Recipients set to On finish get their email automatically when the run reaches a terminal state and are not part of the manual send.
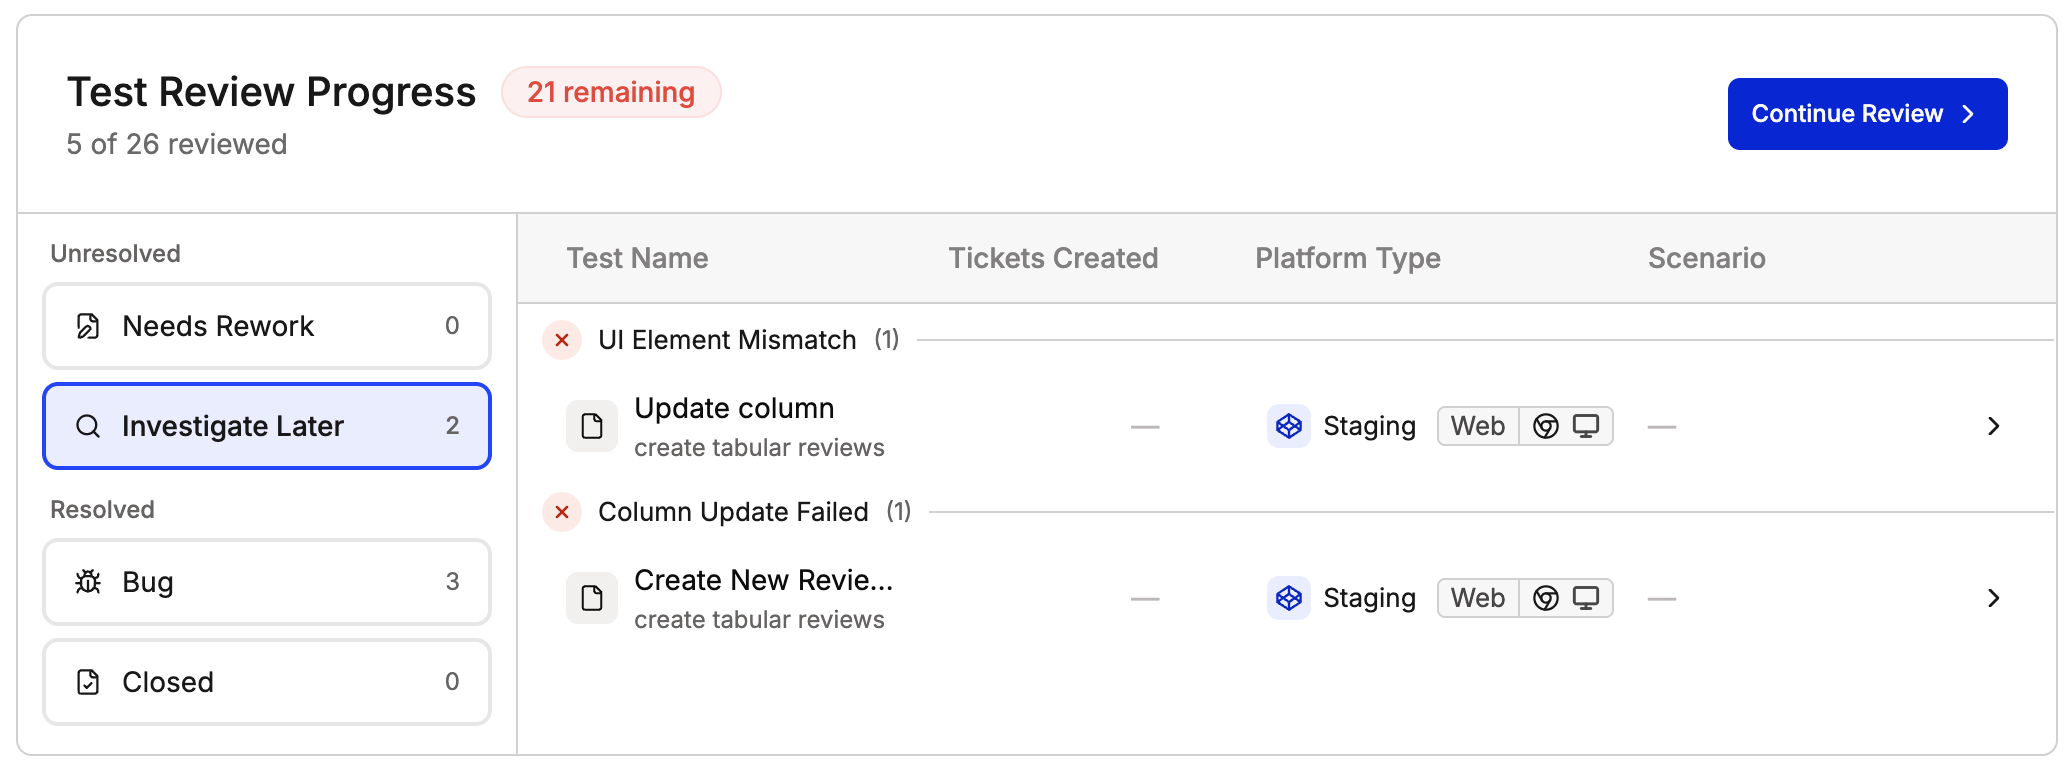
You don’t have to finish a review in one session. Click Exit at any time — your progress is saved automatically.When you return to the test plan run page, the progress bar converts to a summary table showing all reviewed tests grouped by status. Tests with linked tickets show a ticket icon. You can re-enter the review flow from the summary to continue with the remaining tests.
The summary table after exiting a review, showing reviewed tests grouped by status
The goal of the review flow is to reach zero unreviewed tests: every failure, warning, and error has been triaged so nothing slips through before a release.
Was this page helpful?
⌘I
Assistant
Responses are generated using AI and may contain mistakes.