Why Use Scenario Tables?
Scenario Tables are perfect when you have repetitive tests that only differ by input data. Common examples include:- Form submissions with different field values (airport codes, cities, names)
- Login tests with various user credentials
- Product searches with different search terms
- Data validation with multiple input variations
- JavaScript actions with different parameters and configurations
- API testing with various endpoint parameters and payloads
- E-commerce flows with different product categories and pricing tiers
Before vs. After
- Before
- After

- 10 separate tests for the same flow
- Each test differs only by input values
- Hard to maintain and update

Key Benefits
Reduce Redundancy
Write one test instead of many duplicate tests
Easier Maintenance
Update inputs in one central location
Better Test Coverage
Easily test variations and edge cases
Scalability
Add new scenarios without modifying test logic
Video Walkthrough
How to Set Up Scenario Tables
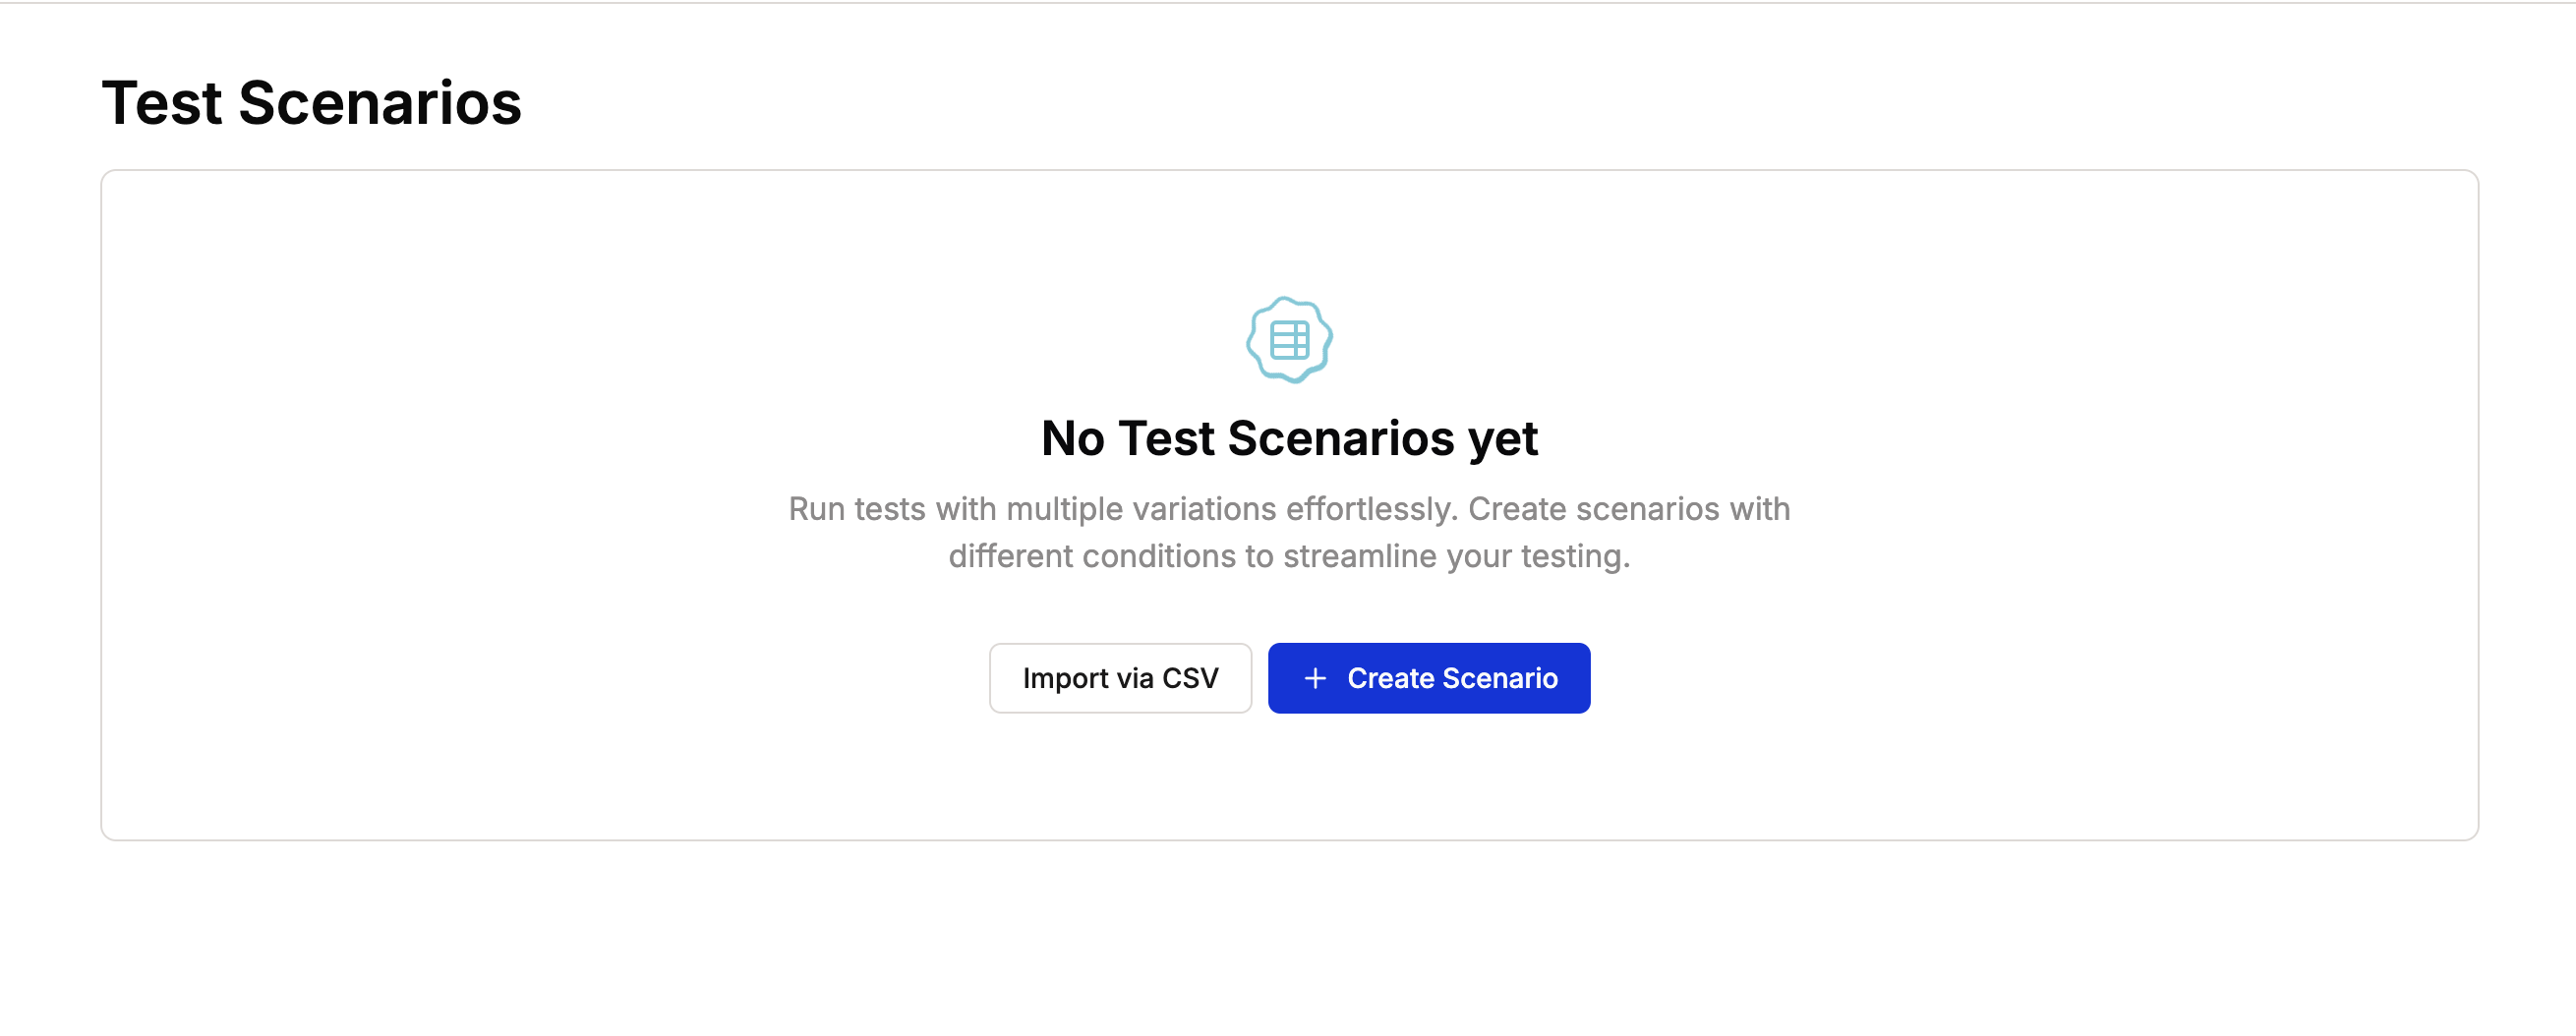
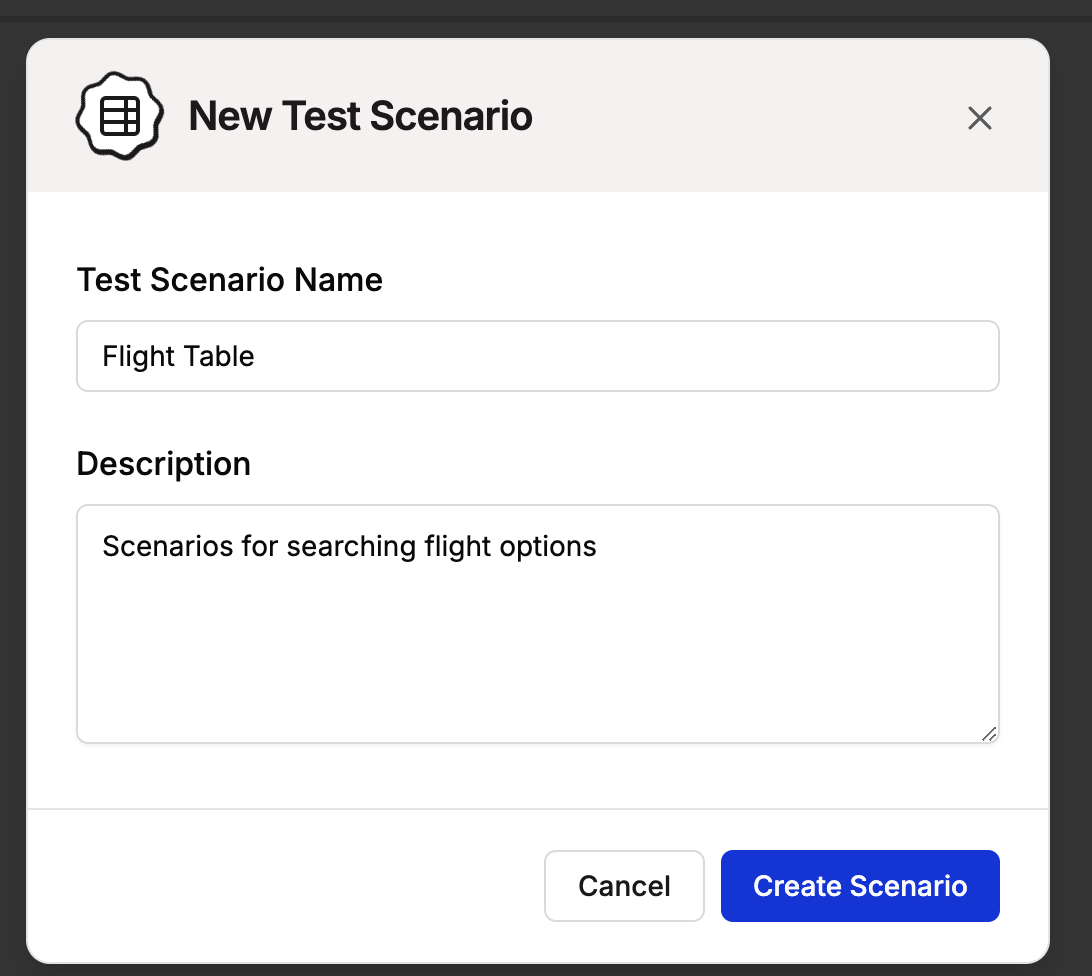
Step 1: Create Your Scenario Table
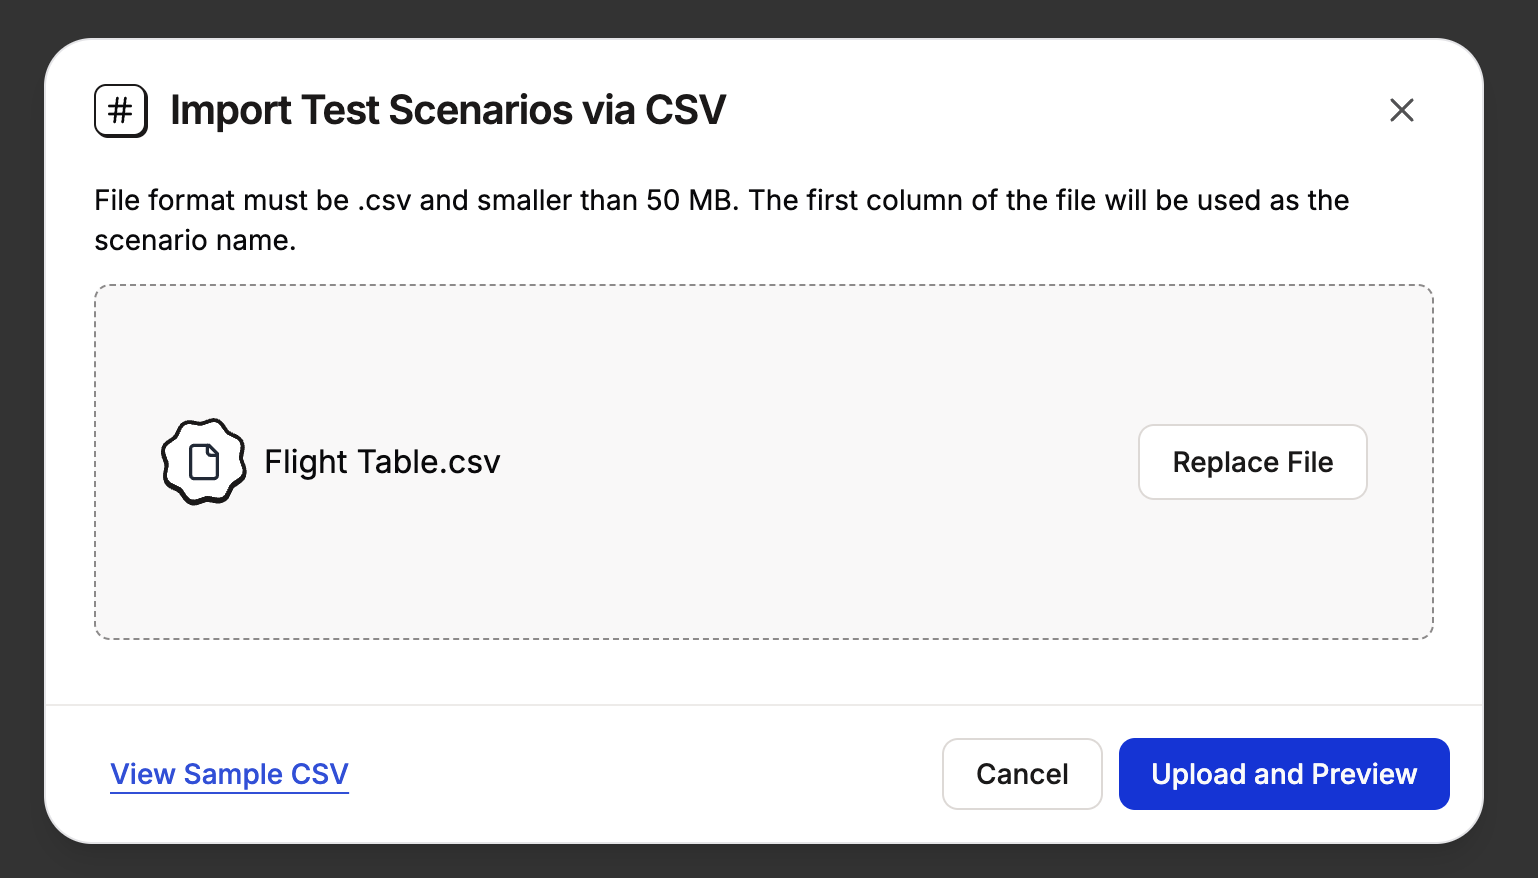
Navigate to the Scenario Tables section in Spur (/scenarios) and choose your preferred method:
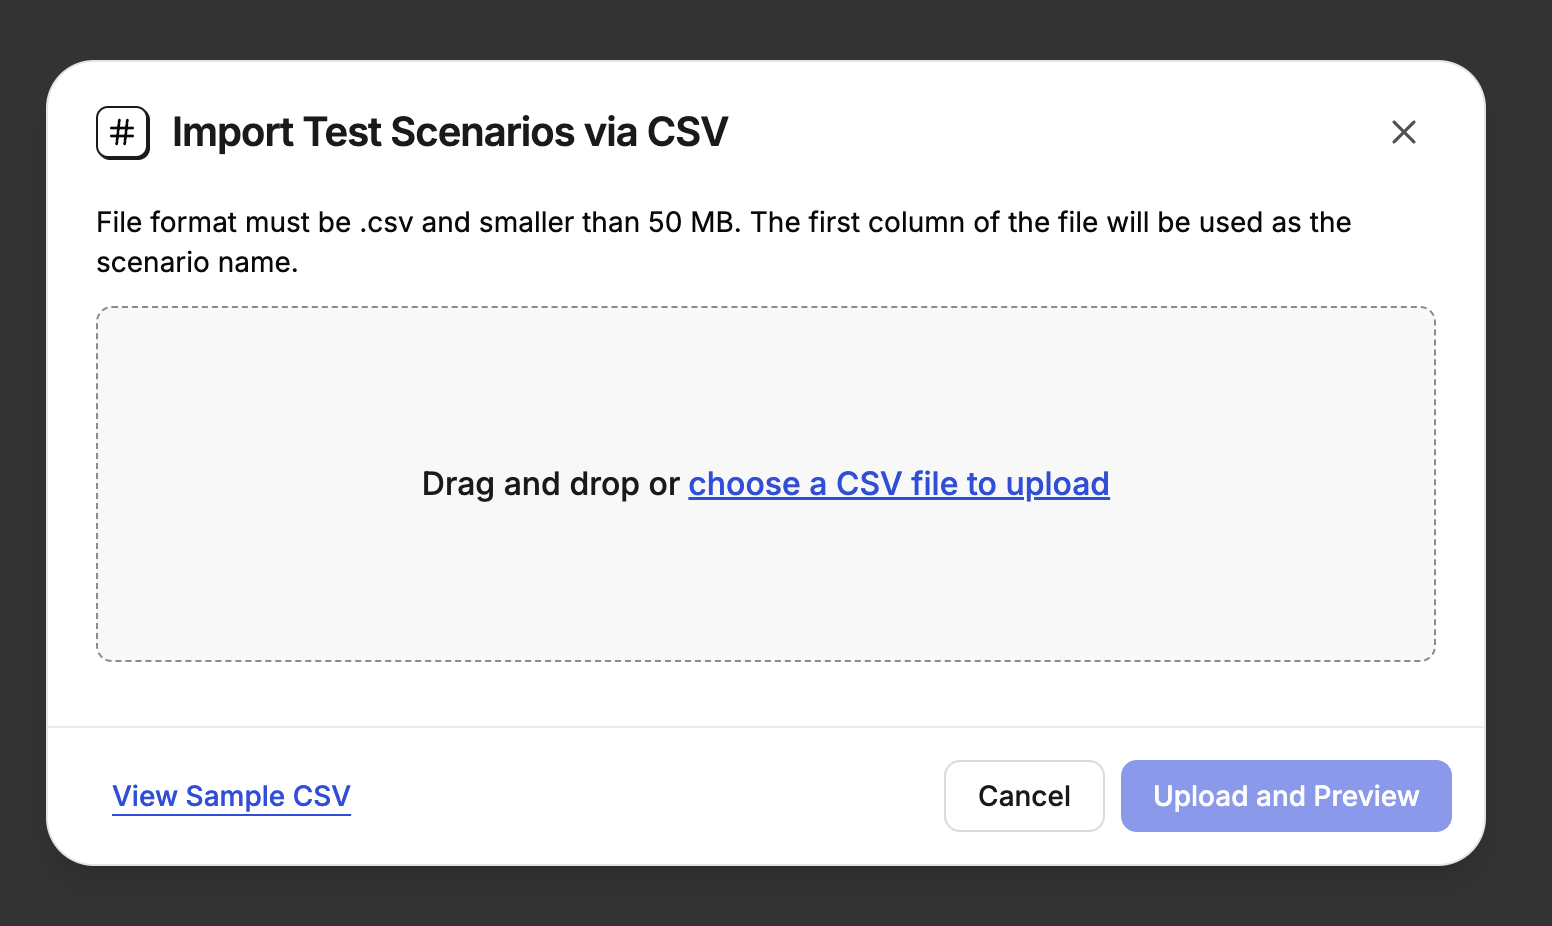
- Import via CSV
- Manual Creation
Recommended for bulk data

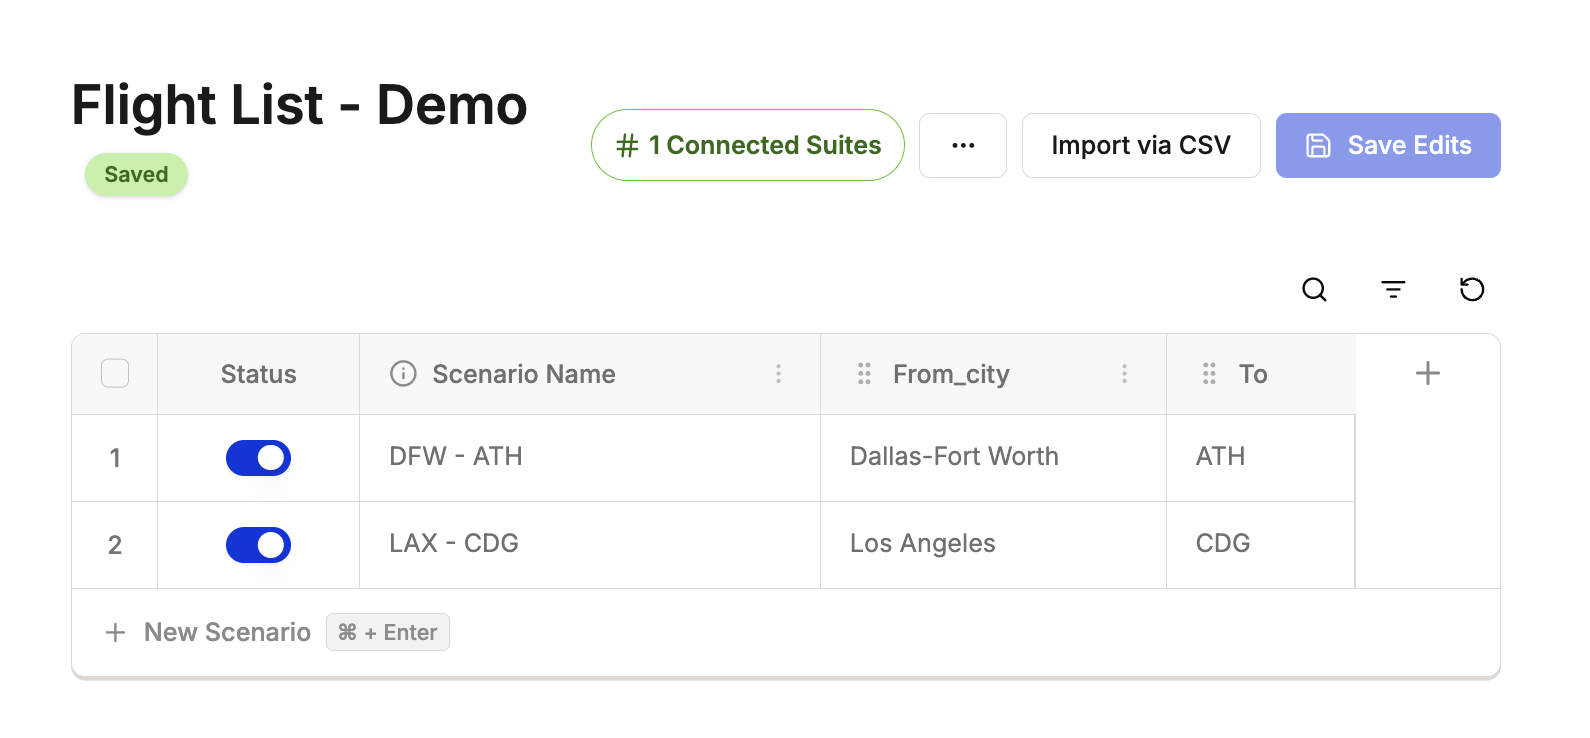
Configure table details
- Enter Scenario Table Name
- Add a clear Description
-
Review the preview to confirm correct import

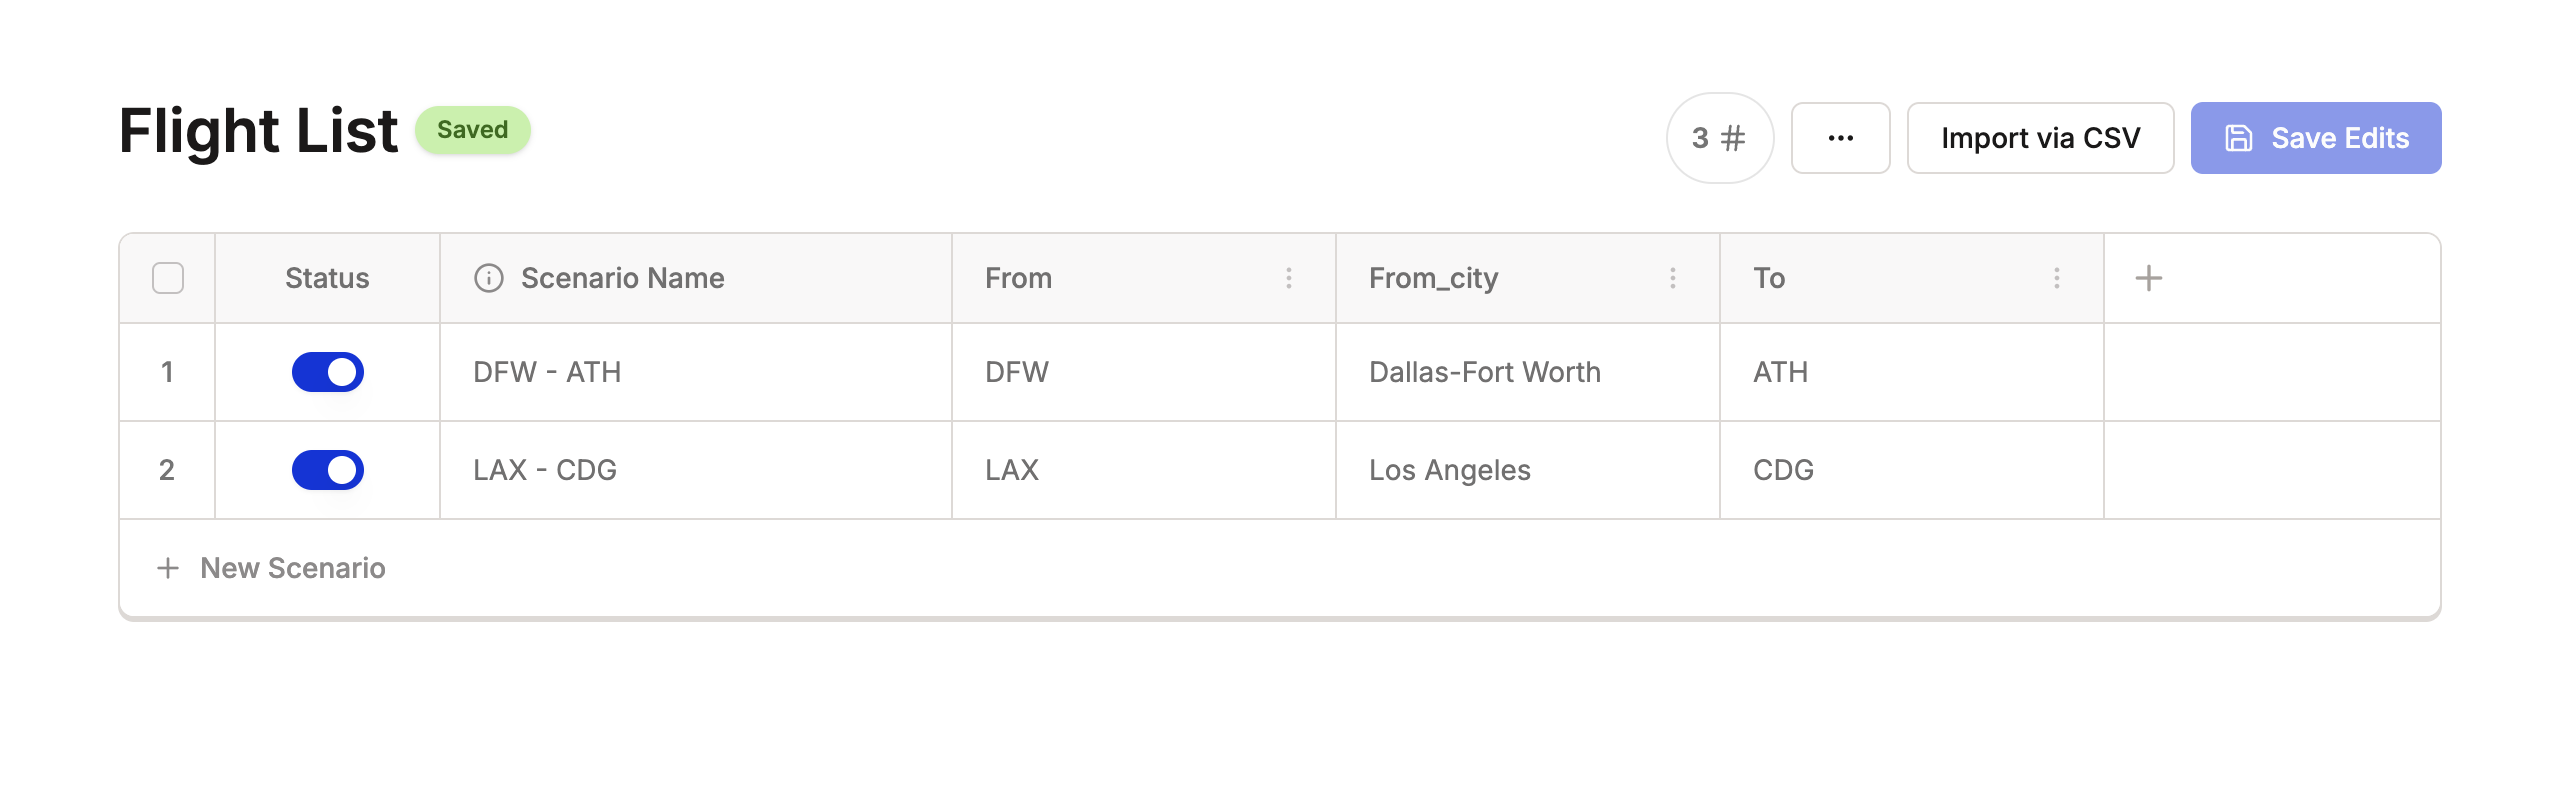
Understanding the structure:
- Each row = one scenario (test variation)
- Each column = one property (variable you’ll use in tests)
Step 2: Connect Your Table to a Test
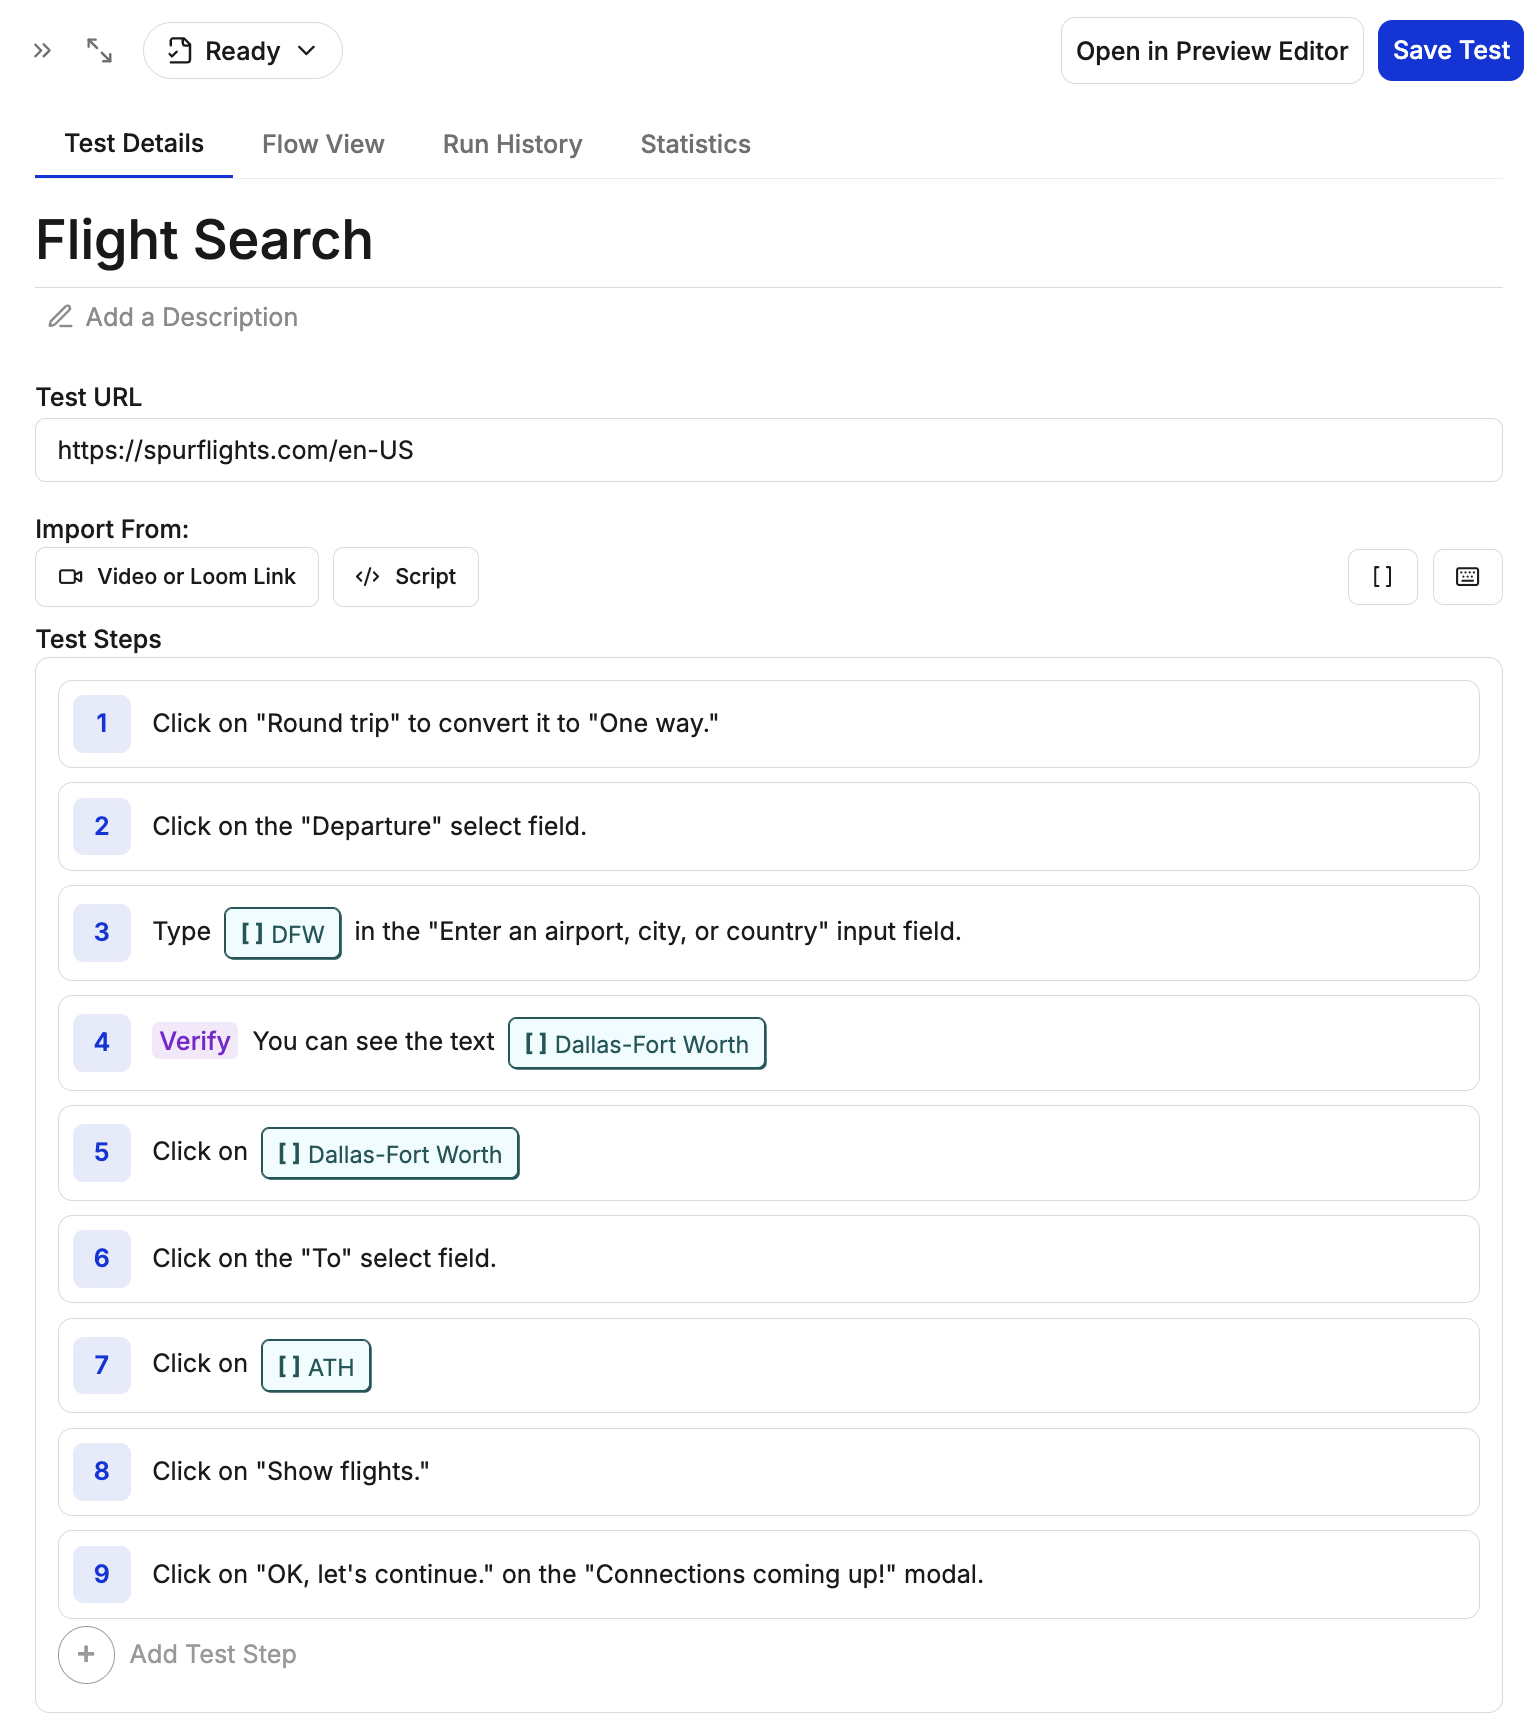
Important: Scenario Tables must be connected to Test Suites, not individual tests. Once connected to a suite, all tests within that suite can use the scenario properties.How it works:
- Connect the Scenario Table to a Test Suite
- Use the properties
[property_name]in any test within that suite - Run the suite to execute all scenarios across all tests
Option 1: Through Test Suites Menu
Option 2: Through Test Editor
Step 3: Run and Monitor Your Tests
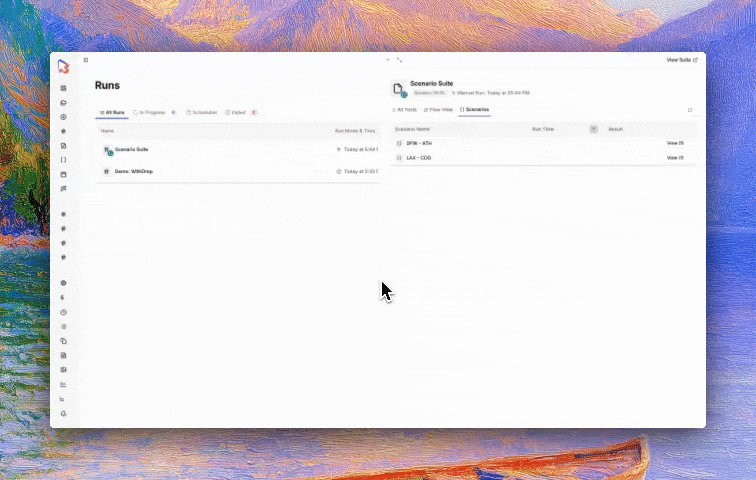
After saving your scenario-based test:View results
Check results in Run History, broken down by scenario: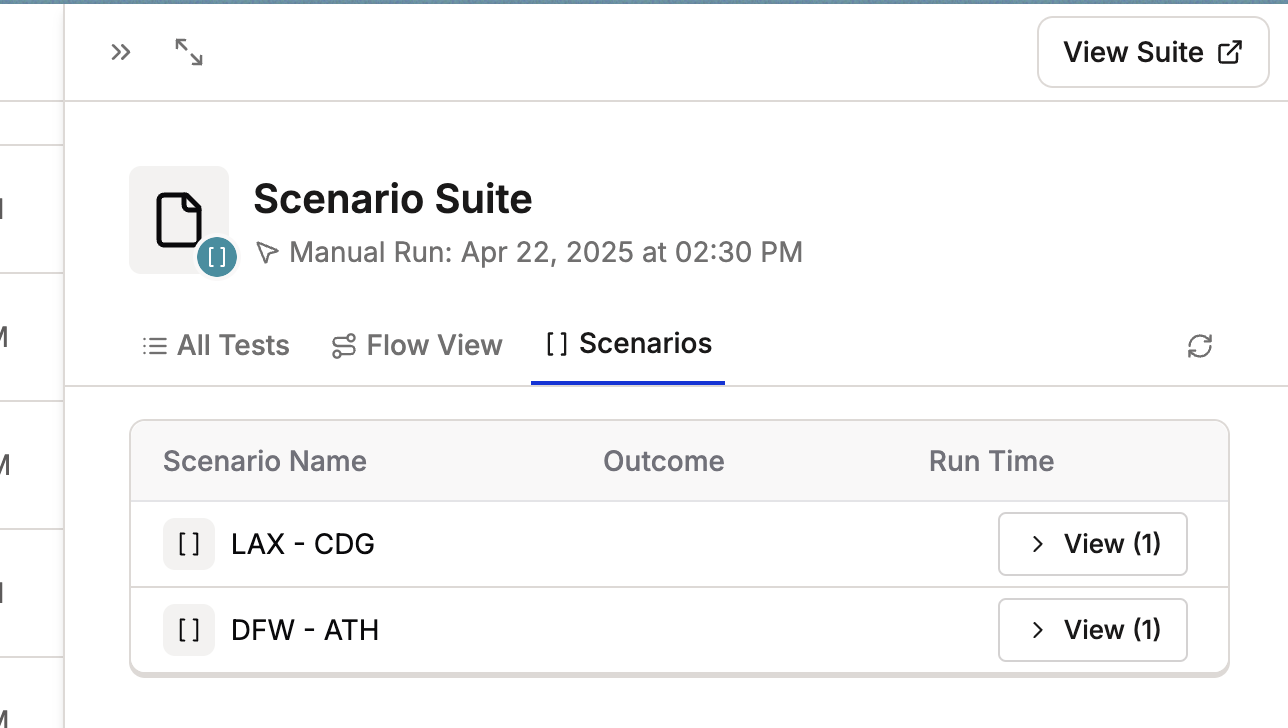
- Example: Separate results for DFZ scenario and LAX scenario
Best Practices
Naming
Use descriptive scenario names that clearly identify what each test variation covers
Properties
Keep property names short but meaningful (e.g.,
from_city instead of departure_city_location)Organization
Group related scenarios in the same table for better organization
Testing
Test your table with a small number of scenarios before scaling up