Overview
Spur now offers first-class support for email inboxes. This allows you to test email-based workflows like sign-up flows or email verifications seamlessly—right inside your test steps.
SpurMail is used under the hood. Read about SpurMail ➜
Creating an Email Inbox
To get started, you can create an inbox in one of two ways:- Type
@in the beginning of a step - Use the
/menu and select Email
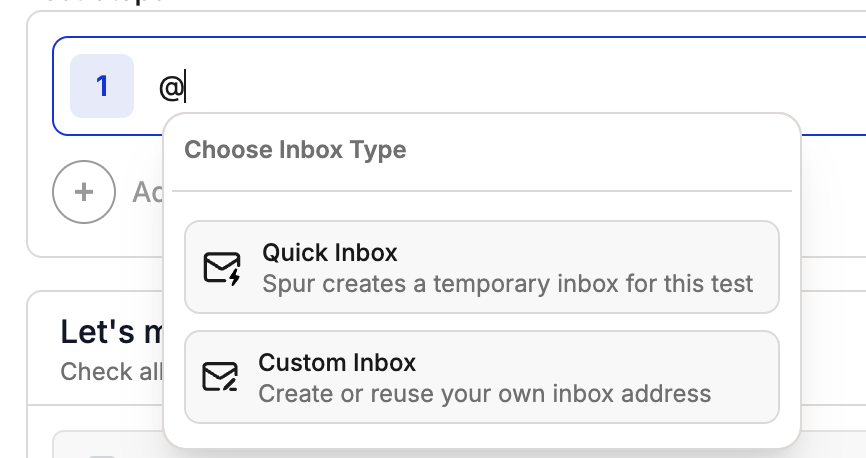
- Automatically generate a Quick Inbox (random email per test run)
- Define a Custom Inbox (persistent, named inbox)
Quick Inbox
Generates a new random email address for each test run. Use case: great for testing flows that require a fresh email for every sign-up.
Custom Inbox
Specify a named inbox you can reference across test steps. Use case: when you want consistency and specificity in the email address.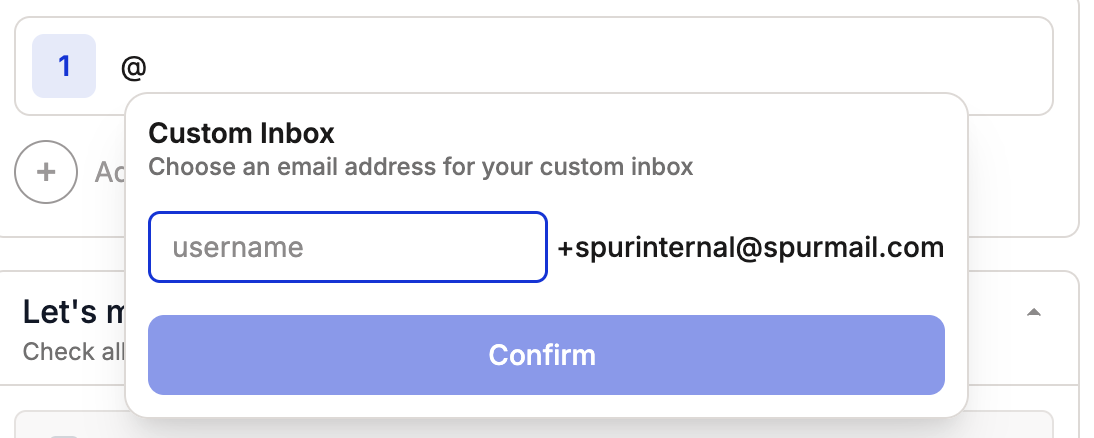

Available Actions
Once you create an inbox, several actions are available to you:- Navigate to inbox – opens the inbox in a new tab
- Open latest email – jumps directly to the most recent message
- Close inbox – closes the inbox tab and continues the test
- Close & clear inbox – clears inbox contents and resets for the next run

Using Your Inbox Email Address
Inserting the Email in Test Steps
You can insert the generated inbox address dynamically in your test steps in two ways: Method 1: Type@ symbol
Simply type @ anywhere in your test step where you want the email address to appear. This will automatically insert the current inbox email address.
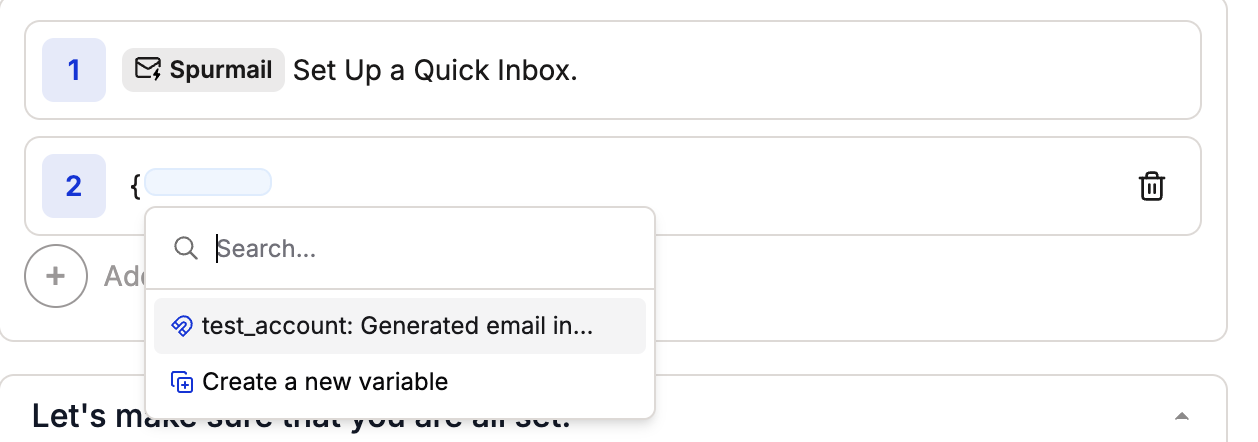
Method 2: Use variables
Access inbox-related variables through the variable menu by typing { and selecting from the test_account variable options.

Accessing Your Inbox on the Web
You can also view your inbox directly in a web browser:- During test execution: Use the “Navigate to inbox” action to open the inbox in a new tab
- Outside of tests: Visit the SpurMail web interface directly to access your custom inboxes and view emails
- In the Test Editor: Navigate to https://spurmail.com, type your inbox username (e.g.
test_account) into the address bar, and press Enter—no extra browser action needed.
Accessing Email Content
Once you’ve navigated to the spurmail.com inbox, you can access different parts of an email by clicking on the appropriate tabs in the email interface.
Example Test
Here is an example for a test that types a randomly generated inbox into a field on the page and verifies the contents of the received email.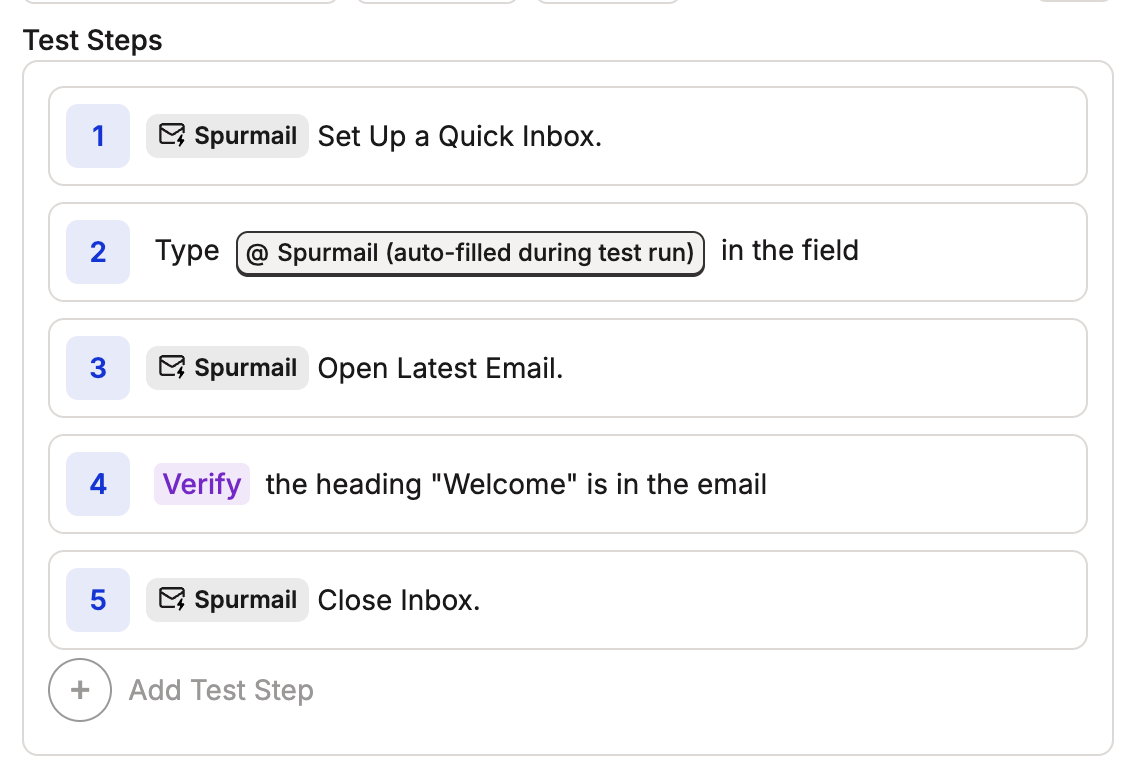
🤔 Tips
Example Use Cases
SpurMail has been used in various testing scenarios including:- User Registration: Test confirmation emails and verification links
- Password Reset: Verify reset instructions and link functionality
- OTP Verification: Test delivery and validation of one-time passwords
- Marketing Emails: Verify promotional content and unsubscribe functionality
- Transactional Emails: Test order confirmations, shipping notifications, and invoices
- Multi-step Workflows: Automate processes that include verifying against an email
Helpful Notes
- You can use multiple email addresses in the same test
- It can be useful to write a Clear Inbox teardown for your email, for ease of use.