Overview

The Scheduler lets you run test plans on a recurring basis. Set a frequency, pick your start time, and Spur handles the rest. Use it for continuous monitoring, regression testing, or pre-deployment validation across any environment.

How to Schedule a Test Plan

1

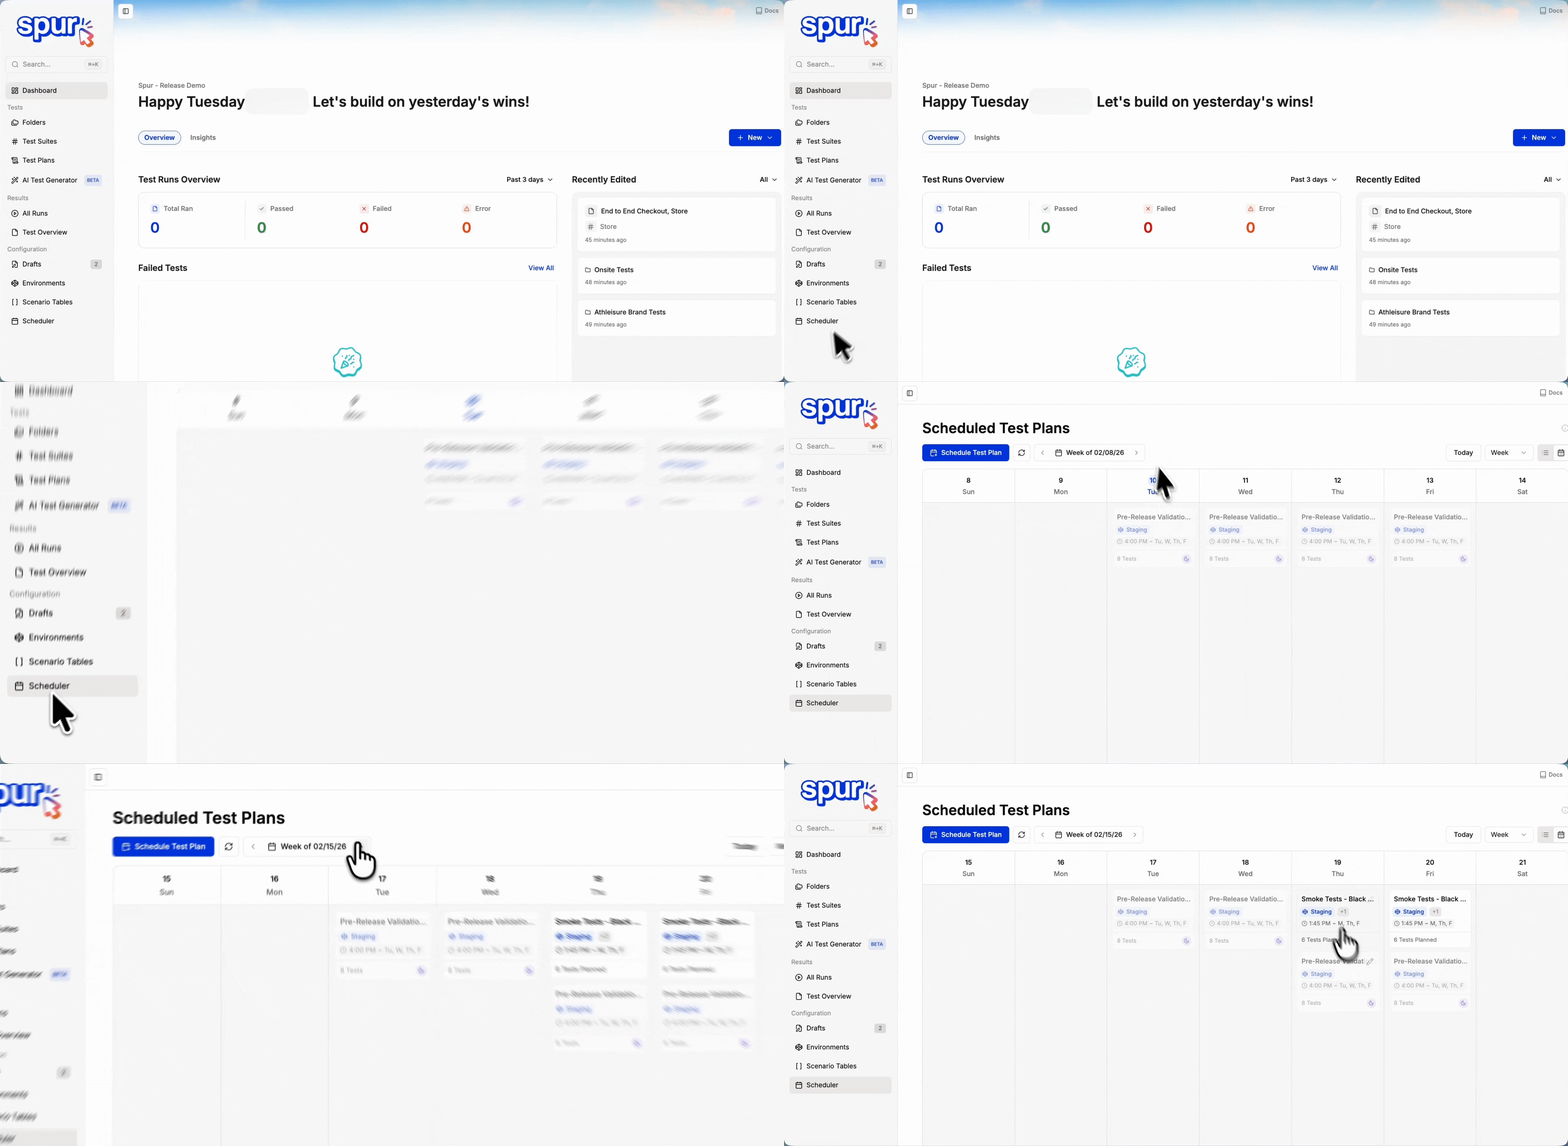
Navigate to Scheduler

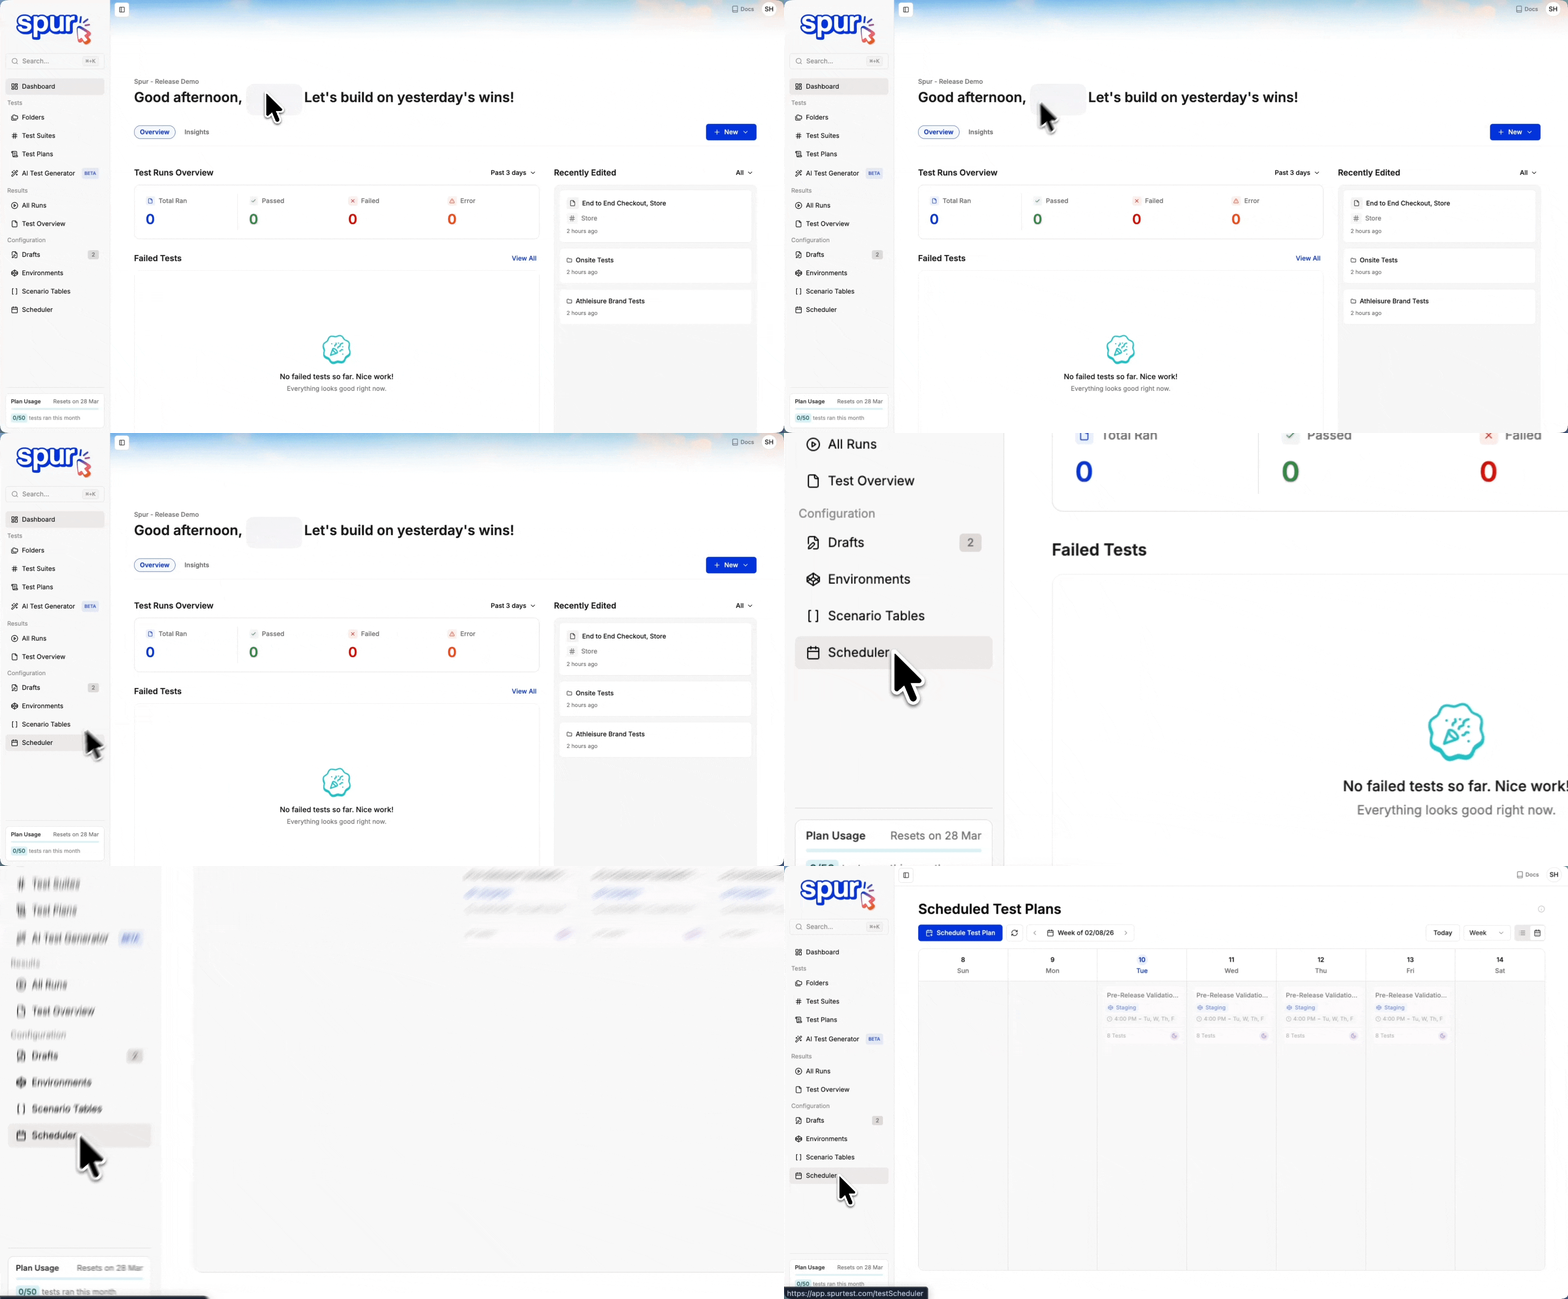
From your Spur dashboard, click Scheduler in the left navigation.
Navigate to Scheduler

Open the Scheduler from the left navigation

2

Click Schedule Test Plan

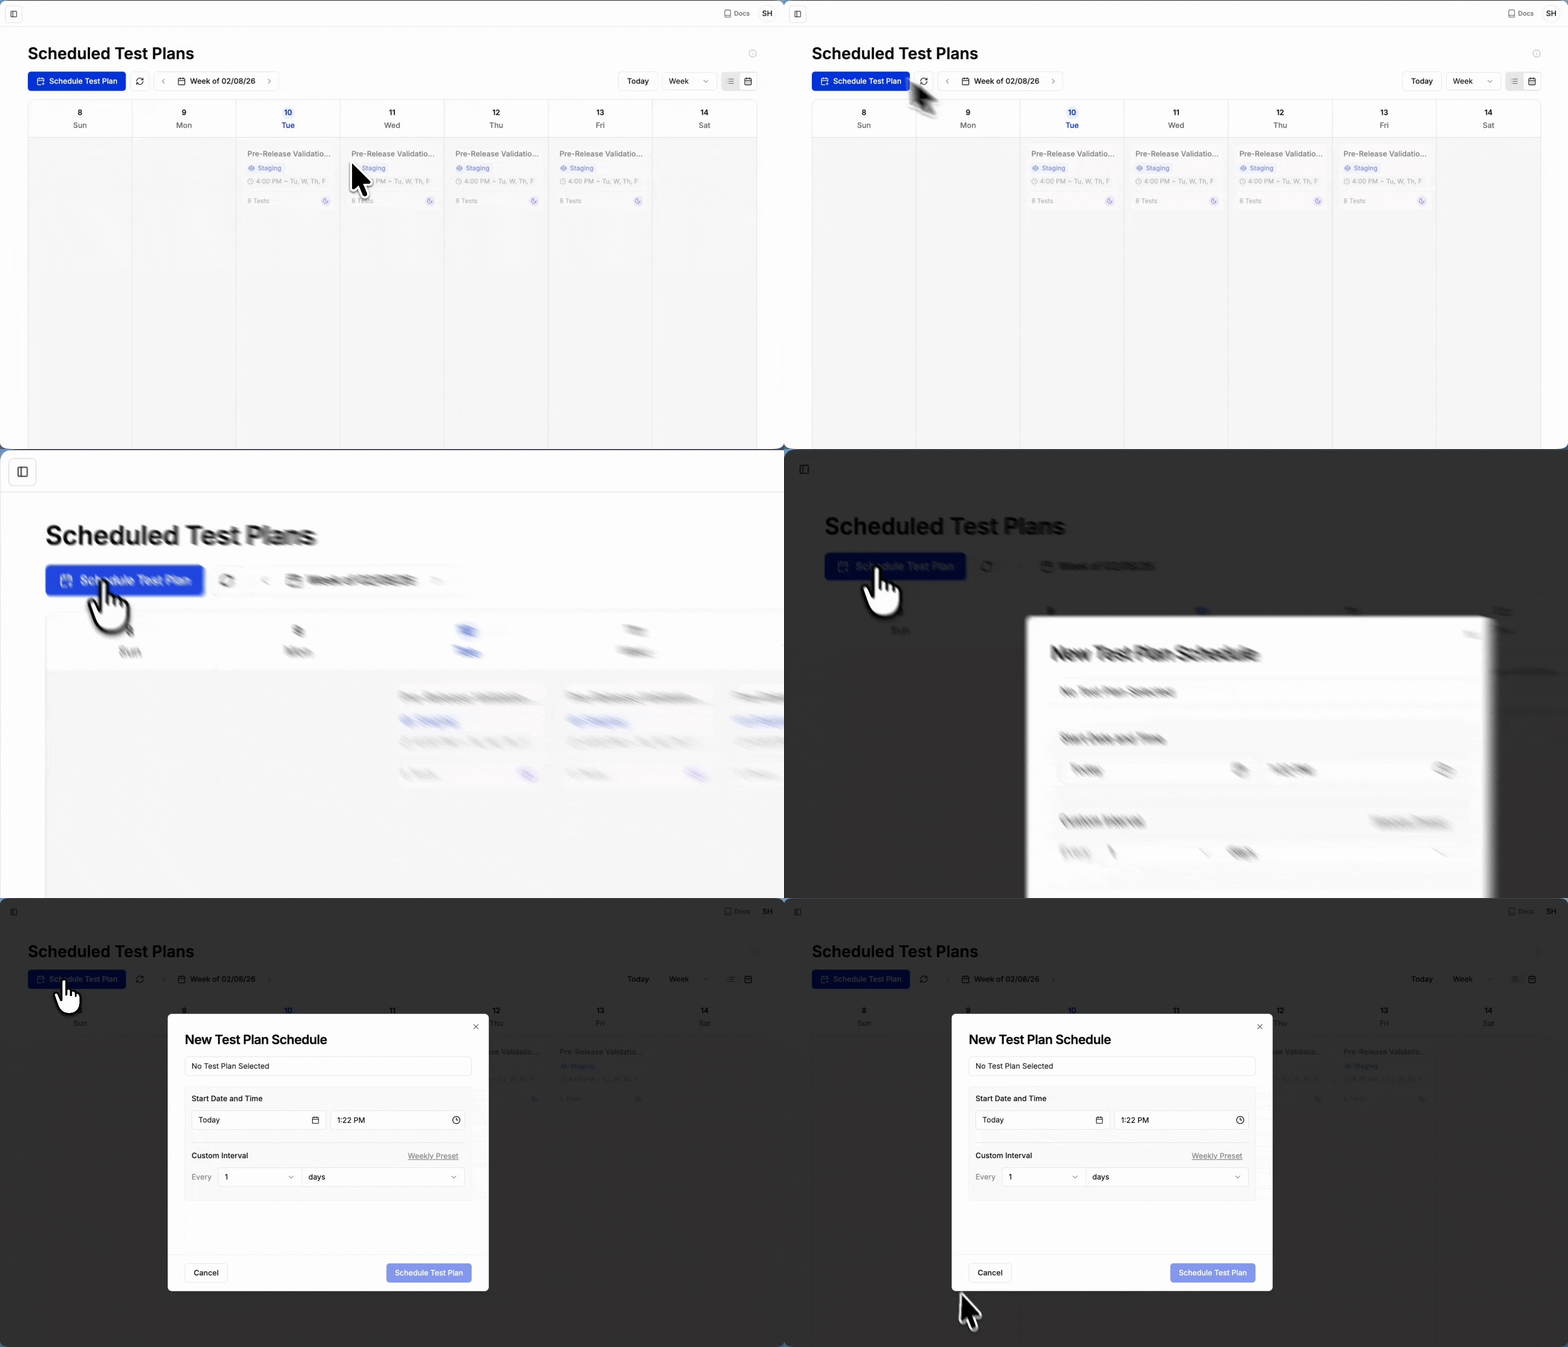
Click Schedule Test Plan to open the schedule configuration modal.
Schedule Test Plan button

Click Schedule Test Plan to get started

3

Configure Your Schedule

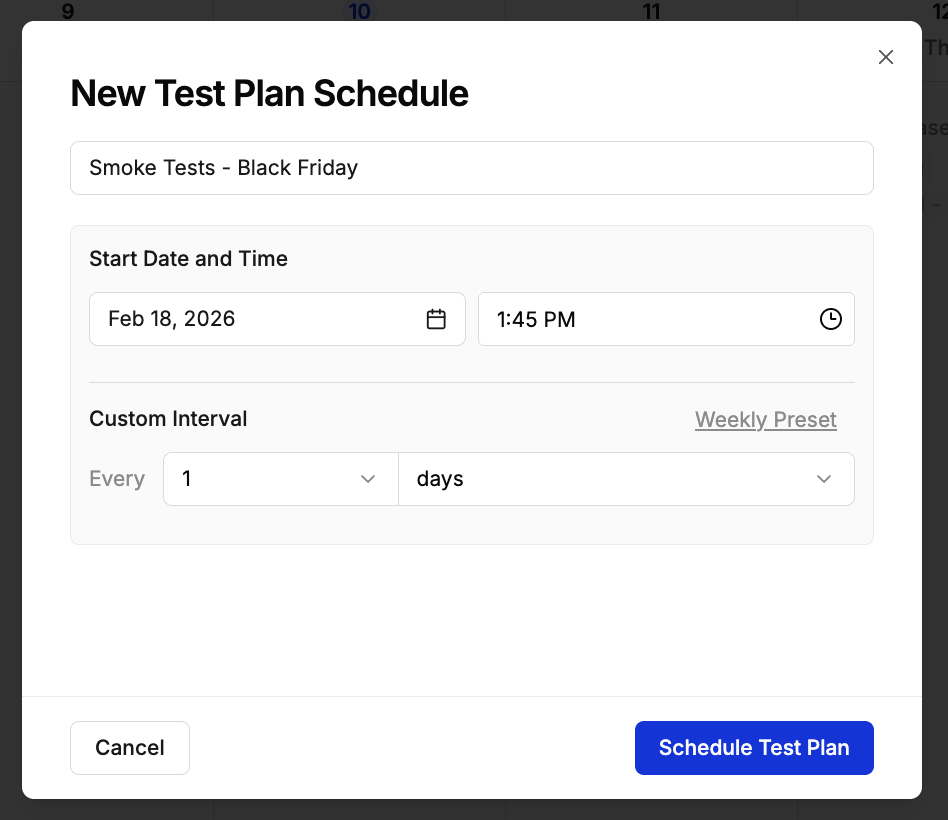
Fill in the schedule details:
  • Test Plan — Select the test plan you want to schedule
  • Date and Time — Set when the first execution should occur
  • Interval — Choose how often to run the test plan
Schedule configuration modal

Configure your test plan schedule

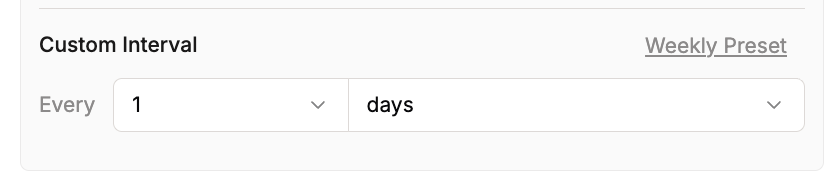
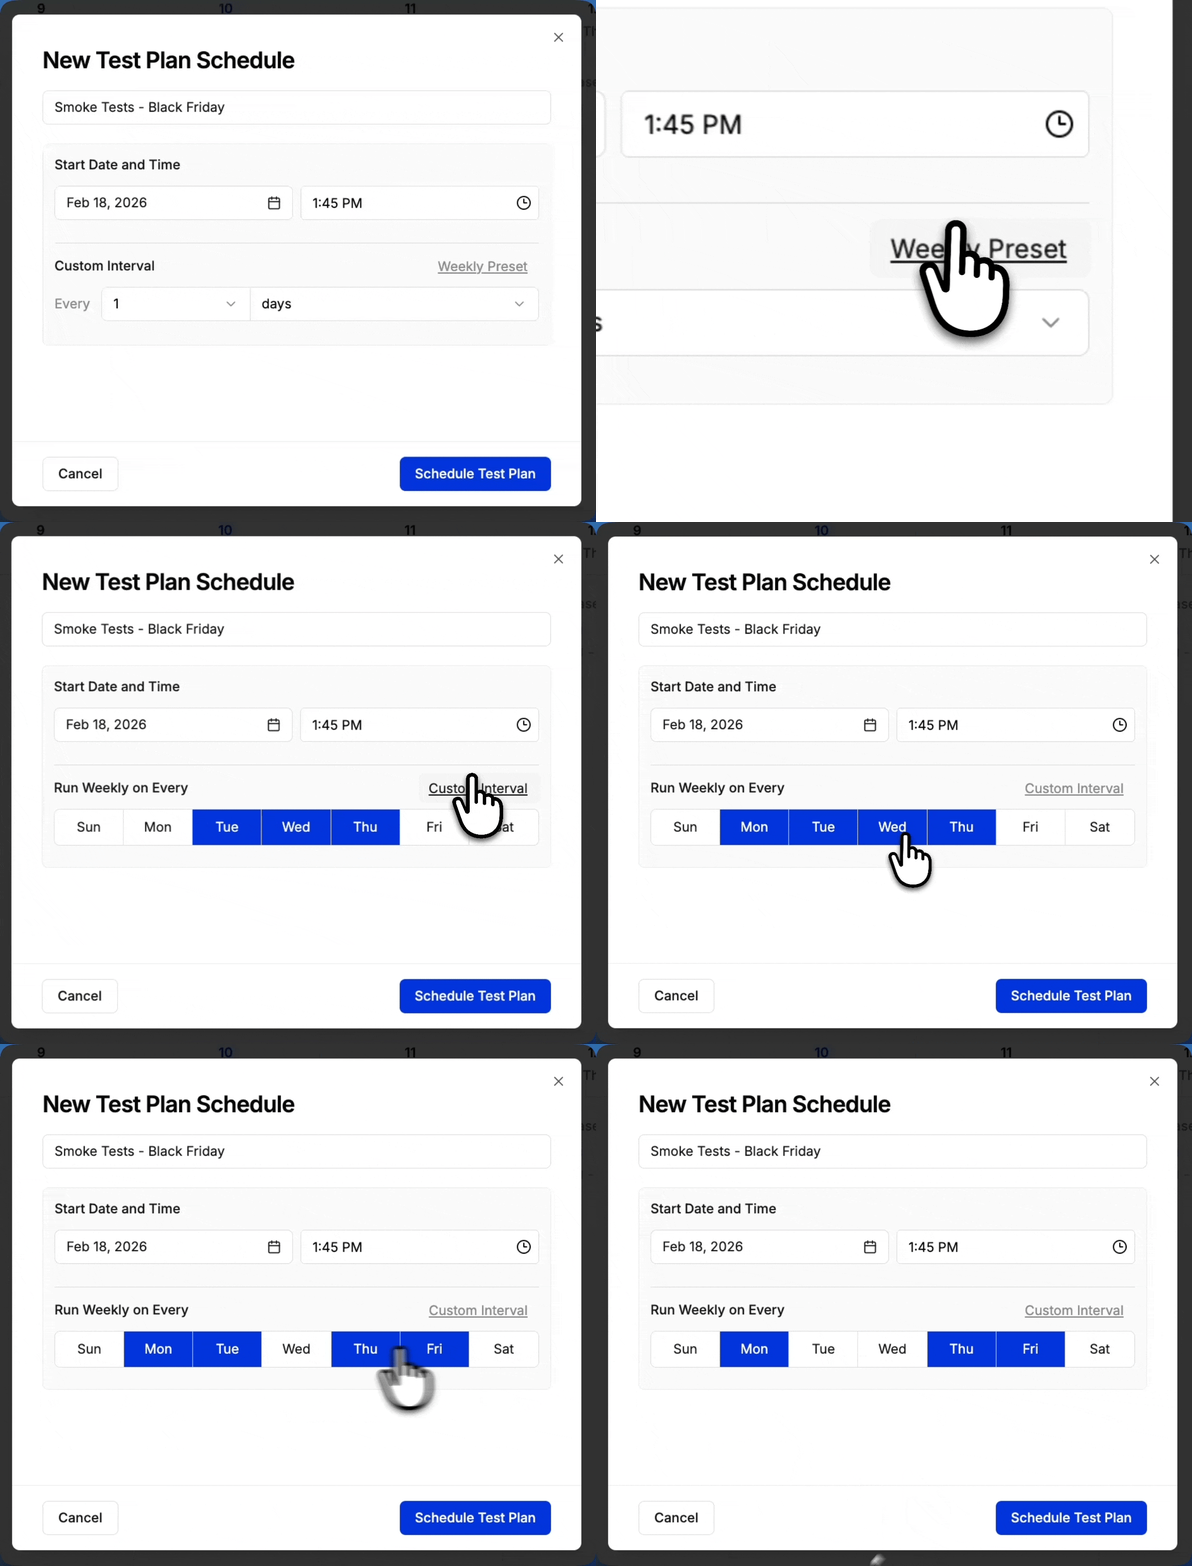
There are two interval options:Custom IntervalSet a specific cadence in hours, days, weeks, or months between executions.
Custom interval

Custom interval configuration

Weekly PresetChoose specific days of the week for the test plan to run.
Weekly preset

Weekly preset configuration

4

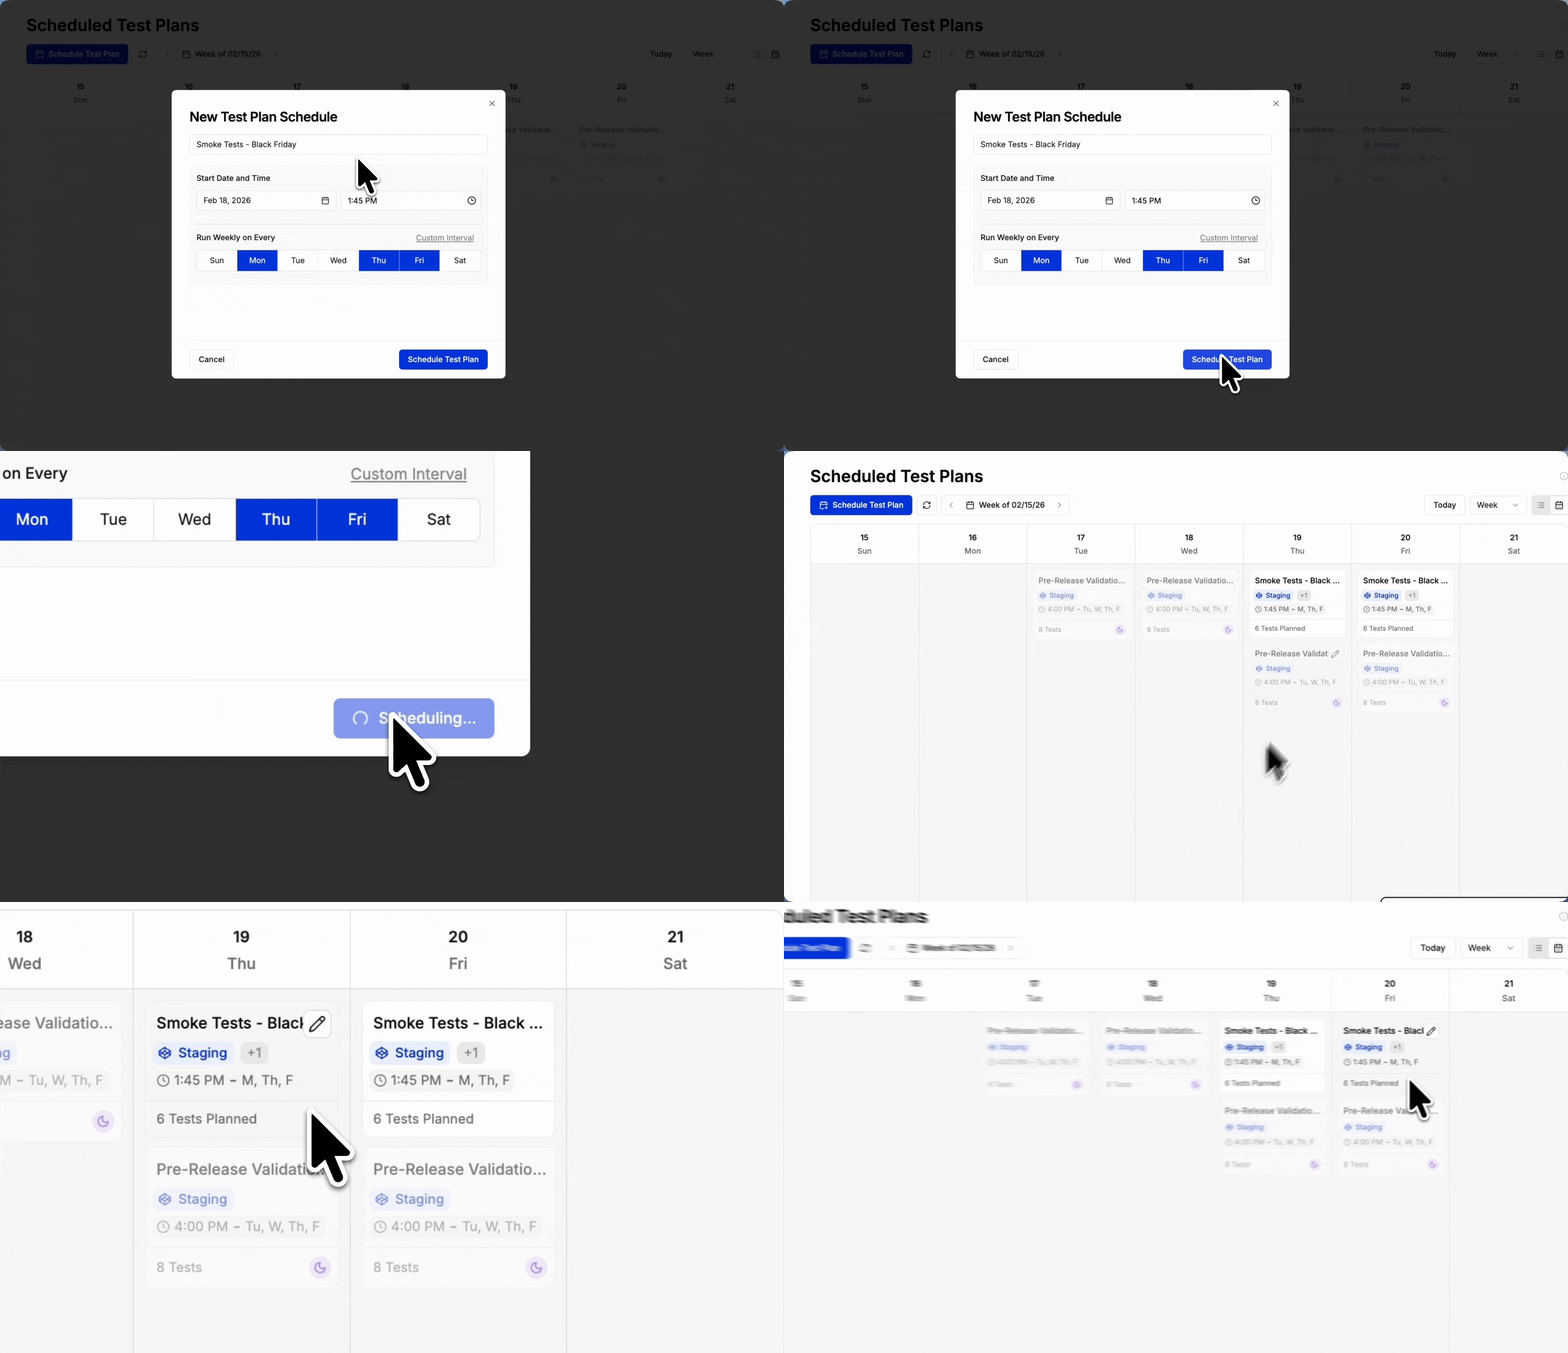
Save Your Schedule

Click Schedule Test Plan to confirm. Your test plan will now run automatically on the schedule you configured.
Save schedule

Save the schedule to activate it

Scheduling from a Test Plan

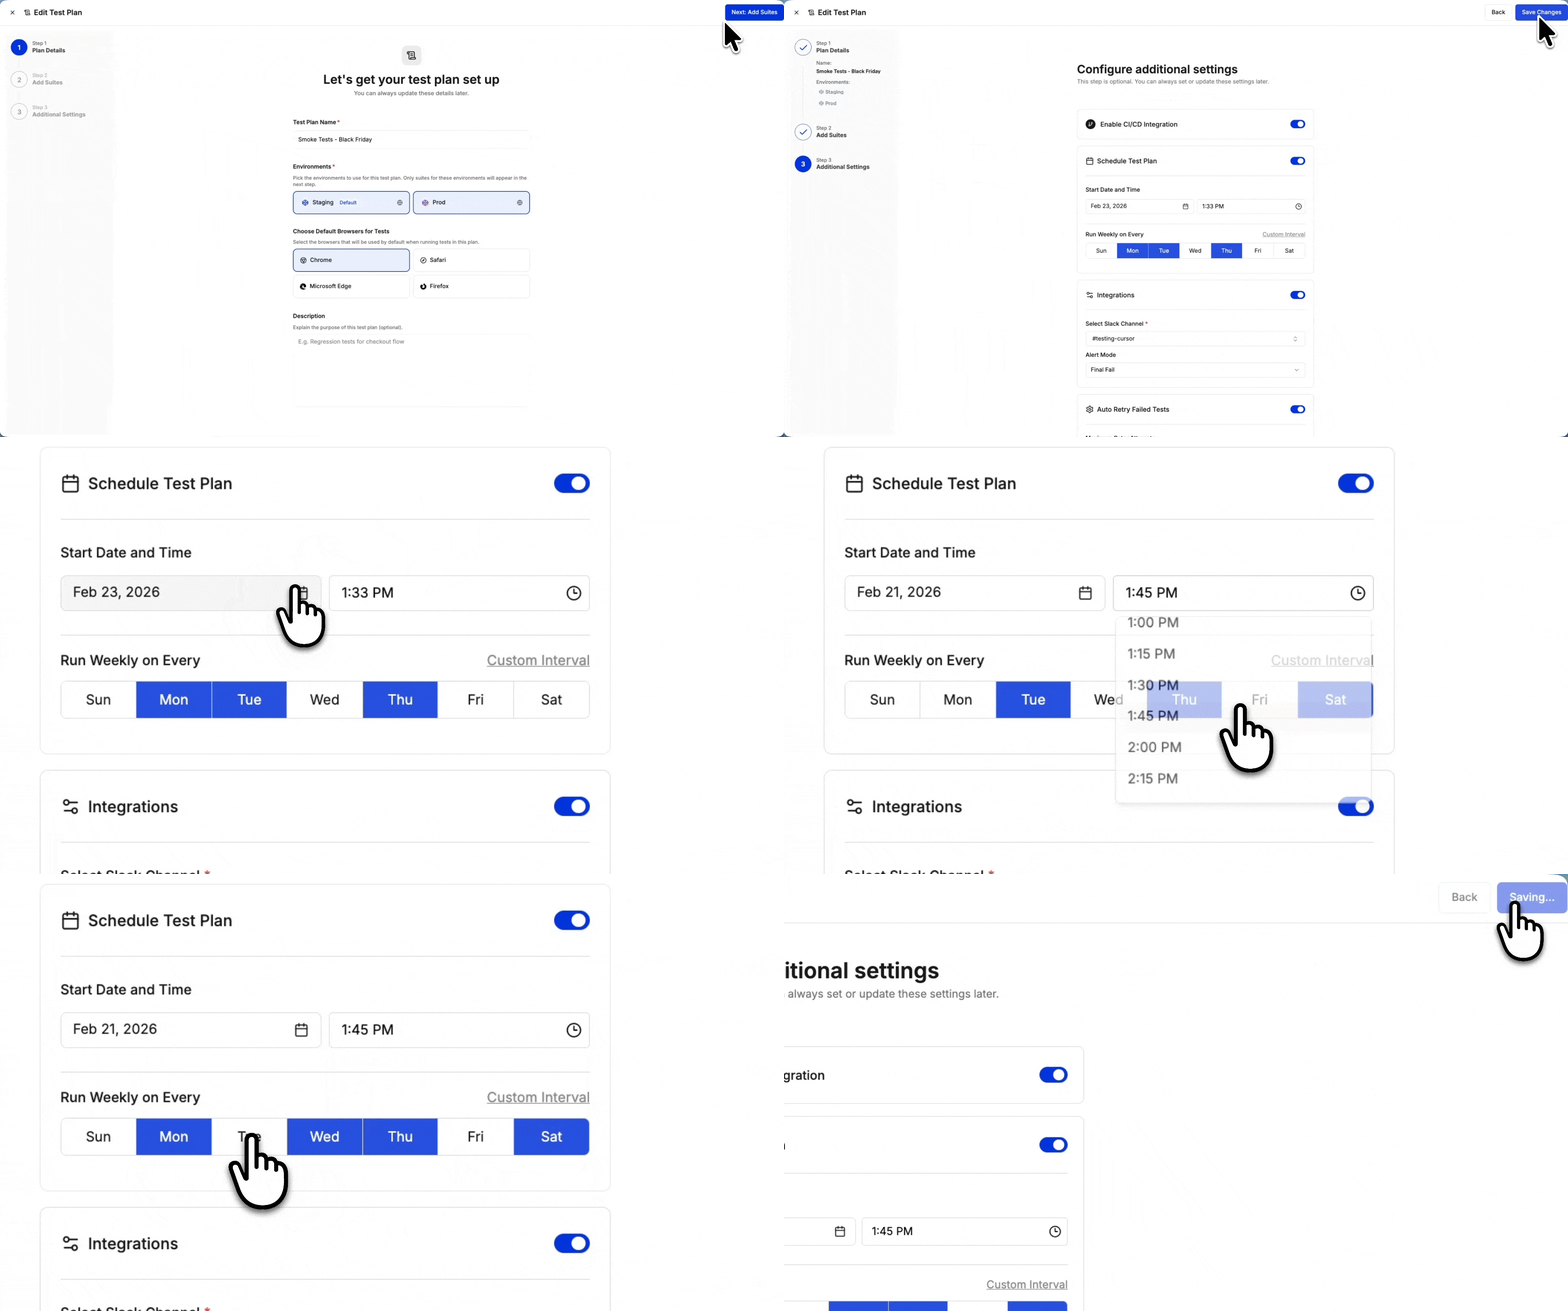
You can also schedule a test plan directly from the Test Plan settings without navigating to the Scheduler.
1

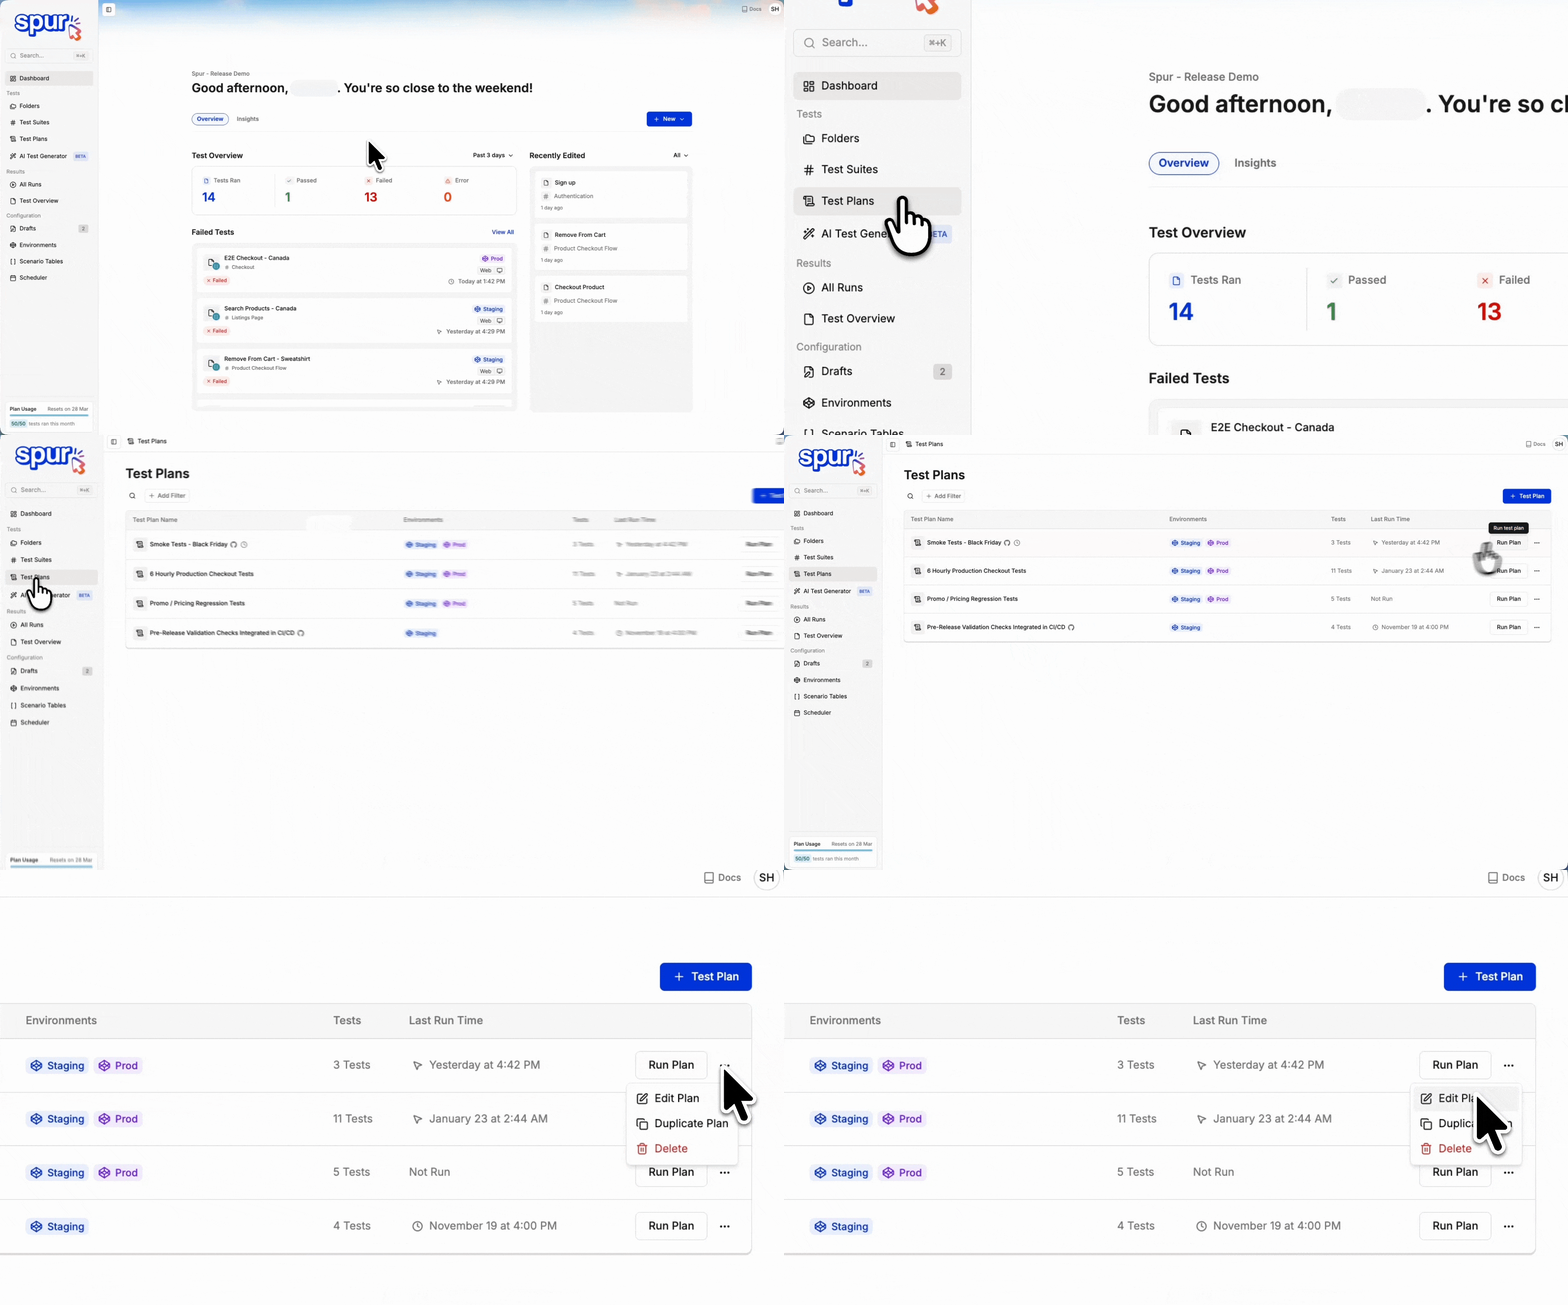
Open the Test Plan menu

Navigate to Test Plans, find the plan you want to schedule, and click the three-dot menu.
Step1 5

Click the three-dot menu on the Test Plan you want to schedule

2

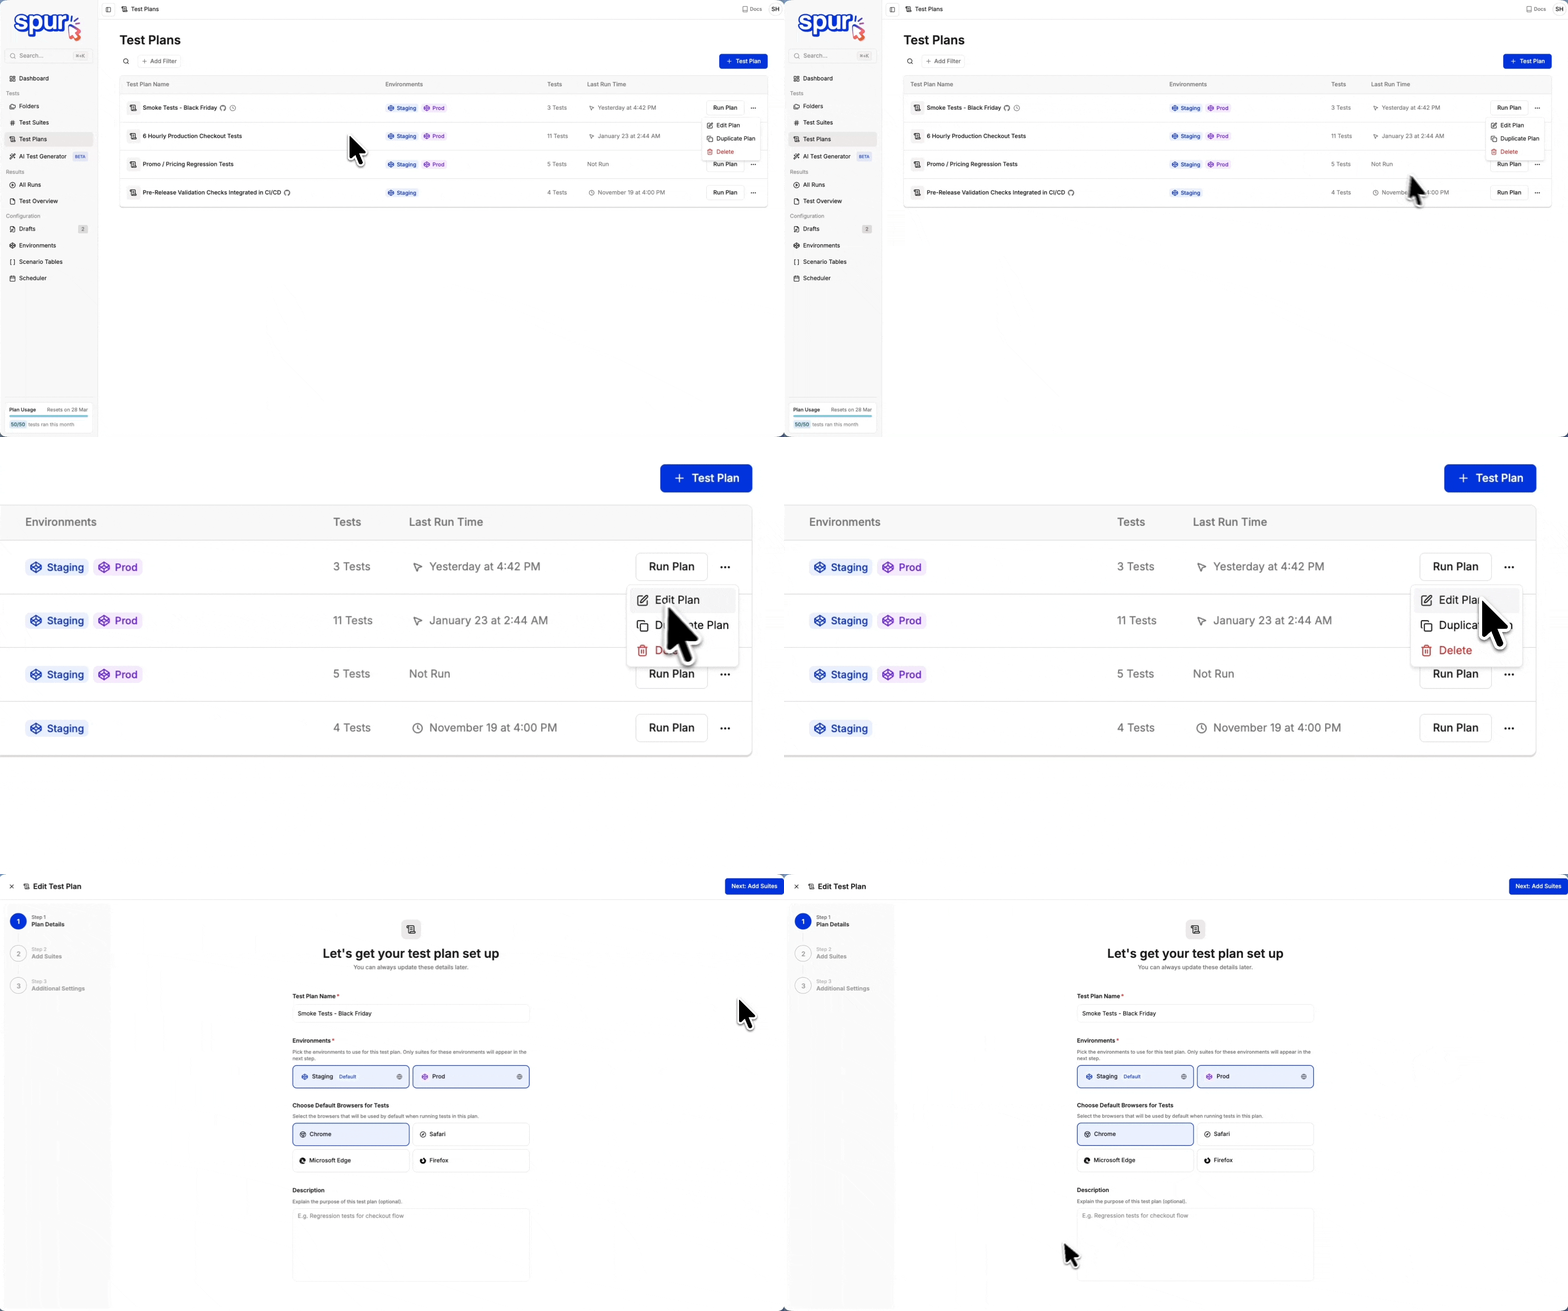
Select Edit Test Plan

Click Edit Test Plan to open the Test Plan configuration modal.
Step2 2

Select Edit Test Plan from the menu

3

Go to Additional Settings

Navigate to the Additional Settings tab where you can configure the schedule, along with alert notifications and auto retry. Click Save Changes to activate the schedule.
Step3 1

Configure the schedule in the Additional Settings tab

How to Edit a Schedule

1

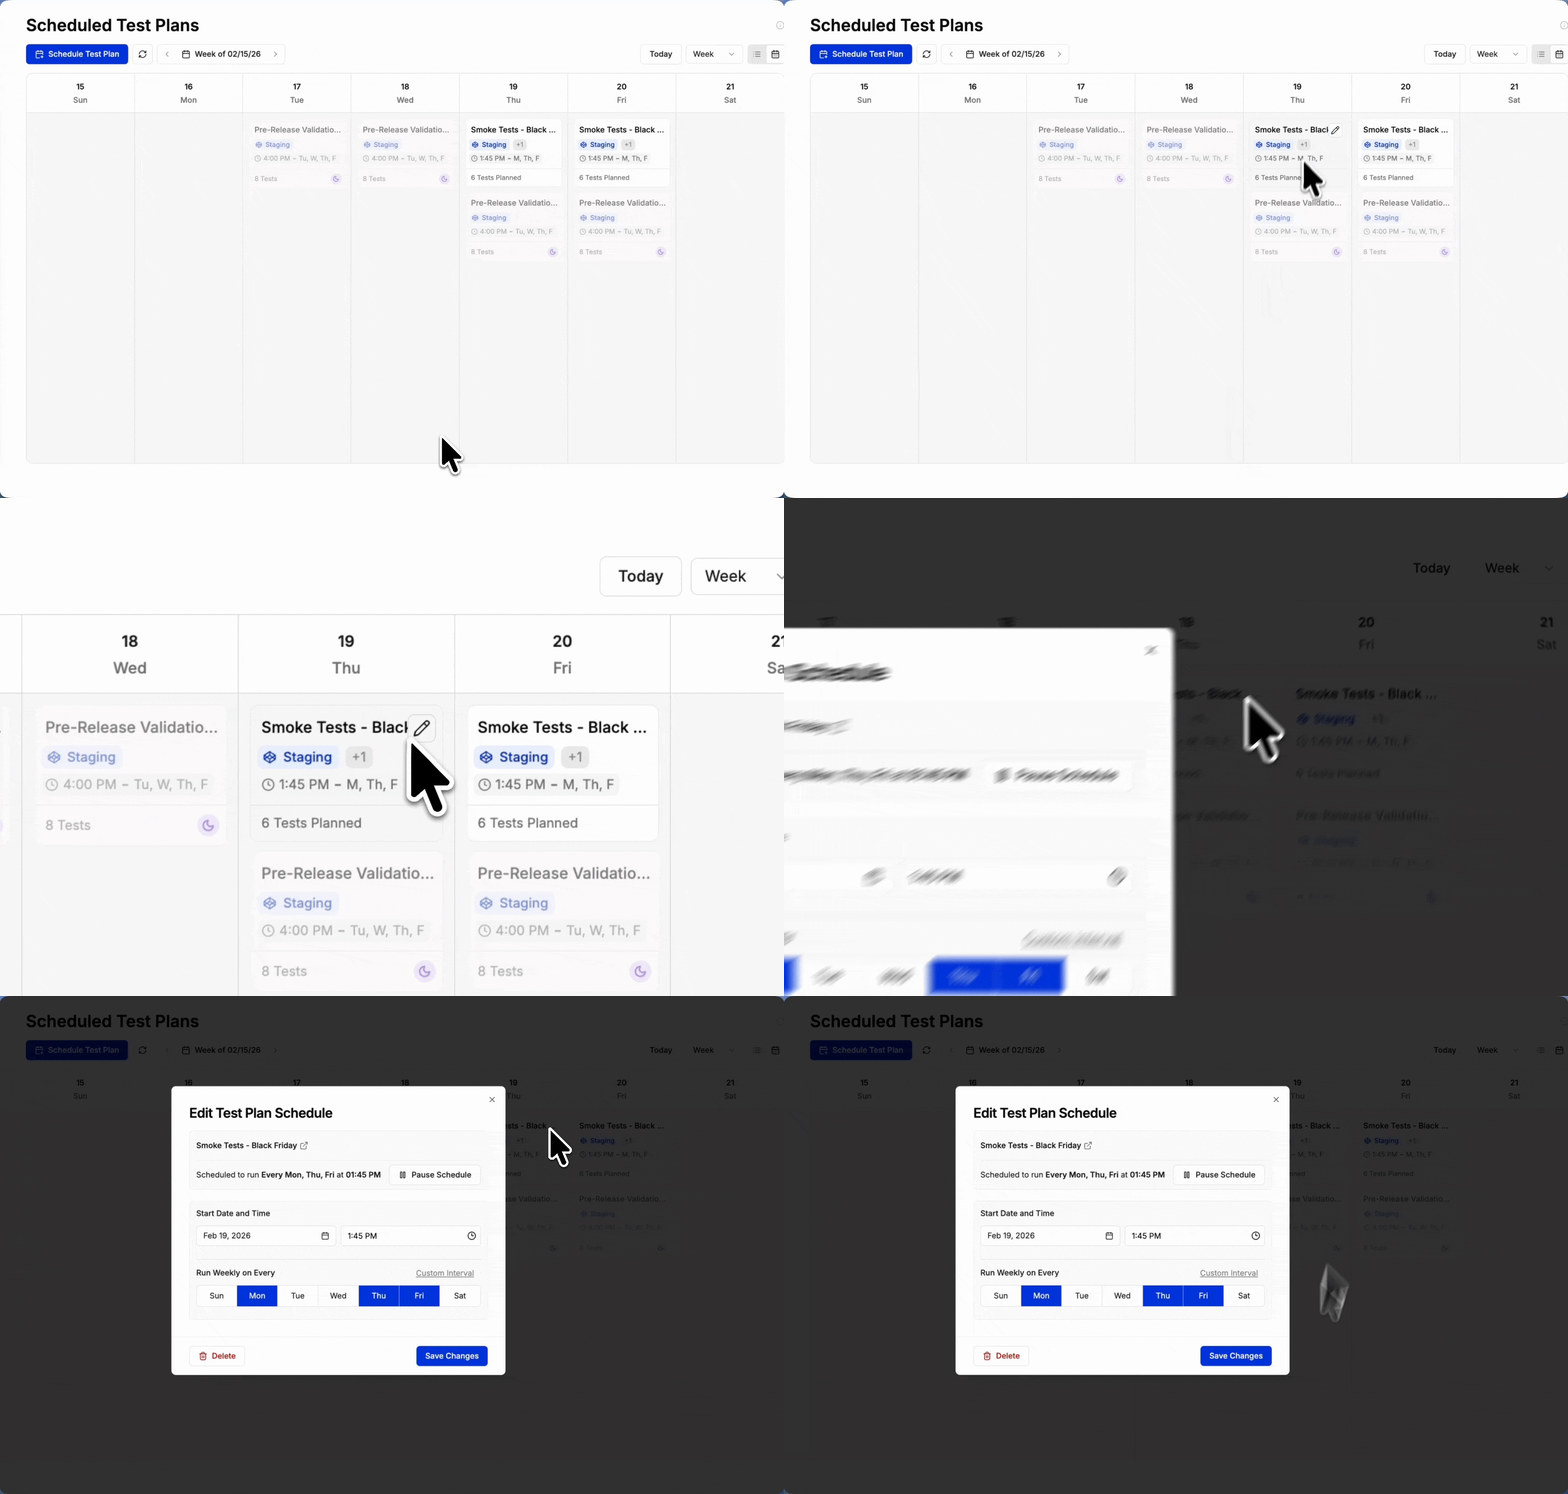
Find Your Scheduled Test Plan

Go to Scheduler and locate the test plan you want to edit. Hover over it to reveal the edit icon.
Find scheduled test plan

Hover over a scheduled test plan to reveal the edit icon

2

Open the Edit Modal

Click the edit icon to open the schedule configuration modal.
Edit schedule modal

Click the edit icon to open the configuration modal

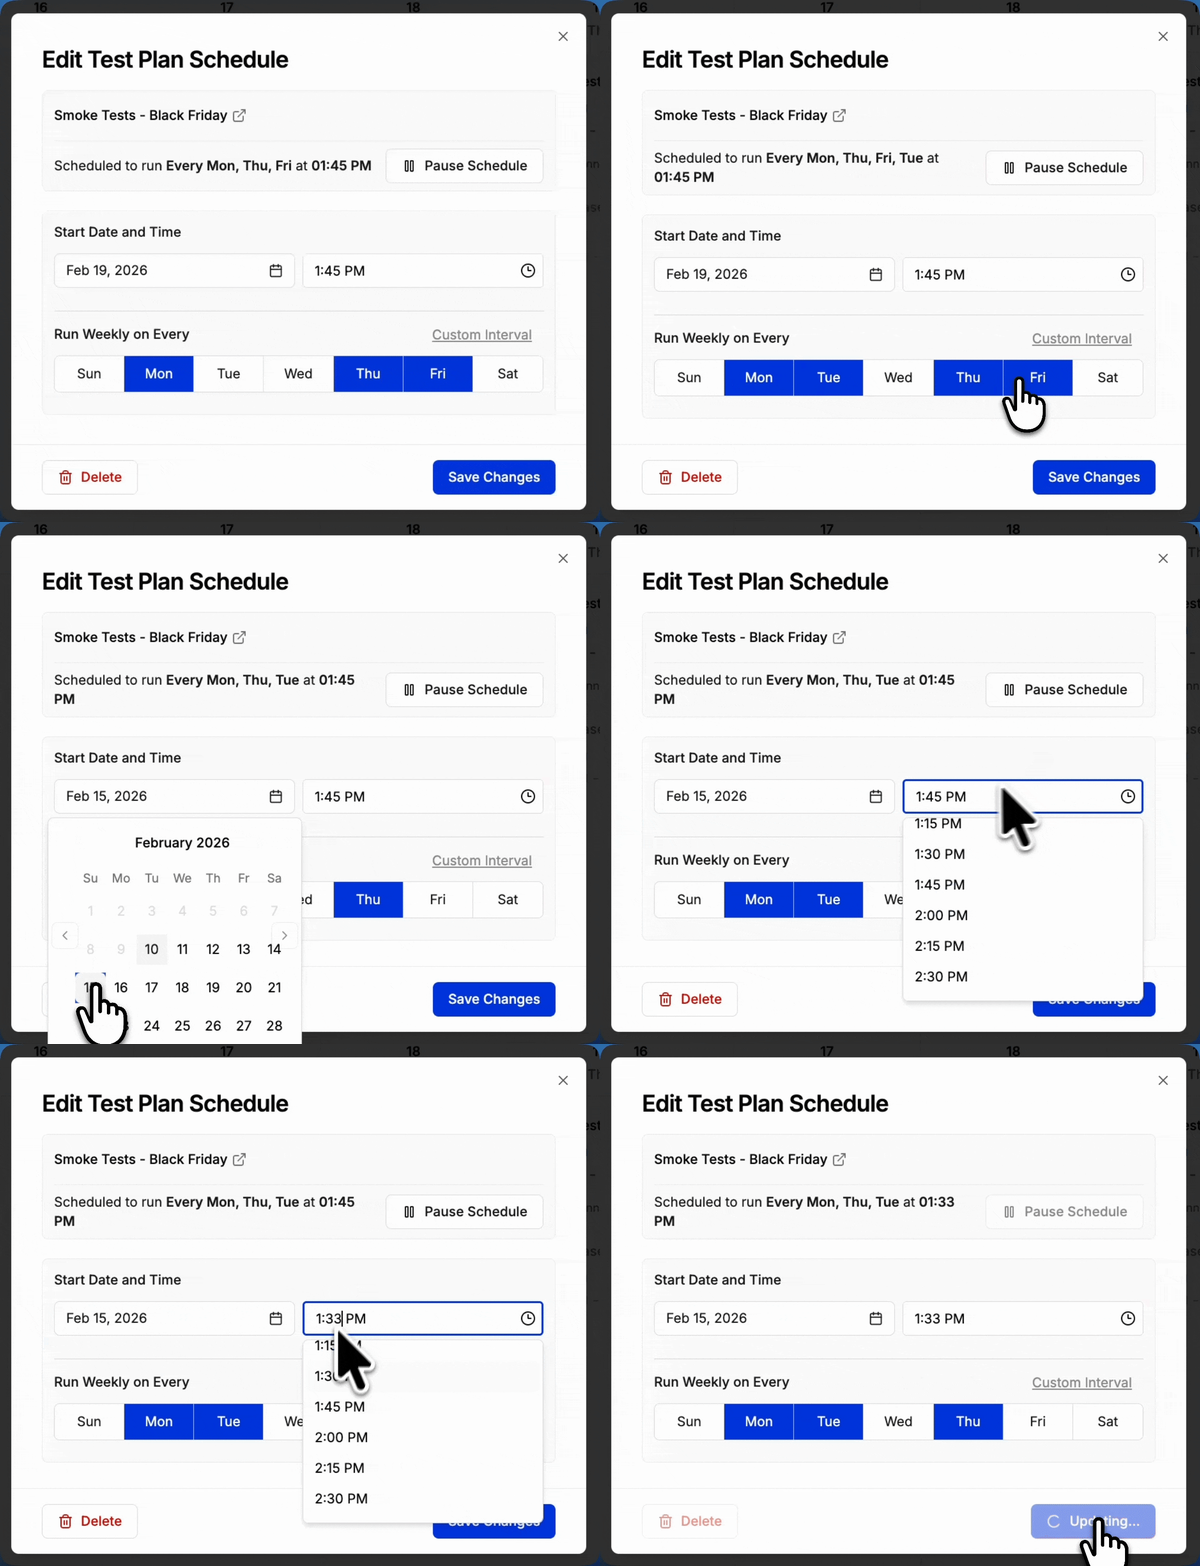
3

Update and Save

Make your changes and click Save Changes.
Use the pause button to temporarily stop a schedule without deleting it.
Save updated schedule

Save your updated schedule

Best Practices

Match Frequency to Impact

Use high-frequency schedules (every 30 min to 2 hours) for critical production monitoring, daily for regression, and weekly for full browser matrix runs.

Isolate Environments

Use separate schedules for production and pre-production. Different environments often need different run frequencies and notification channels.

Keep Test Data Ready

Ensure test data is available at scheduled run times. For pre-production, use cleanup scripts to reset state between runs.

Review Schedule Health

Regularly review pass/fail trends. Investigate consistently failing tests, update schedules as test plans evolve, and remove obsolete ones.