Setup
If you have not integrated Spur with Linear, follow the setup process here.Overview
Connecting to our Jira integration allows you to easily create Bug Tickets. Choose between:-
Manually creating tickets from Test Results
- Easily create detailed Bug Tickets from Spur Test Results, fitting into your team’s workflow easily
- Choose which Project to send tickets to, as well as details such as Priority and Assignee
-
Automatically create tickets on Test Completion
- Set up rules for automatic ticket creation based on test outcomes
Recommended Practice: We recommend starting with manual selection for ticket creation, only moving to automatic after tests have been run a few times.
Creating a Ticket Manually from a Test Failure
Reviewing a Test and Initiating a Bug Report
After reviewing a test run, open the Share menu and click the “Create a Ticket” button to open the Jira ticket creation modal: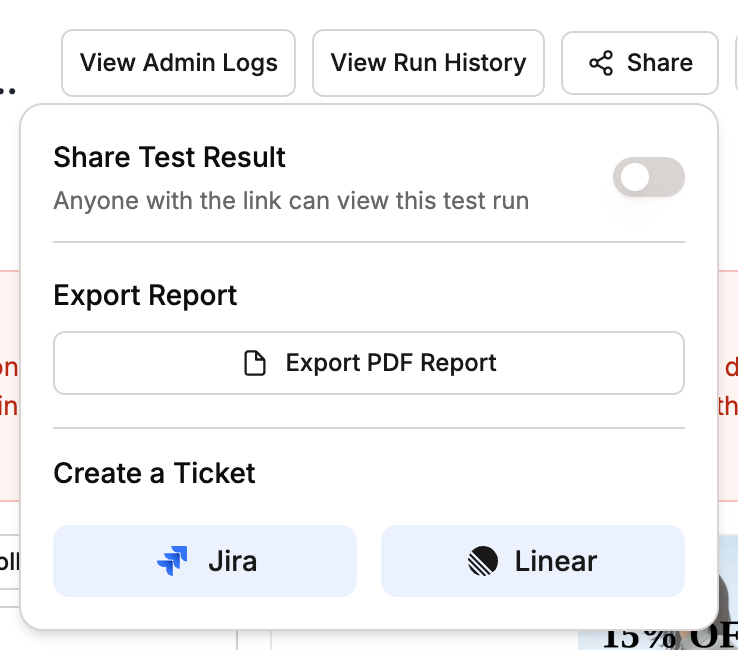
Jira Ticket Creation Modal
The modal opens with pre-populated information from the test failure: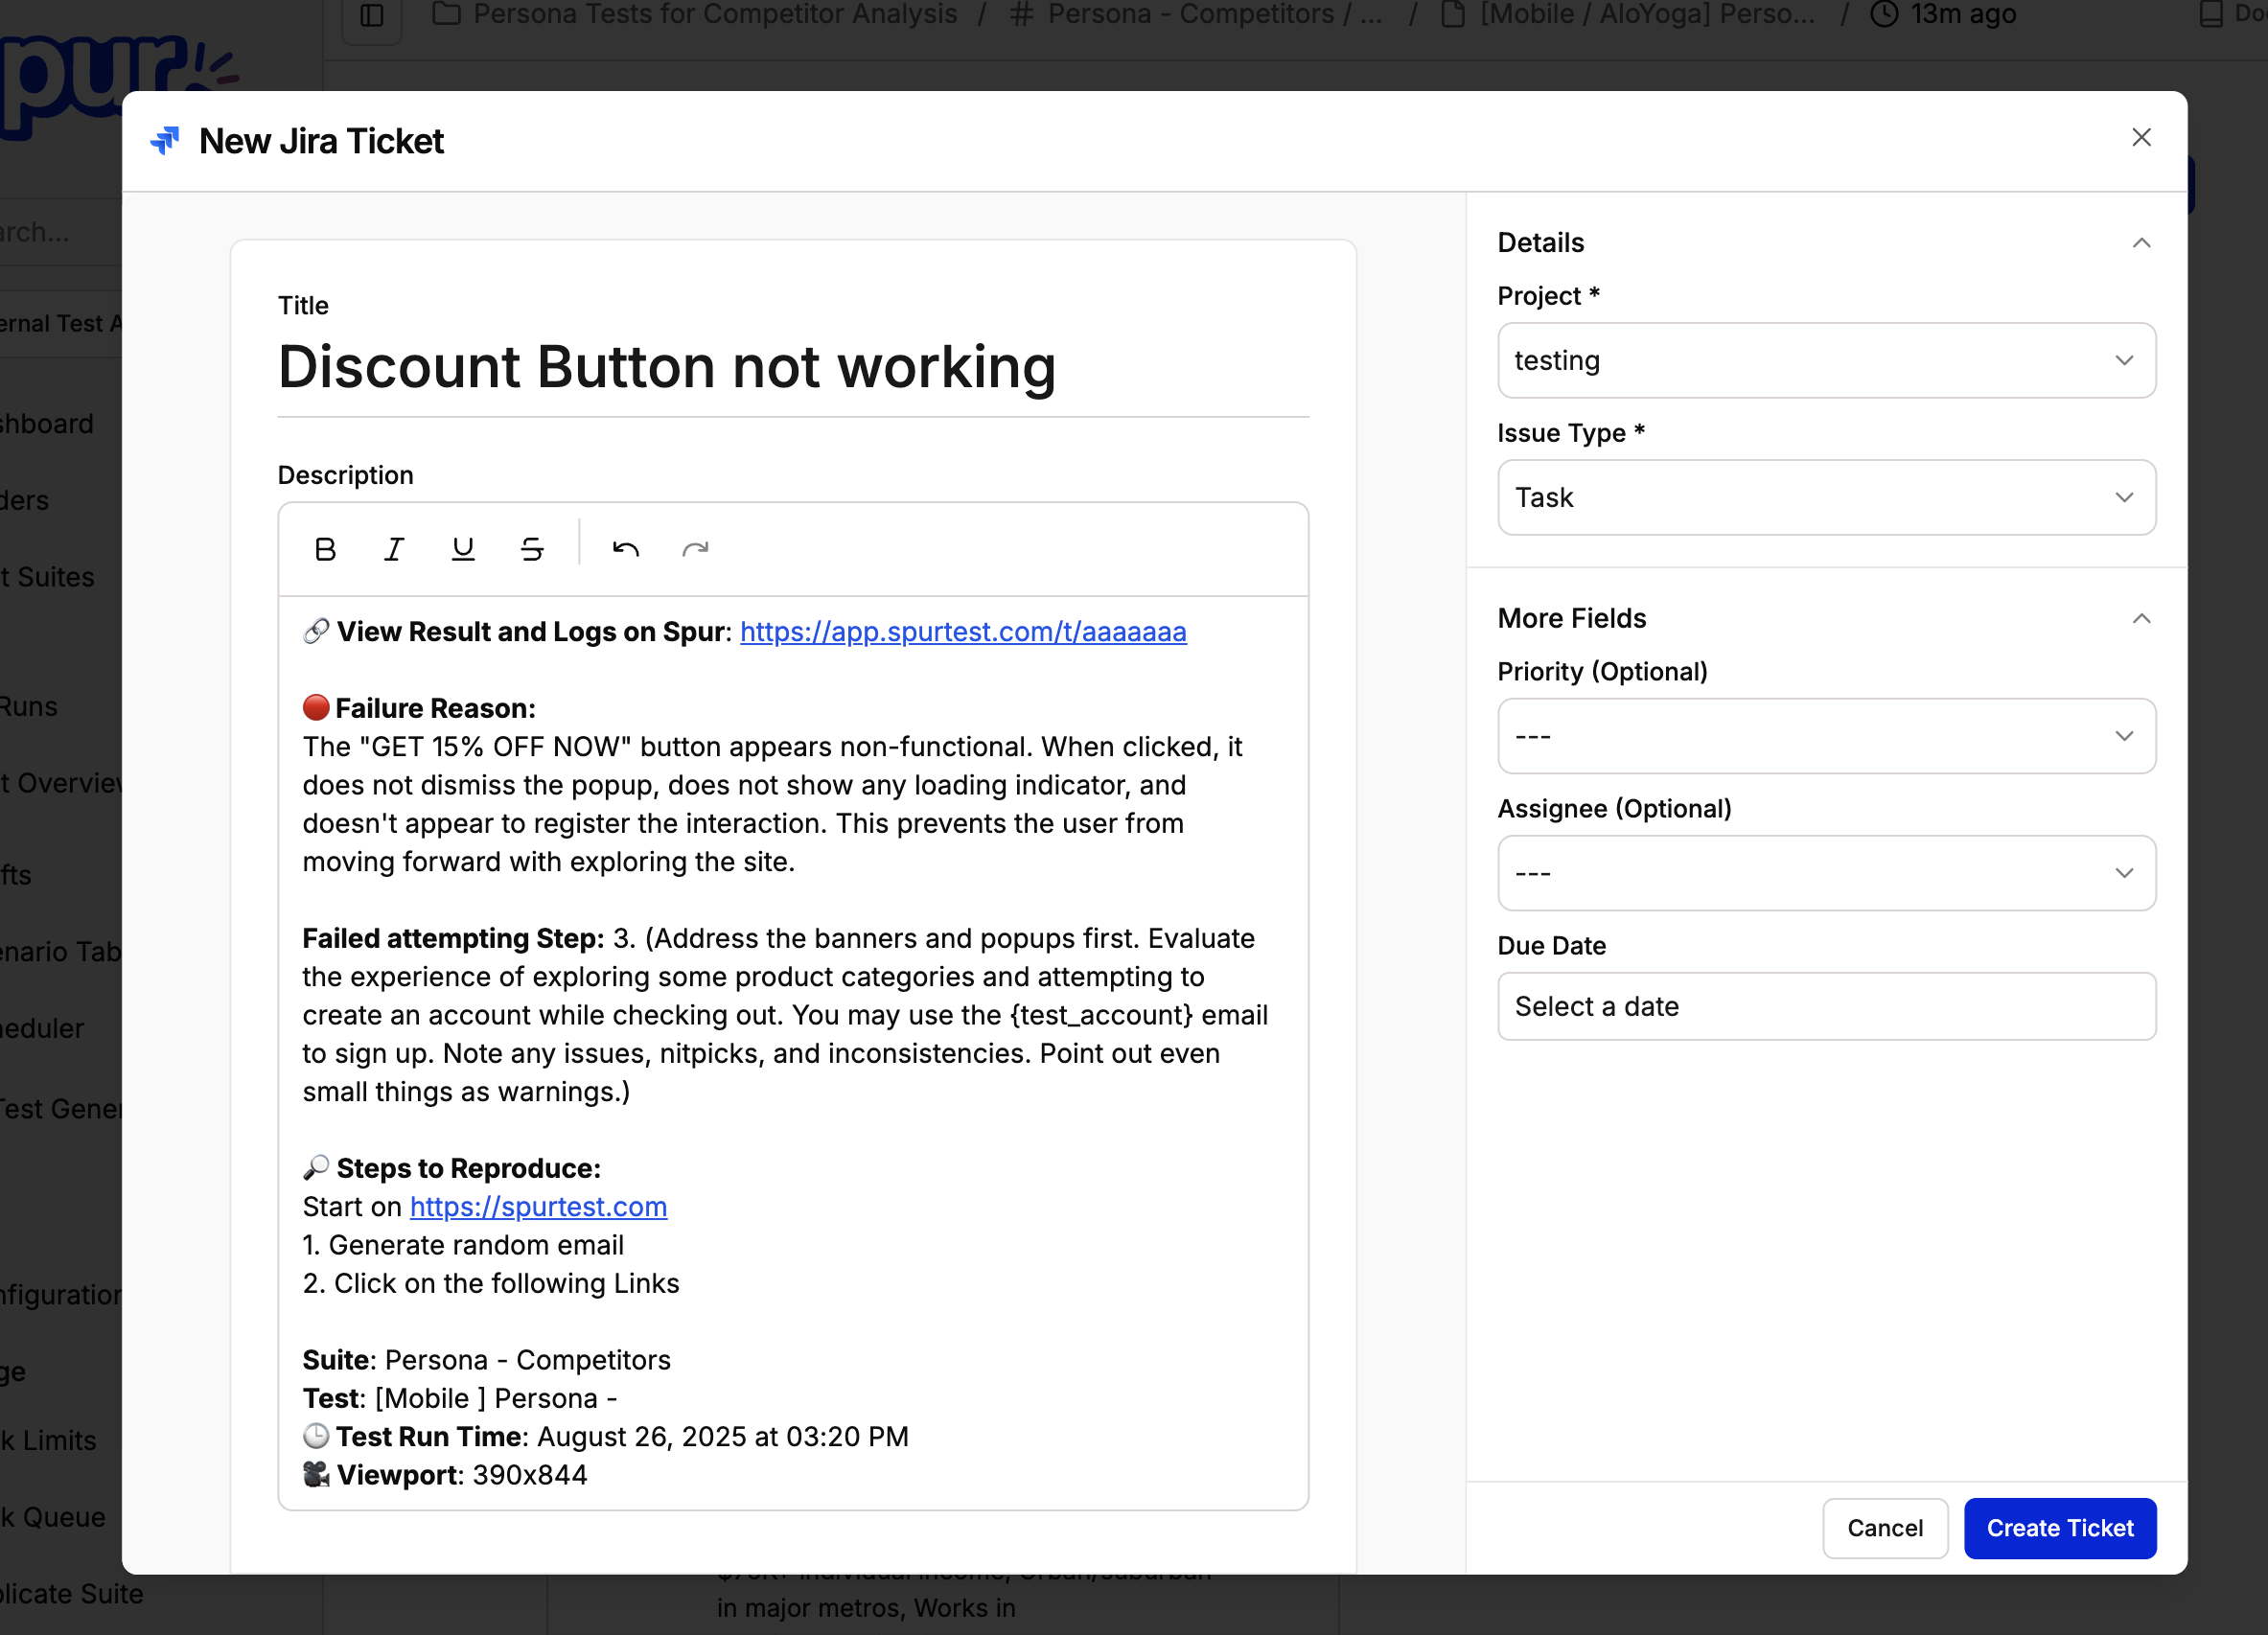
- Title: Name of the Test
- Description: Detailed bug report including:
- Failure Reason
- Reproduction steps
- Test name and execution details
- Project: The default project, if chosen in the Integrations page.
Customize Ticket Details
Edit the title and description, if necessary. Choose additional ticket details.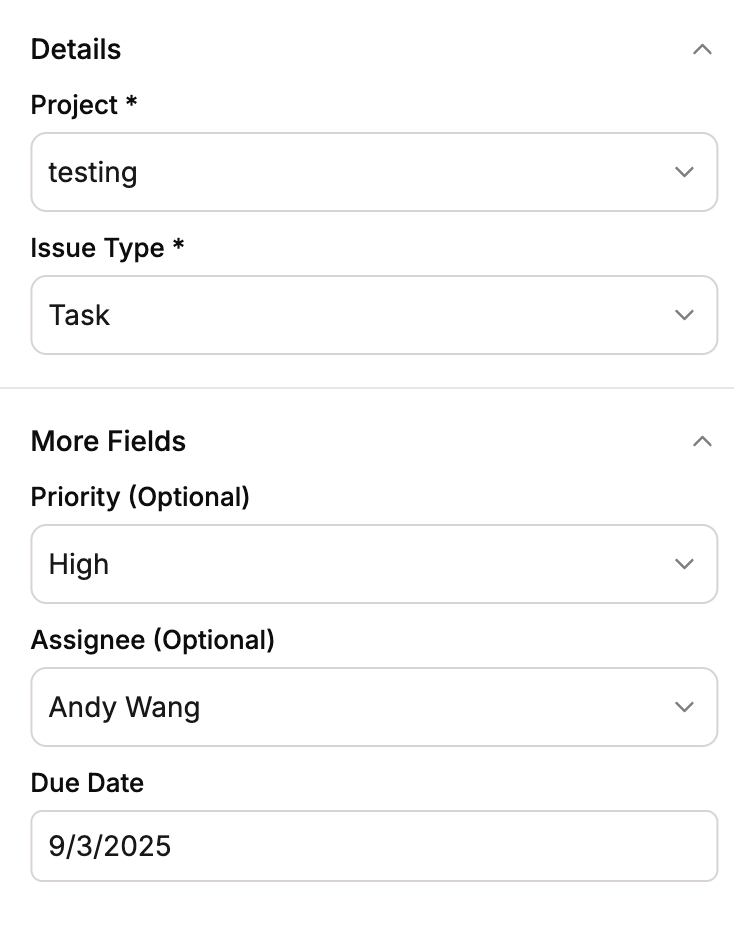
- Assignee: Set who should handle the ticket
- Priority: What is the urgency of this bug?
- Due Date: When will this ticket be considered overdue?
Troubleshooting
Common Issues
If fields are missing:- Your integration permissions may not be set properly. Try reintegrating from the Integrations page.
- Confirm you have chosen a proper project and issue type
- Check required field configurations