
View test suites
Navigate to Test Suites in your Spur Dashboard to see all suites with their environments, test counts, and latest results. You can also organize suites into Folders to keep related suites grouped by product area, team, or domain.Important: All tests must be added to a test suite.
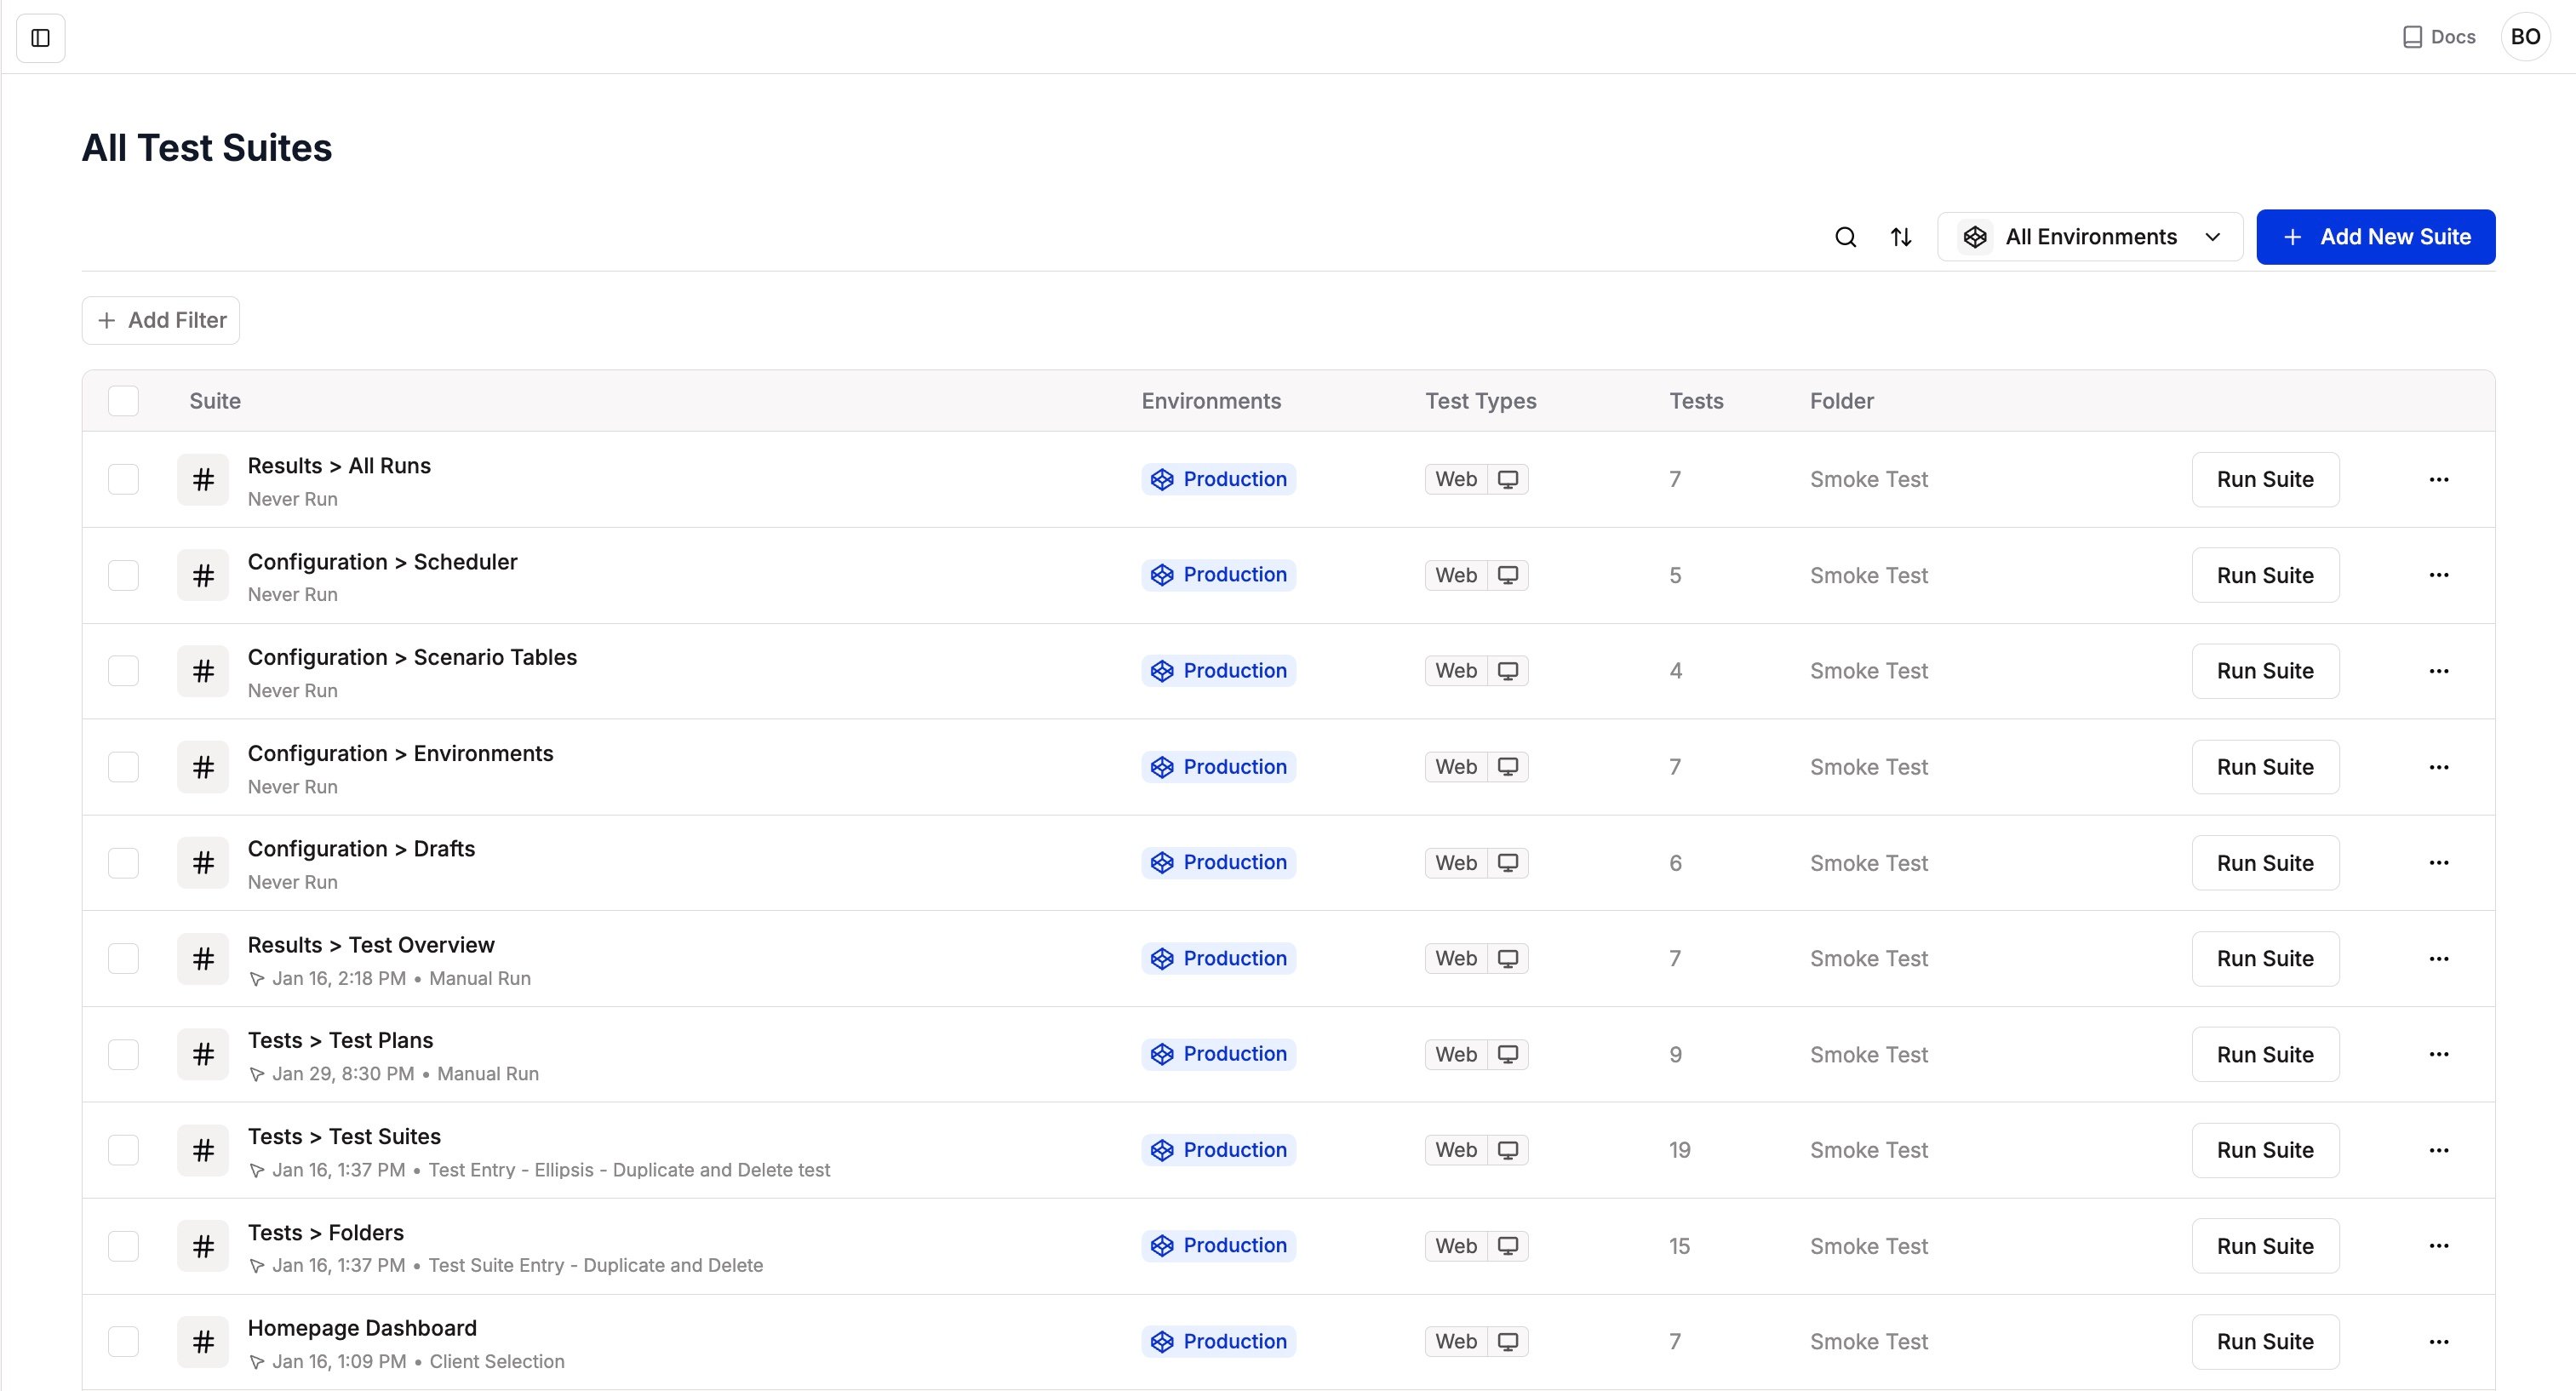
Test Suites overview displaying suite names, last run times, number of tests, and latest results
Move, duplicate, or delete a suite
On the Test Suites page, click the three-dot menu (⋯) on a suite’s row to manage it:- Move Suite: Opens Move Test Suites. Choose a destination folder and click Move. See Folders.
- Duplicate Suite: Creates a copy of the suite. The copy is named after the original with
(Copy)added, and you can change the name before you confirm. - Delete Suite: Deletes the suite. To confirm, type
Delete Suitein the dialog.
View a test suite’s flow
1
Open the suite detail page
Click any suite name to open its detail page. By default, you’ll see the “All Tests” view showing a list of all tests in the suite.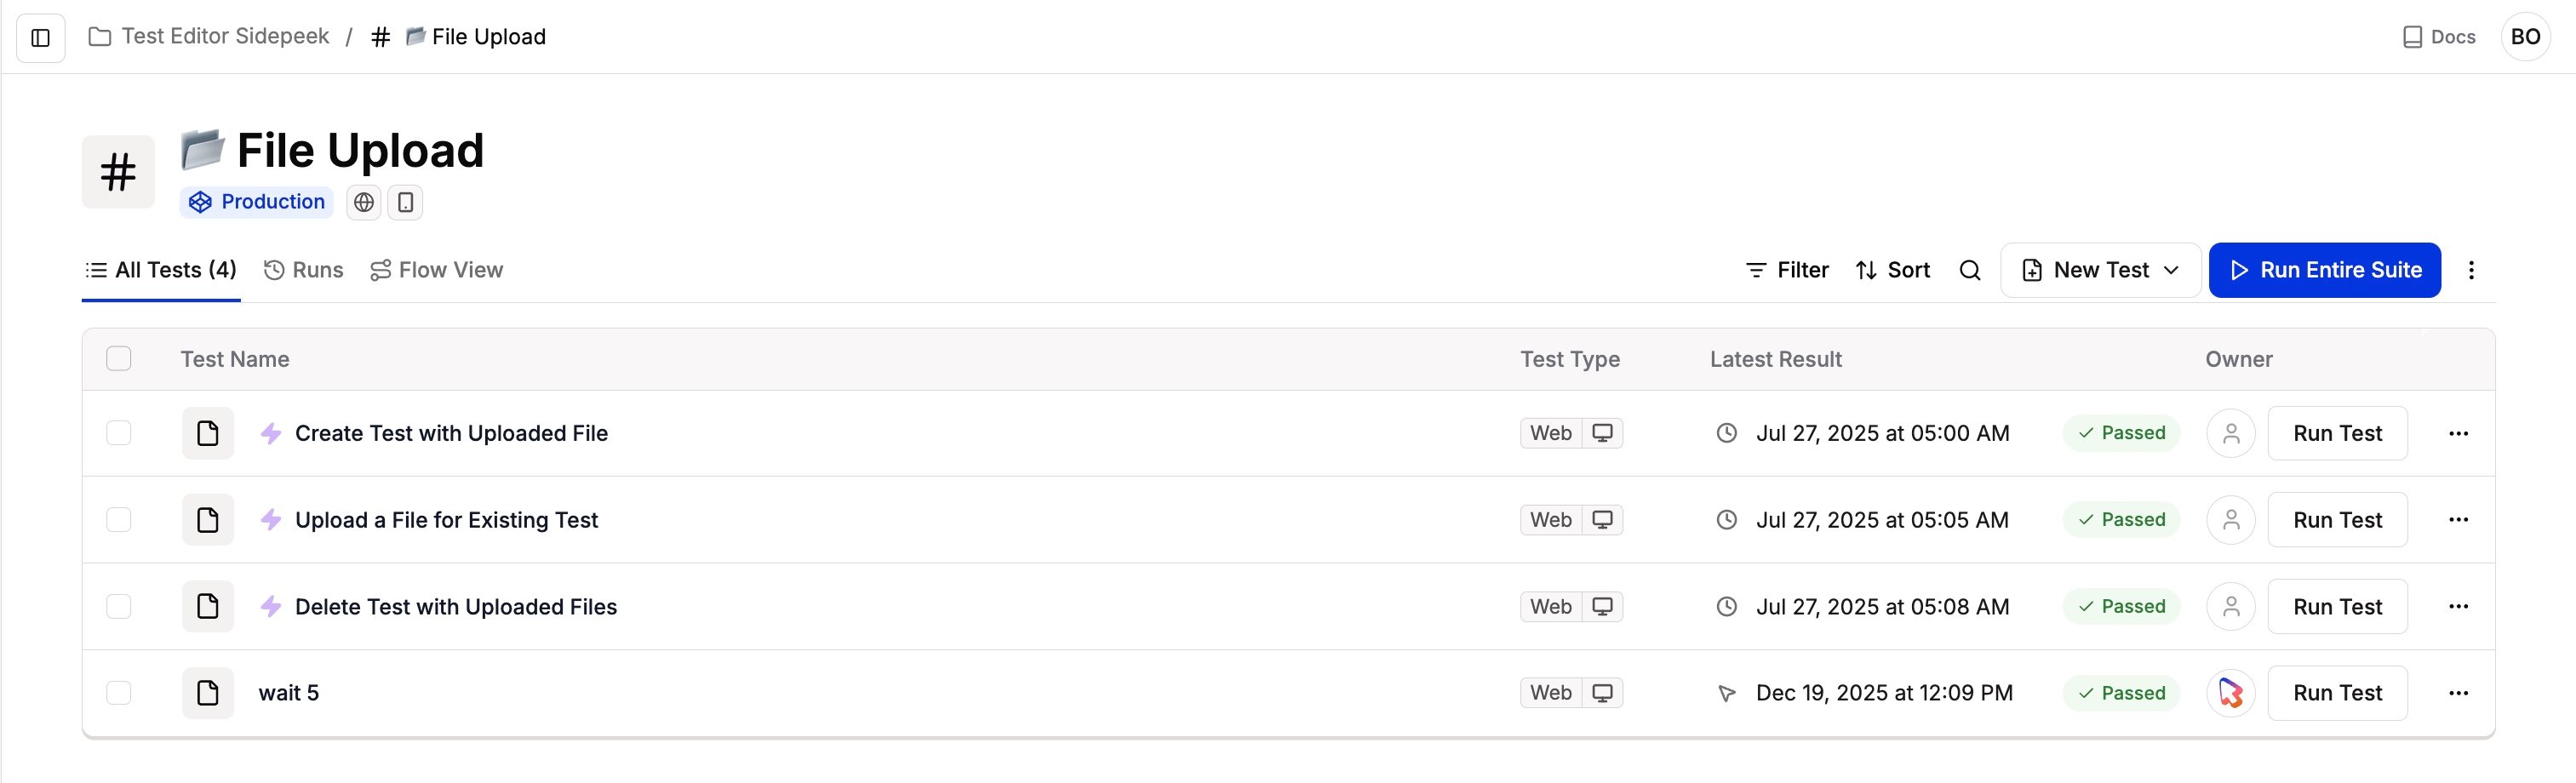
2
View test dependencies
Open the Dependencies tab to see how tests connect. Child tests run after their parent passes. Learn more about test dependencies.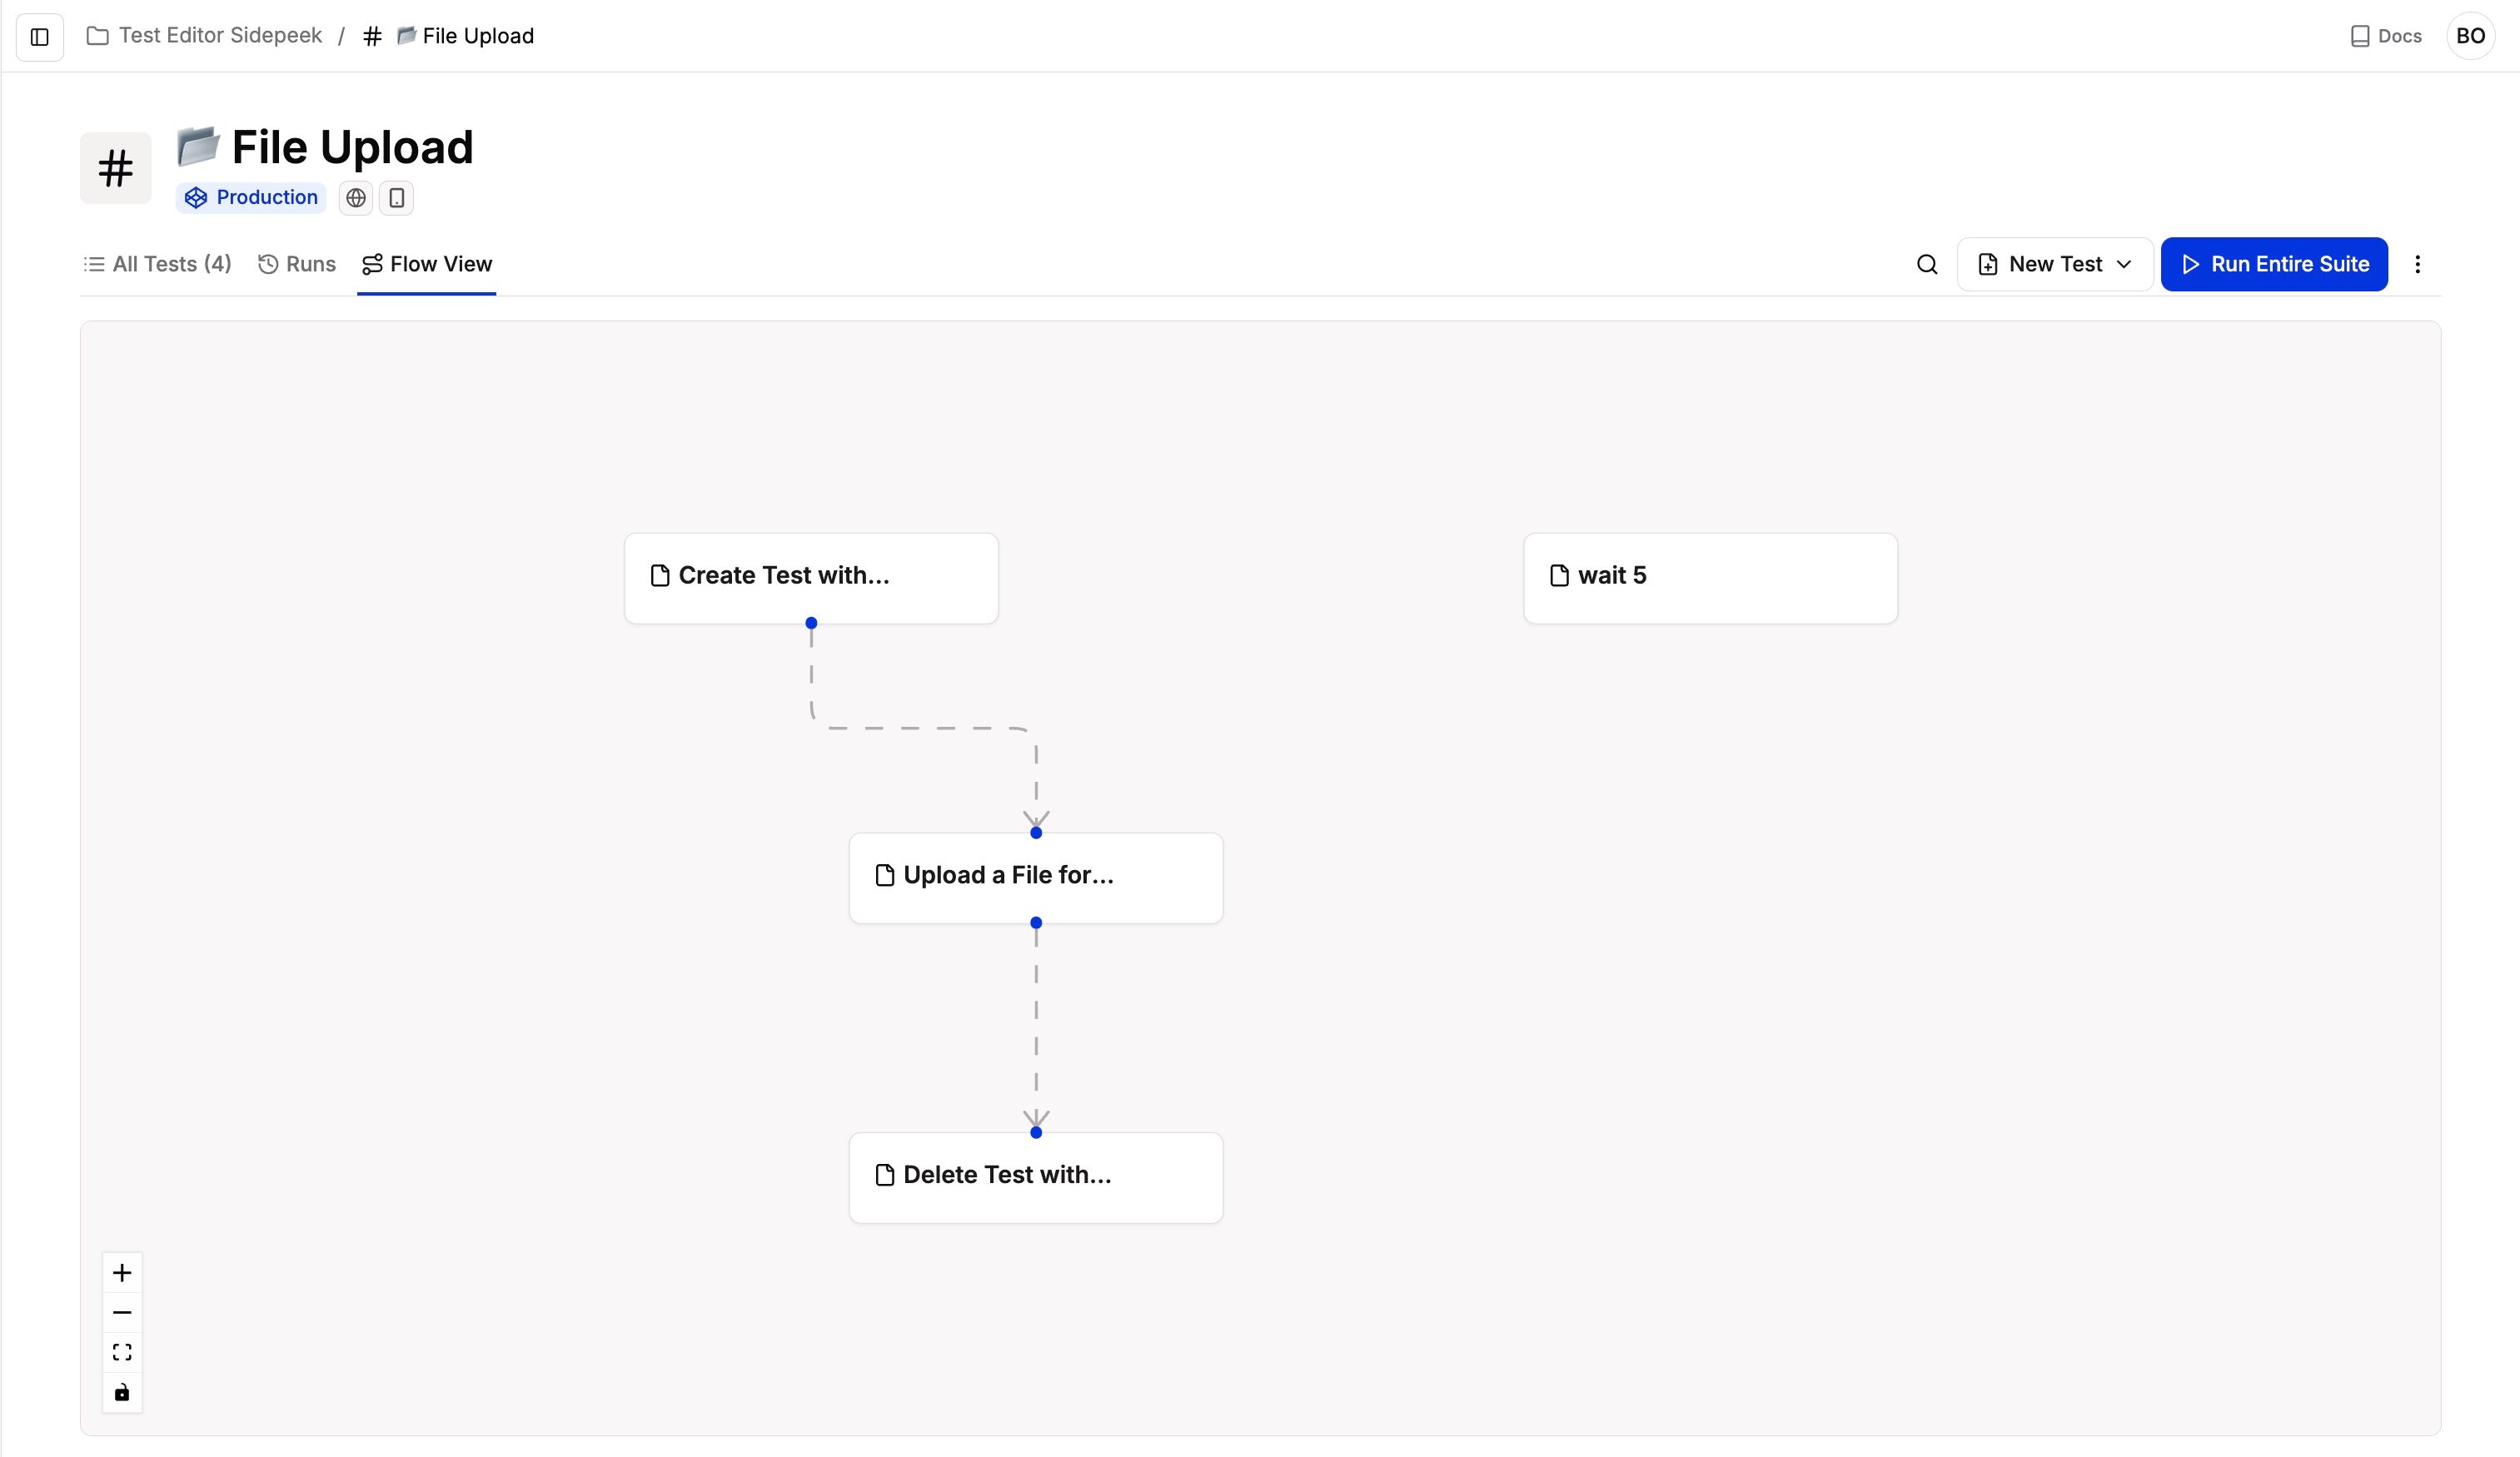
Running test suites
When you run a test suite, Spur executes all tests within the suite in their specified order, respecting dependencies and ensuring proper flow. The execution view provides real-time feedback on:- Current test status
- Progress through the suite
- Any errors or issues encountered
- Test execution time
Editing enabled environments
You can restrict which environments a test suite runs against directly from the suite page. Open the suite’s Settings menu (top-right) and select Edit Environments. In the modal, toggle the environments you want the suite to run in and save — every test in the suite is updated in a single action. Use this to keep a suite scoped to just the environments where it makes sense (for example, disabling Production for a suite that seeds data).Running tests across environments
Test suites can be run across multiple enabled environments without duplication. Use Environments to configure different deployments (Dev, Staging, Production) and run the same test suite in all of them. Benefits:- No need to duplicate test suites for different environments
- Consistent test logic across all deployments
- Easy comparison of results across environments
- Centralized test maintenance
Best practices
- Logical grouping: Group tests that validate the same feature, user journey, or workflow into the same suite, so results stay focused and easy to interpret.
- Clear run order: Define a formal execution order for tests in the suite so preconditions run first, core flows run in sequence, and any teardown or cleanup last.
- Maintainable size: Keep suites focused and manageable.
- Clear naming: Use descriptive names for easy identification.